Talk to a Tacoma Sales Tech
1-877-870-8556
M-F 8:30A-11P, Sat-Sun 8:30A-9P
Logo Image
$20K Sweeps! 10 Chances to Win! Enter Daily >

Adjustable Height Adventure Bed Rack (16-23 Tacoma w/ 5-Foot Bed)

Item TT29365
Verify parts fit and get product recommendations.
Tacoma Sales Techs: Connect Now M-F 8:30A-11P, Sat-Sun 8:30A-9P
$0.00
Our Price

$839.99 (each)

FREE Shipping Market Price $966.99 You Save 13% ($127.00) Up to 10% off for Military & First Responders! See Details

Will this fit your Vehicle?

Select a different vehicle Help?
Update or Change Vehicle
Ship to: Enter Zip
Sorry, please enter a valid US or CA postal code
We're sorry, zip can't be updated at this time.
    Create a list
    Add to New List

    Saved - View your saved items

    We're sorry. We couldn't save this product at this time.

    or use

      Product Videos

      Meredith: If you need flexibility out of your storage system for any adventure that you may go on with your 2016 or newer Tacoma, this Adjustable Height Adventure 6-foot Bed Rack, in textured black, will be a great addition to your build. Now, this setup will be great for the Tacoma owner really looking to customize their setup for off-road adventures, overlanding, camping, and more, thanks to the endless amount of ways that you can set up this rack. Now, because of the adjustable height, you'll basically have multiple racks in one. So, no matter what you're mounting up as far as gear is concerned, or putting in the bed, you're always gonna be prepared with this system.Now, the biggest benefit of this rack, again, is the adjustable design, allowing you to really fine-tune the height of the rack, to maximize your storage, thanks to the six levels of adjustment on the main crossmembers. Now, not only are you getting that adjustability, but also versatility, with the amount of mounting locations and adjustability within each mounting point. So, you can position your cargo or mounts wherever you want it, like your tent, your tools, jerry cans, water cans, whatever you need to mount up to this rack. Not to mention, the durability of this rack, without modification. This is gonna be able to hold up to 600 pounds of static weight, while requiring no drilling or modification to your bed in order to install this on your truck, which is a big bonus there.This will be made of a CNC-cut and precision brake-formed 3-millimeter thick steel plate construction. On top, you're also gonna see a very fine textured black powder coat finish, which will resist any rust or corrosion on the metal, and it's also going to keep this rack looking new for years to come. You also won't have to question when it comes to install, considering that this is going to come with every single nut and bolt and bracket that you need in order to get this on your truck.This rack is gonna be $850, roughly, and is set at a great price point, in my opinion, for what this offers. Now, this has a one-up on other racks, with that adjustability, and the fact that it's not only going to have two or three positions of adjustment, but six, while maintaining a pretty large load capacity. Now, it really takes customization to a new level, if you need that out of a rack system, depending on the items that you're taking with you on the trail or during everyday life, making it a great pick for your Tacoma.Now, install is gonna be a pretty easy 1 out of 3 wrenches on the difficulty meter, taking you about an hour to get the job done with some pretty basic hand tools. Now, at this point, we can head over to our shop, and check out a detailed breakdown on how to get this onto your Tacoma at home. So, that's gonna wrap it up for me. Let's go ahead and get into it.Man: For this install you will need a ratchet, 5-millimeter Allen socket, 13-millimeter socket, and a 13-millimeter ratcheting wrench.What's up, guys? Today we're gonna be installing a bed rack on our Tacoma, so let's get started.So, our first step here is gonna be to grab our three crossmembers that come with our kit, and they do come with these supportive U-brackets loosely installed with carriage bolts and we're gonna have to go ahead and remove these to reinstall them later, after we get more assembly done. So, for that, we're gonna grab our 13-millimeter socket on our ratchet, and just run these off. So now, once you've got this done for this one, you can go ahead and repeat the same process for the other five brackets. So next, we're gonna grab our L-brackets out of our kit, and what we're gonna do is take our verticals that we just removed the U-brackets from, and we're gonna slide those into our L-brackets here, and we're gonna line those up flush with our carriage bolt holes, and we're gonna do that for both sides. So, these just simply lay right into place. Get lined right up with our carriage bolt holes. Then what we're gonna do is grab those carriage bolts that we just removed from the brackets, and we're gonna insert two on each side here, one far forward, and one in the back. And we'll do the same thing for the other side here. And once we have our carriage bolts in place, we're gonna grab our flat washers and our 13-millimeter nuts. Go ahead and get those into place here. Same thing for these. Now, once we have these in position, we'll go ahead and do the same thing for the other side. So now, once you have these L-brackets on and hand-tight, we can go ahead and repeat the same process for other two crossmembers.So next, we can go ahead and install our leg brackets, and we're gonna start with our front legs here, and you'll notice these have a flat side, and then they have this cut-out here, and they're gonna be facing towards the front of the vehicle while it's upside down. And these are adjustable, too. You have many slots here for your hardware, so, once you slide this in, you can go with the lowest setting here, or if you choose to have it at the highest setting, as long as you have two bolt holes on each side, that is where your highest setting will be. So, we'll go ahead and put ours in at the lowest setting, but feel free to choose whichever setting you would like. So, now we're gonna grab two of our 5-millimeter Allen head bolts, lock washers and flat washers for each side. We'll go ahead and put one at the bottom here. So, we'll go ahead and add our other Allen head bolt, lock washer and flat washer, and we'll do the same thing for the other side. Then, on the backside, we can add another flat washer and 13-millimeter nut to each bolt. Now, once you have these hand-tight, you can go ahead and repeat this process for the other side, and then you can add your middle and rear brackets on your other legs as well.So, now that we have all of our legs assembled, we can go ahead and grab our double nut plates here, and we're gonna install them into the sliding rack on our bed. So, to do that, we'll come over to here. So, we'll go ahead and remove this end cover here. Simply just slide that out of the place. Then we're gonna install three nut plates for each side of the truck. Now, they do have this little tab, for grabbing on the end of it. You want that to face towards the rear of the vehicle. So, we'll go ahead and slide these in. We're gonna move them up, and then we'll put our other two in, and we'll do the same thing for the other side. Now we can go ahead and reinstall our end cap. It simply slides back into place, like so. So now, we've come to the bed of the truck, and we've got our front rail in our hands, and we're gonna set this in place, and get it loosely installed. Come up to the front here, and get our legs set on our bed rails here. Now we're gonna come flush with the end of our bed rail here, and we're gonna slide our first nut plate into position. [inaudible 00:08:21] get that lined up with our mounting holes here. And we're gonna grab our 13-millimeter bolts, lock washers, and flat washers, go ahead, get these in place. Now, you may need to grab your nut plate and pull it forward just a hair. And we're gonna leave these hand-tight for now, then we'll go ahead and do the same thing on the other side.So, now we can go ahead and install our side panels here. So, we have three openings here, and we have three hole slots here, and we're only gonna use two bolts per side. But this is also gonna allow us to set our gap between our legs. So, we'll go ahead and grab our 5-millimeter Allen head button screws, and lock washers and flat washers. We're gonna get two in on this side over here. Gonna hold this in place. And on the backside of these, we'll grab a flat washer and a 13-millimeter nut. And once we have these on this side, we'll go ahead and move our middle leg towards this, and get them loosely mounted on the other side, and then we can repeat this whole process for the other three panels.So, now that we've got all of our panels in, it's time to start tightening down our hardware, and we're gonna start with our panel hardware, because that's gonna bring everything together, make everything nice and level, and even. And then we'll go ahead and continue from there. So, we'll grab our 5-millimeter Allen head socket on our ratchet, and a 13-millimeter wrench, go ahead and begin tightening these down.Now we'll go ahead and tighten down our leg hardware. So, again, with our 5-mill Allen head socket and our ratchet, and our 13-millimeter wrench, go ahead and tighten these down. Now, these bottom ones may be hard to get to, so we're gonna switch out to our 13-mill ratcheting wrench for these. And once you have this done, you can go ahead and do the same thing for the other ones. Now, once you've got all of your legs tightened down, we can come back and tighten down our carriage bolts for our crossmembers. Now we're gonna go ahead and grab our 13-mill socket on our ratchet for that, and tighten these down. And again, once you have these tightened down, you can go ahead and repeat the same process for your other crossmembers. Now, once we have everything else tightened down, we can go ahead and tighten down our mounting bolts to our rails. And for that, we'll grab, again, our 13-mill socket on our ratchet, and tighten these down. Then you can go ahead and repeat the same process for your other rail brackets.All righty guys, that about wraps up our review and install of our Adjustable Height Adventure Bed Rack for your '16 to current Tacoma with 5-foot Bed. Thanks for watching, and as always, for everything Tacoma, keep it right here at extremeterrain.com.

      Product Information

      Features, Description, Reviews, Q&A, Specs & Installation

      Features

      • CNC Cut and Precision Brake Formed 3mm Thick Steel Plate Fabrication
      • Heavy-Duty Design that Can Support 600-Pound Static Load
      • Bolt-On Installation with No Drilling Needed
      • Has Corrosion Resistant Finish
      • Adjustable 6 Heights
      • Robust and Reliable Composition
      • Fits all 2016-2023 Toyota Tacoma with 5-Foot Bed Models

      Description

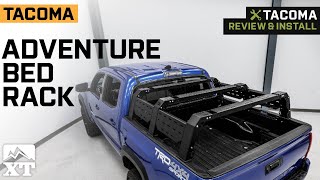
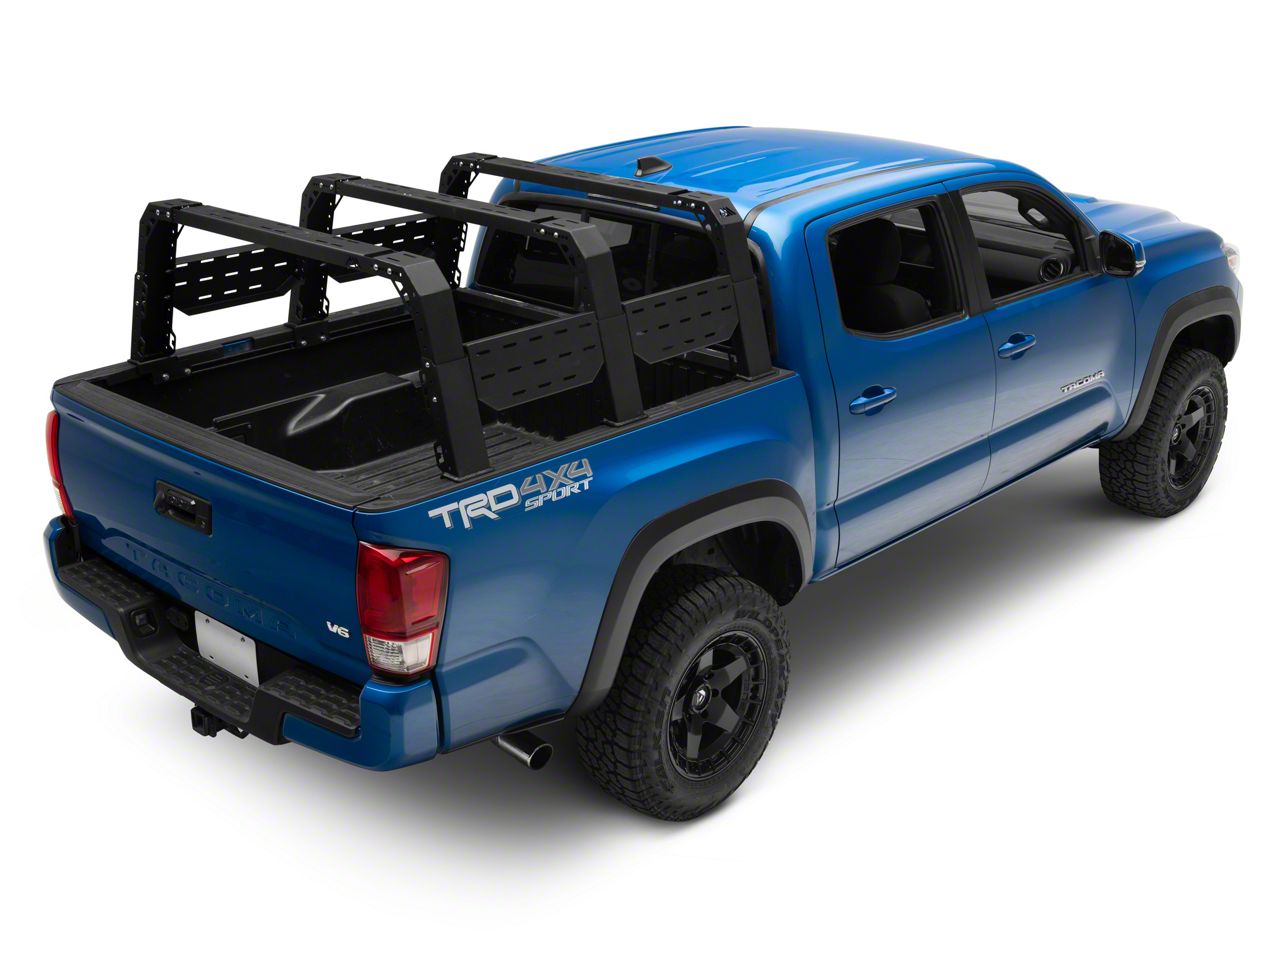
      Sturdy and Heavy Load Capacity. Looking for the perfect bed rack partner for all your adventures? Check out this Adjustable Height Adventure Bed Rack. This tough, reliable rack is made of CNC-cut, precision-brake formed 3mm thick steel plate fabrication, making it sturdy enough to support up to a 600-pound static load.

      Adjustable and Functional. Plus, it's easy to install with no drilling required and features an adjustable height design that let you customize it to fit your needs. And best of all, it has a corrosion-resistant finish to keep your Tacoma looking good for years to come. Whether you're looking to add some extra storage capacity to your Tacoma or just want a dependable bed rack that can handle anything you throw at it, this is a perfect choice. Order yours today and take your off-roading adventures to new heights.

      Installation. Putting this Bed Rack on your ride is easy and requires no drilling.

      Warranty. There is a 5-year finish warranty and a lifetime warranty on this product.

      Application. This Adjustable Height Adventure Bed Rack fits all 2016-2023 Toyota Tacoma with 5-Foot Bed Models.

      Fitment:

      Details

      CA Residents: WARNING: Cancer and Reproductive Harm - www.P65Warnings.ca.gov

      Installation & What's in the Box

      Installation Info

      What's in the Box

      • (1) Bed Rack
      • Mounting Hardware
      • Installation Hardware
      4.8

      Customer Reviews (6)

        Reviews of similar Exterior products have an average rating of 4.7 out of 5

          Questions & Answers

          10 More Questions

          Will It Fit My Tacoma

          • 2.7L I4 - 16, 17, 18, 19, 20, 21, 22, 23
          • 3.5L V6 - 16, 17, 18, 19, 20, 21, 22, 23