Talk to a Tacoma Sales Tech
1-877-870-8556
M-F 8:30A-11P, Sat-Sun 8:30A-9P
Logo Image
$20K Sweeps! 10 Chances to Win! Enter Daily >

S&B Cold Air Intake with Dry Extendable Filter (16-23 3.5L Tacoma)

Item TT1493
Verify parts fit and get product recommendations.
Tacoma Sales Techs: Connect Now M-F 8:30A-11P, Sat-Sun 8:30A-9P
$0.00
Our Price

$349.00 (each)

FREE Shipping Market Price $401.35 You Save 13% ($52.35) Up to 10% off for Military & First Responders! See Details

Will this fit your Vehicle?

Select a different vehicle Help?
Update or Change Vehicle
Ship to: Enter Zip
Sorry, please enter a valid US or CA postal code
We're sorry, zip can't be updated at this time.
    Create a list
    Add to New List

    Saved - View your saved items

    We're sorry. We couldn't save this product at this time.

      Product Videos

      Hey, guys. So, today I'm here with the S&B Cold Air Intake with the Extendable Dry Filter fitting all 2016 and newer 3.5-liter Toyota Tacomas. So, if you're looking to get more power and more efficiency out of your 3.5-liter, a cold air intake is always a great place to start. And this one by S&B is gonna open up that airflow getting colder, denser air into your intake manifold with a ram air design accompanied by the fender vent or the fender inlet on the side, making for a 43.83% increase in airflow. It's also going to make that engine sound a little bit better than the factory because you do have a lot less restriction. Now, this is gonna offer a closed box design which will offer a little bit more protection than those other options on the site that are only gonna come with a heat shield. You are getting protection from the elements from this. However, it's not invincible, so if you are doing any water forging or any water crossings with your Tacoma, I would take a look into some snorkel options. Nonetheless, this is gonna look a lot better than your factory setup. You are getting a high strength construction with this and I do like the fact that this has a clear lid on top. It's gonna help out with the aesthetic but it's also gonna help you keep an eye on your filter for maintenance down the road. Now, I would like to mention that this is not CARB-certified. So, if you do live in an emission restrictive state, I would keep that in mind while you're shopping around for cold air intakes. So, this is going to be roughly $300 on the page making for a very averagely price quality intake. So, choosing an intake really comes down in what you're looking to do with your truck and what application is gonna fit you best. So, you have the option between a dry filter as well as an oiled filter on the page. And you also have choices between the actual design of the airbox whether you want an enclosed box adding a little bit more protection or you're just looking for less restriction and are okay with just a heat shield for a little bit of less protection. Now, this is gonna be for somebody who wants that extra protection and also wants that dry filter in there which will require a little bit less maintenance and you don't have to keep up with an oiled filter as much. And this is also gonna be one of the only options that's going to provide this ram air extension up at the front. So, overall, I think this is a great choice for a quality intake and it even comes with a million wild warranty to keep a piece of mind. So, install is gonna be a very easy one out of three wrenches on the difficulty meter, taking you about an hour to install with some basic hand tools. So, speaking of that install, let's jump into that now.The tools that I used for my install were a trim removal tool, a flathead screwdriver, a Phillips head screwdriver, a pair of snips, a three-inch extension, a 12-millimeter, 10-millimeter, an 8-millimeter deep socket, and an impact wrench. So, the first step of our install is to obviously pop our hood and then we can pop off our engine cover so we have full access to our intake system. We can just pop this out and get it out of the way. So, once we have that engine cover out of the way, we can start disconnecting things from our intake. So, we're gonna start by removing this hose. There is a spring-loaded clamp, you can just press that in and pull back on it. Now, we need to keep this clamp because we will be reinstalling this hose in the near future, then we can move on to our MAF sensor. So, next we're going to disconnect our MAF sensor wiring harness. So, first we wanna free it up from our intake so we don't damage this harness here. I'm just gonna pull back on this and that's going to free the loom of the wire. Then we can press down on this tab and just pull back. So, we can free our wire but it's still connected on our resonator back here. So, I'm gonna grab a trim removal tool and we're gonna pop that out of place. So, now with the trim removal tool, we can go ahead and just pull up on this harness and disconnect that from our resonator here. So, we're gonna put that out of the way and then we can loosen up the clamp that's attached to the throttle body.So, now with a 10-millimeter socket, I'm just gonna loosen up this clamp. So, now we can unclip the top of our intake box. It's gonna be these clips over here on the side, we can just raise those up. All you have to do is basically just push back and that's going to release that. So, then we'll actually be able to pull this whole top piece off and remove it. So, next, we can go ahead and take out our factory paper filter. It's just a drop in filter so it'll release just like that. But, we still have two bolts that are holding in the bottom of our intake box. So, we're gonna grab a 12-millimeter socket and I'm gonna go ahead and remove those. So, now with a 12-millimeter socket, we're gonna remove the two bolts holding in the bottom of the intake box.Once those two bolts are removed from the inside of the box, there is a tab on the outside, it's going to be back towards the firewall. It's gonna be the same 12-millimeter bolt. It is a little bit difficult to see, I'll show you where it is in just a minute when I remove it. So, after we have the two bolts on the inside of the intake box removed, there is a tab still holding the box down on the outside. I'm gonna use that same 12-millimeter socket as well as the three-inch extension to remove that. But once that is out, we can fully remove our intake box. So, obviously, we have a little bit of assembly to do before we can put this in our Tacoma. However, while I have it on the table, I did wanna tell you guys a little bit about this in comparison to your factory setup. Now, overall, this is going to increase your performance and increase your efficiency because of the components laid out on the table. Now, starting off with the filter, this is gonna be an extendable dry filter. It's going to be larger and take in more air than your factory paper filter. So, it is gonna be a little bit similar in the fact that it is dry. However, you won't have to change this as frequently as you would your factory paper filter. Now, moving on to the intake tube, this is gonna be a lot larger as well as have a straight through flow design. If you can tell on our factory intake tube, you do have a resonator here which is gonna cause some restrictive airflow. So, with this, you are getting way less restriction. All of that air is a straight through shot to your intake manifold in comparison to your factory setup. So, something that is very similar to your factory intake is the overall design of the actual intake housing. So, this is gonna be a closed box design, keeping all that hot engine bay air out and away from your cold air filter. This is also going to provide you a little bit more protection from contaminants, water, dirt, mud getting inside of your engine bay. So, you do have protection on your side with this. However, this is going to allow a lot more air in, colder and denser air in as well. So, you do have a ram air intake on the front here. So, you can take off this cover. You don't have to if you don't want to, but you do have that. So, all that cold air coming in from your grille is gonna be rerouted into your intake as well as the fender vent. So, you are getting a couple of directions of air bringing all of that air in and increasing your performance overall.Now, you are getting a couple of silicone couplers with this as well. They're not gonna crack and break unlike some other options as well as your factory options here and you are getting everything that you need to install this with. Not to mention, you are getting a clear lid on top. This is going to help out with aesthetics. Gonna be a lot more attractive than your factory setup overall and it's also gonna help you out with maintenance because you do get to keep an eye on your filter while it's in your engine bay installed. So, enough about these two side by side, let's go ahead and start assembling our new intake.So, we do have to swap over a couple of things on to our new intake system. Now, we're gonna start with our mass airflow sensor, so you're gonna need a Phillips head screwdriver. So, there are two screws that are holding in our MAF sensor. I'm gonna go ahead and take those out. Now, we are not gonna be reusing these, so if you are discarding your intake after you take this off, you won't need to keep track of them. However, if you are planning on selling your intake or doing anything with it, I would recommend to keep these screws. So, after those two screws are out, we can go ahead and wiggle out our MAF and put the top of our intake aside. So, with our new intake, we are provided with a gasket as well as a piece that is going to hold our mass airflow sensor. So, we're going to install our gasket first, then the top portion that's gonna hold our MAF, then we can insert our MAF into the intake tube, making sure that it's oriented in the correct way. After that's sitting on top of there, we can take our provided bolt and start to thread those in. I'm using that same Phillips head screwdriver. Now, you don't wanna tighten down one, you wanna make sure you get them both threaded in first. Now, we can go ahead and tighten them down. So, after those are tightened down and your mass airflow sensor is sealed, we can move on to removing the grommets on the bottom of our intake. So, what we need to do now is transfer over these three grommets onto our new intake box. So, what I'm gonna do is take a flathead screwdriver. This has a metal sleeve inside of it, you're not gonna be able to get the grommet out unless you take that metal sleeve out, but they move pretty easily. So, I'm just going to take the flathead screwdriver and push them down. And you should be able to wiggle that out and then you'll be able to manipulate the rubber out. You also, when you're taking the flathead screwdriver, just be careful that you're not ripping the actual grommet. But when you push that out, this is what you're gonna be left with. And then we can just fold this in on itself and just push that down on through. And then that is how you get the grommet out. All right. Then we can do the same thing for the other two. So, again, be careful while you're using this flathead, you don't wanna hurt yourself or the grommet. This one looks like it could easily slide out, but because you have the metal sleeve in there it will not, so we're gonna have to do the same process. All right. Now, we can totally discard our factory intake system. So, once you flip your new intake box over, you'll see the three spots where we have to put those three grommets. So, we're just going to repeat that process backwards. So, now we can fold the grommet in on itself and insert that into the provided hole for us, take our metal sleeve, and push that down in place. Same thing for the other two. You have to reach in to make sure that is seated correctly or take your flathead and make sure that it seated. You can go ahead and do that. Looks pretty good. Put in our sleeve. You wanna make sure that that sleeve is flush with that grommet on both sides.So, what we're gonna do next is install our silicone before we put our box in our truck. So, we're gonna take the fender vent here, making sure that the smaller end or the step-down end is on the outside. And we're just gonna flip that over that opening there and make sure that that is pressed on. All right. Then we can move to the side. Now, if you would like to keep this on, you don't want that ram air feature. You can totally do that. However, we are going to take it off so we can show you the full features of this intake and all you have to do is just pull back. It's gonna have a little ridge there and that's gonna be the same as the ridge on the ram air. So, we're just going to pop that into place. Now, it may be a little bit difficult to hold the box still while you're getting it in, but it is pretty flexible so you should be able to do that. You have to turn the box over, manipulate the rubber. All right. Then our last step is just to put on our silicone for our actual intake tube. So, this is going to have a cut on the outside and that's gonna fit right on the edge of our box there. Again, you're gonna have to manipulate the silicone in order to get that on. But it is pretty flexible and has a little bit of forgiveness to it, so. Also, I would like to mention that you wanna make sure that the smooth side is facing outward. If you're having a little bit of binding there on the silicone, you can take a flathead and flatten that out. All right. There we go. Now, we can install the box on our Tacoma. So, now we're going to install our intake box inside of our engine bay. Now, you wanna make sure that this ram air is fitting down next to your windshield washer fluid and then we can start to line up those grommets with our factory holes. Now, we're gonna install our three factory bolts in the same factory location through our grommets. So, you may have to wiggle this around to get them lined up. Make sure you watch your head on the hood here. So, once you have all of your bolts threaded in, we can take the same 12-millimeter socket that we used before, go ahead and tighten those down. I'm also using a three-inch extension just to give myself a little bit of room.All right. So, what we can do now is install our intake tube. Now, I have our end coupler on here that goes from our intake tube to our throttle body as well as the clamps that are loosely installed there. So, what we can do at this point is put the top of our intake tube inside of our silicone seal here and we're going to push it all the way through so we can get it attached to the throttle body. So, you just work the plastic in. And since it does step down, what I'm actually gonna do is push it a little bit farther through so we have a little bit of room when winding this up so we can get our CCV lined up as well. So, with that lined up, I'm just gonna go to the other side and push this through onto the throttle body and seat it. Yeah. So, it doesn't really seem like it's going to go onto the throttle body after installing it on the intake tube. So, what I'm gonna try to do is put it on the throttle body first so we can line up the intake tube with the throttle body coupler. We definitely don't want it to be seated weird on the throttle body. So, once that's seated correctly, then we can take our intake tube and go ahead, push that through, gives us a little bit easier access to that throttle body there or to that coupler there. Now that that's in on all sides what I'm gonna do is just push that in from the back making sure that our intake is seated as well. So, after everything is seated correctly, what I'm gonna do is tighten up these clamps with an 8-millimeter deep socket. These clamps are pretty loose so I am using an impact to save a little bit of time. All right. What we can do next is attach our CCV hose. Place that on and then push our clamp down. Make that's seated over that neck there. And then lastly, what we're gonna do is plug in our mass airflow sensor harness. All right. Now, we can install our air filter.So, our next step is to install our filter. So, we are going to put that over our intake tube and then go ahead and tighten down that clamp. Now, it could be positioned where it's easily accessible. So, now I can go ahead and tighten down this clamp that's holding on our filter. It's gonna be the same 8-millimeter socket and you wanna make sure that it's in an accessible spot if you ever have to maintenance your filter. All right. So, once that's tightened down, we can attach our lid. So, we do have this gasket here to make sure that our lid is sealed and no moisture is getting inside to the filter. So, what I'm gonna do is just align this groove here with the gasket. All you have to do is just press that down on in. So, if you need help tucking this in, I just grabbed a flathead screwdriver just to help get it seated. So, after it's most of the way in, what I'm gonna do is trim this and then get it fully seated so we can attach our lid. What I'm gonna do is just measure this out and trim where I need to with a pair of snips. Put that aside or you can trash it. Then we're just gonna get this seated the rest of the way. Since it does stretch out, I'm just gonna keep trimming until it's fit.So, what we're gonna do is place our lid down on top and line that up. Now, we do have some plastic washers here that we're gonna put on our bolt. We can go ahead and thread the provided bolts into the top of the intake. Now, we wanna make sure that we catch a couple of threads and then move on to the next bolt and we can tighten it all down at the end. That's just going to allow us to get all of our bolts in where we need them without any issues on the lid. All right. So, once they're threaded in, we can take our Phillips head screwdriver and just tighten them all down.And then that's gonna wrap up my review and install. Make sure you like and subscribe. And for more videos like this, always keep it right here at extremeterrain.com.

      Product Information

      Features, Description, Reviews, Q&A, Specs & Installation

      Features & Specs

      • Superior Cold Air Intake
      • Improves Horsepower and Torque
      • Enhances Throttle Response
      • Dramatically Outflows Stock Intake
      • Highly-Efficient Dry Extendable Filter
      • High-Strength Construction
      • Limited Million-Mile Warranty
      • Not CARB Certified
      • Fits All 2016-2023 3.5L Tacomas

      Description

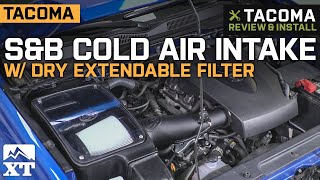
      Absolute Power. If you're looking to dramatically enhance your 2016-2023 3.5L Tacoma, make sure to invest in S&B's Cold Air Intake with Dry Extendable Filter as a replacement for your sub-par stock intake. Improving your airflow by up to 43.83%, this intake drastically boosts your rig's horsepower, torque, and throttle response, giving you the power you need to compete with the most ferocious rigs on the road.

      Dry Filter. The cold air intake also features an impressive filter made from dry, extendable media that is specifically crafted to offer ideal power and efficiency. With a massive profile, this unbeatably effective filter banishes dust, dirt, and power-robbing particles to ensure your engine remains in ideal condition and performs at its highest potential.

      High-Strength Build. With a fully-enclosed air box, this cold air intake manages to keep out dust and dirt, while simultaneously reducing engine heat for an impressive performance that will give you the power you need. The intake also sports high-strength, hardcore materials that guarantee long-lasting durability, even when facing the most challenging conditions.

      Installation. Set aside about 1 hour to complete the installation of this intake and filter. The job requires basic mechanical skills.

      Warranty. Boasting a limited million-mile warranty, this intake and filter are protected against defects in materials and craftsmanship. However, some limitations do apply, so check out the full warranty for details.

      Not CARB Certified. This intake is not CARB certified. Currently, its certification is pending, meaning it is not yet street legal in all 50 states.

      Application. S&B's Cold Air Intake with Dry Extendable Filter is created to fit all 2016-2023 3.5L Tacomas.

      Fitment:

      Details

      S&B 75-5096D

      CA Residents: WARNING: Cancer and Reproductive Harm - www.P65Warnings.ca.gov

      Installation & What's in the Box

      Installation Info

      What's in the Box

      • (1) Cold Air Intake
      • (1) Filter
      4.9

      Customer Reviews (484)

        Questions & Answers

        10 More Questions

        Will It Fit My Tacoma

        • 2.7L I4 - 23
        • 3.5L V6 - 16, 17, 18, 19, 20, 21, 22, 23