Talk to a Tacoma Sales Tech
1-877-870-8556
M-F 8:30A-11P, Sat-Sun 8:30A-9P
Logo Image
$20K Sweeps! 10 Chances to Win! Enter Daily >

Freedom Offroad Front Upper Control Arms for 2 to 4-Inch Lift (05-23 6-Lug Tacoma)

Item TT6125
Verify parts fit and get product recommendations.
Tacoma Sales Techs: Connect Now M-F 8:30A-11P, Sat-Sun 8:30A-9P
$0.00
Our Price

$370.50 (pair)

FREE Shipping Market Price $390.00 You Save 5% ($19.50) Up to 10% off for Military & First Responders! See Details

Will this fit your Vehicle?

Select a different vehicle Help?
Update or Change Vehicle
Ship to: Enter Zip
Sorry, please enter a valid US or CA postal code
We're sorry, zip can't be updated at this time.
    Create a list
    Add to New List

    Saved - View your saved items

    We're sorry. We couldn't save this product at this time.

    or use

      Product Videos

      Hey, guys. Today, I'm here with the Freedom Off-Road Front Upper Control Arms, fitting all 2005 to 2019 six lug Toyota Tacomas are fitted with a 2 to 4-Inch Lift. So if you've lifted your Tacoma 2 to 4 inches and you're looking to swap out some of your factory components to accommodate for that extra lift height, this option by Freedom Off-Road is gonna be a great one to take a look into.So essentially what you're doing when you're lifting your Tacoma is adding some hard angles spear suspension geometry and some of your stock components can't keep up with that added height considering that they just aren't made for it. One of those big components is going to be your front upper control arms and this option by Freedom Off-Road is going to an upgraded replacement to make sure that these are not going to wear out over time with that added height on your truck. This set of front upper control arms is gonna have a corrected ball joint angle to accommodate for that 2 to 4 inches of lift and it's also gonna have a very durable construction to make sure that these are able to take a lot of abuse, especially if you are taking your Tacoma off-road. Not to mention you can maintenance these over time and keep an eye on them considering the size these are fitting on top of the ball joint as well as replaceable bushings.With all that being said, these are actually gonna be one of your more affordable options for front upper control arms on the site at roughly $300. Now when we're taking a look at the design of these compared to some other options on the site, these are gonna have a more basic construction. Now it's still gonna get the job done but they're not gonna have those extra bells and whistles like adjustability or different style ball joints that some of the more expensive choices have. Now my personal opinion, I think if you don't need all of those extra bells and whistles, you're looking for something that's gonna get the job done while still being able to maintenance this overtime at a pretty affordable price, this is a really good option to take a look at.As far as install goes, this is gonna get a two out of three wrenches on the difficulty meter. You are gonna need about three to four hours worth of your time as well as a number of basic hand tools. So speaking of that install, let's jump into that now. The tools that I use for my install where grease gun, pair of needle-nose pliers, a set of Channellocks, a trim removal tool, a small and a large flathead screwdriver, a 12-millimeter ratcheting wrench, a 19-millimeter open-ended wrench, a set of ratchets, an impact wrench, a dead blow, and a ball-peen hammer, a socket set ranging from 22-millimeter down to 10-millimeter. A torque wrench, a breaker bar, a large pry bar, and a punch.Our first step is to get our Tacoma up off the ground. Now you can use a lift or you can jack up the front of the Tacoma and chock the rear wheels, then we're gonna take off our front two wheels, and after that is complete we can start to take off our mudflaps. So I'm gonna start with the back one here, this is gonna expose the nut on the other side of the control arm and this is also going to expose some brake lines that we have to move out of the way in a little bit. So I'm gonna use a trim removal tool and just pop out these clips. And we can just move this out of the way and work on the front one.What we can do next is remove the 10-millimeter bolt that's holding our ABS line bracket on our control arm, I'm gonna use a 10-millimeter socket and a quarter-inch drive ratchet. There's one more bolt holding on a bracket onto our spindle that we have to remove as well, and I'm gonna use the same 10-millimeter socket. This bracket is gonna be down by the sway bar end link bolt, I'm gonna use that same 10-millimeter socket and remove that bolt from the spindle. Once that bolt is removed, we can wiggle our ABS line out of the way and start working on our brake line.The reason why we're getting this brake line out of the way is to access the bolts on the control arm as well as to make sure there's enough slack in the brake line so we don't damage it when we remove the control arm from our spindle. I'm gonna use a 12-millimeter ratcheting wrench to remove the bracket on the frame here. And then we have one more bolt up at the top of the frame. We're gonna remove this brake line bracket on the top of the frame as well. On the driver side there is a wiring harness casing here so it may be a little bit difficult to see but it's right on the other side of that, I'm gonna use a 12-millimeter socket to remove that one as well. All right. So when that bolt is removed we'll be able to move this back and forth and fit a socket on this nut here when it comes to that time.Next week and disconnect our sway bar end link from our spindle, I'm gonna using a 17-millimeter deep socket and my impact wrench to remove that. Depending on your lift kit and if you have replaced your sway bar end links the size may differ. So I'm just gonna keep that nut on there and hit this with a dead blow to help this come out of the spindle. Next, we can start to disconnect our upper control arm from our spindle, I'm gonna start by taking a pair of needle-nose pliers and removing this cotter pin here. Then what we can go ahead and do is crack the castle nut off of the spindle but we are not going to fully remove it, I'm gonna use a 19-millimeter socket in my impact wrench to do that. So once it's cracked loose we can take a ratchet and continue to loosen it up. Again, we don't want to fully remove it because we do have to smack the spindle in order to get this tapered ball joint to disconnect from the spindle, then we can take a hammer and hit the spindle in order to disconnect it from the control arm.Next, we want to make sure that we support the spindle because once it's disconnected from our control arm it will be loose and we want to make sure that we are protecting our brake lines. Once again, I'm just gonna take a caliper holder, put that through the [inaudible 00:07:01] and get on to our coil here. Then we can take our 19-millimeter socket and continue to loosen up the castle nut. What we can do now is remove the nut on the upper control arm bolt, I'm gonna be using a 19-millimeter deep socket and a breaker bar to do this. I did move the brake line from the back of the driver side wiring harness to the front just to free up some space. And I'm also gonna put a 19-millimeter wrench on the other side of the bolt head. So once that's loosened up, we can switch over to a hand ratchet and use that wrench to help us remove the bolt. Then we can remove the nut as well as the washer, make sure we put those aside because we will be reusing them.So what we need to do next is remove this bolt that goes all the way through the back of our strut tower to the other side of our control arm. Now it's perfectly in line with the body of our Tacoma here, so we will have to bend this metal out of the way in order to remove this bolt out of the strut tower. Now there's also a small wiring harness behind here and on the driver side you are gonna have a large wiring harness, we should be able to clear the large wiring harness here. However, I do want to remove this smaller harness on the other side of the body and I'm gonna just remove the clips with a pair of needle-nose pliers and just pull back. All right, there's one clip down at the bottom and then one clip at the top. Then we can just move that away from the side of the body so we have enough room to wiggle that bolt out.So what we can do now is take a pair of Channellocks or a pair of pliers and start to bend back this piece of metal, it is pretty thin, however, we are gonna have to bend back a decent amount in order to get this bolt out. Now the washer is not connected to this bolt here, so we can keep this up against our control arm and just work on this bolt here. I'm just gonna take a pair of Channellocks and start to bend the body up. So after I've pried that some of this body back to make sure that the bolt had cleared, what I did was took a large pry bar and just pried from the back of the bolt onto the body and just moved it outward, then we'll be able to slide the bolt out and fully disconnect our control arm. So once it is completely disconnected, we can take that long bolt out and fully remove our control arm.Before we hope into the install, I wanted to put our newer Freedom Off-Road upper control arm on the table next to our factory one and tell you guys a little bit about the benefits that you're gonna get out of this new control arm with your 2 to 4-inch lift kit in comparison to our factory setup. Now the big reason why you would want to upgrade to a control arm like this, especially this Freedom Off-Road option is the fact that this is set up to accommodate that 2 to 4-inch lift kit. So our factory upper control arm, that's perfect for the stock application but once you change the angles with that upgraded lift kit, you are gonna be changing the angle of the ball joint. Now that is going to induce wear and tear, it may even rip the boot on the ball joint causing extra wear and tear and even for the ball joint to break over time.Now when moving over to something like this, the ball joint is going to be accommodated with a little bit of extra angle for that 2 to 4-inch lift, so this will hold up a lot better over time. Not to mention it is going to be a lot more durable in conjunction with the added angle. The ball joint is going to be an [inaudible 00:11:04] E-style ball joint, however, it is going to be made of a chromoly material which is a lot stronger than the factory setup. The construction of the whole control arm itself is also going to be a lot more durable considering this is one and a half-inch steel tubing and it's also gonna have gusseting on each of the mounts on the back here which is going to give it a lot more strength than the factory setup. If I flip over the factory control arm, you can see that there is a channeling design and this does have the ability to bend or break with a lot of abuse and with this new Freedom Off-Road upper control arm, that's not gonna happen considering the durable construction on this.The new upper control arm is also gonna have a durable finish, it's gonna have a black epoxy E-coating on top, which is going to reduce any rust or corrosion or any weathering when this is mounted up to the truck. Now what I really like about this in comparison to the factory control arm is the fact that this is rebuildable and you can maintenance this over time. There is gonna be a rubber cap on top of our ball joint here and underneath that is gonna be a Zerk fitting so you are able to grease this as needed and with the hard rubber bushings you are able to replace those over time instead of your factory control arm, if this does wear out, you will have to replace the whole control arm. Not to mention you also are getting a mount for that factory brake line, so this is going to accommodate for all of the factory features on your truck and mount up exactly the same. So enough about these two side by side, let's go ahead and mount up our new control arm.What we can do now is mount up our control arm. This does come with a boot over the ball joint, I'm gonna keep that on for now just so we don't damage the threads while we are mounting it up. But in order to mount this up, we're gonna line it up with our strut tower and I'm actually gonna put a punch through the right side of the control arm just to keep it in place so we can line up the other side and get our bolt through. So you want to make sure that this is going underneath this ABS line. As you can tell, it is kind of wiggling around and that's why we're gonna put this punch here just so we can line this up. The punch isn't going to stay in place the whole time but this will help us align everything. So now you can rest the control arm in place, grab our bolt as well as our washer and start to line that up and put that through. So what I'm gonna do is put our washer here because it's not gonna fit past this body line if we put it on the bolt first, then we can grab our bolt and feed it in the way that it came out. So now we can take our punch out from the other side since everything's lined up and start to feed our bolt all the way through. All right. So once that is all the way through, we can secure it down with the factory washer and nut on the other side, we're only gonna keep it hand tight because we have to attach this to the spindle first before we tighten anything down.What we can do now is start to mount this up or line this up with our spindle. So I'm gonna take off the nylon lock nut and the washer as well as the boot, get rid of the boot that is protecting that. And I'm not gonna install the washer just yet, I want to make sure that this lines up with the spindle. Before we do that, we do have to disconnect the spindle from the shock here. So it may not line up right away as you tell, this is a bit of an angle, so what I'm gonna do is put the spindle back in place for so we're not damaging any brake lines. Put the nut on and then we can take a dead blow and move this ball joint out.The reason why I'm using a dead blow is just because this is a new ball joint and it is difficult to move by hand. We're just going to tap it in place and the nut on the end is going to preserve the threads so I'm not hitting the threads. All right. So now we could take the nut back off and see if this aligns. So once it's aligned and you have threads coming through the spindle, what we can do is attach our washer and our nylon lock nut and we can tighten that down with a 22-millimeter socket. Before we tighten that upper bolt and attach our sway bar end link, while there is nothing here I want to tighten this down or torque this down to 81-foot-pounds.What we can do now is tighten down at the upper control arm bolt. I'm gonna use that same 19-millimeter socket and half-inch drive ratchet and then I'm also gonna put a 19-millimeter wrench on the other side of the frame so we can wedge it while we tighten down the bolt. Next we can torque this down to 85-foot-pounds. What we can do now is reattach our sway bar end link through our spindle, it might help if you pull down on the sway bar a little bit. We are gonna be reconnecting that with the factory bolt and tightening that back up with a 17-millimeter socket. Next we can re-secure our brake lines.So I'm gonna start with the ABS line down at the bottom on the spindle here. I'm gonna reuse our factory bolt and then secure it back down with that 10-millimeter socket. Then we can move up to the controller mount. Then we can take our factory bracket, put that over our new mounting location and re-secure our new nylon lock nut. We're tighten that down with the same 10-millimeter deep socket. Now we can reattach our brake line.So we can start with the bracket that's on the side of our frame here, I'm gonna reattach it with that factory bolt and tighten it down with the 12-millimeter ratcheting wrench that we used before. Then we can move to that top bracket on the other side of our frame. So you can tighten that back up with the 12-millimeter socket that I used before. Next we can reinstall our mudflaps.So we can line these up with the factory location, take the factory pins and pop those back into place. And we can do the same for the front one. Last but not least, we want to make sure that this is packed with grease before we go ahead and take our truck out. So I'm gonna take a small flathead just to help me pry the cap off, then we can grab a grease gun, attach that to the Zerk fitting and make sure that this is properly greased. Once you see a little bit of excess come out of the top of the Zerk fitting, should be okay and then we can pop this back on. Now we can repeat that on the other side and you'll be all set to go.So that's gonna wrap it up for my review and install. Make sure you like and subscribe. And for more videos and products like this, always keep it right here at extremeterrain.com.

      Product Information

      Features, Description, Reviews, Q&A, Specs & Installation

      Features & Specs

      • Maintains Proper Suspension Geometry
      • Front Upper Control Arms
      • For Use With 2-4-Inch Lifted Height
      • Heavy-Duty, 1.50-Inch Tubular Steel Build With Gusseting
      • Specialized, Black E-Coating
      • Replaceable Hard Rubber Bushings
      • Resilient Chromoly OE-Style Ball Joint
      • Built-In Brake Line Attachment
      • Sold as a Pair
      • Limited Lifetime Warranty
      • Fits All 2005-2023 6-Lug Toyota Tacoma Models

      Description

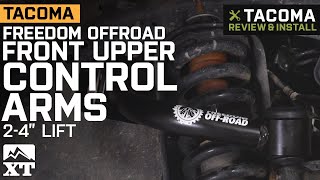
      Superior Control Arms for Your Tacoma. The Freedom Offroad Front Upper Control Arms for 2 to 4-Inch Lift are a wonderful upper control arm upgrade for your lifted Tacoma truck that offers superior strength. These front upper control arms’ heavy-duty build quality can take the abuse of regular off-roading, while ensuring suspension geometry remains optimally configured. This ensures your near factory-level handling, as you make your way through uneven terrain.

      Brake Line Provisions. The Freedom Offroad Front Upper Control Arms come with built-in brake line attachments on one of its arms. This convenient feature eliminates the need to provide a separate bracket for your brake lines helping with more efficient installation.

      Heavy-Duty Build Quality. The Freedom Offroad Front Upper Control Arms are constructed from high-grade, 1.50-inch wide tubular steel. These control arms feature gusseting on both ends, adding rigidity. Additionally, these upper control arms come with replaceable hard rubber bushings, offering an ideal balance between performance and comfort. Likewise, the included chromoly ball joints are fully replaceable and greasable, offering the correct angle for your lifted truck. Finally, these control arms receive a specialized, 2-layer, black e-coating for maximum rust protection.

      No-Frills Install Procedure. The Freedom Offroad Front Upper Control Arms mount on preexisting locations on your truck. No modifications are needed as soon as your lift is properly set-up. Also, standard hand tools are all you need for installation.

      Covered by a Limited Lifetime Warranty. The Freedom Offroad Fixed Front Lower Control Arms are covered by a limited lifetime warranty against workmanship and material defects. Please visit the manufacturer’s website for more details.

      Application. The Freedom Offroad Front Upper Control Arms for 2-4-Inch Lift fits all 2005-2023 6-Lug Toyota Tacoma models.

      Fitment:

      Details

      Freedom Offroad FO-T701FU

      CA Residents: WARNING: Cancer and Reproductive Harm - www.P65Warnings.ca.gov

      Installation & What's in the Box

      Installation Info

      What's in the Box

      • (2) Front Upper Control Arms
      5.0

      Customer Reviews (90)

        Questions & Answers

        10 More Questions

        Will It Fit My Tacoma

        • 2.7L I4 - 05, 06, 07, 08, 09, 10, 11, 12, 13, 14, 15, 23
        • 3.5L V6 - 23
        • 4.0L V6 - 05, 06, 07, 08, 09, 10, 11, 12, 13, 14, 15