2022-2024
 2014-2021
 2007-2013


Installation Time
(approx) 4 Hours
Difficulty Level:
Mechanical expertise or professional installation required.
 FREE 1 to 3-Day Delivery on Orders $119+ Details


$209.95 kit
FREE Shipping Market Price $241.99 You Save 13% ($32.04) Up to 10% off for Military & First Responders! See DetailsWill this fit your Vehicle?
Saved - View your saved items
We're sorry. We couldn't save this product at this time.
or use

Features, Description, Reviews, Q&A, Specs & Installation
| Brand | Supreme Suspensions |
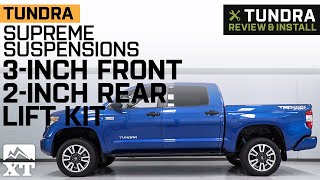
| Lift Height | 3.00 Inch |
| Lift Kit Type | Suspension Lift |
| Lift Kit Max Tire Size | 33 Inch |
| Lift Kit Includes Shocks | Shocks Not Included |
Enhanced Off-Road Capabilities. Let your Tundra conquer the great outdoors with the Supreme Suspensions 3-Inch Front and 2-Inch Rear Pro Billet Lift Kit. This lift system includes well-engineered components to ensure more stability and control on your rough off-road adventures. It comes with heavy-duty rear lift blocks, U-bolt lift kit, front strut spacers, and differential drop spacers.
Premium Components. Included in this suspension upgrade are a set of billet aluminum rear blocks, U-bolts, and spacers. The solid aluminum blocks are stronger, offer a longer service life than cast blocks, and are less susceptible to potential damages. In addition, the zinc-plated U-bolts ensure maximum clamp force with an even distribution of pressure, eliminate flexing, and provide the strength to keep original vehicle handling. Moreover, the differential drops maintain proper axle angle for safety and stability.
Installation With Mechanical Expertise. The components of this Pro Billet Lift Kit directly attach to your vehicle’s factory mounting locations. It includes all the necessary hardware for a hassle-free installation process that requires mechanical expertise. Please note that an alignment is highly recommended after altering the height of your vehicle.
Lifetime Warranty. This Pro Billet Lift Kit comes with a limited lifetime warranty that covers manufacturing defects in materials and workmanship under normal use. Some exclusions apply; please check the full warranty policy for complete details.
Application. Supreme Suspensions specifically designed the 3-Inch Front / 2-Inch Rear Pro Billet Lift Kit to be used on all 2007-2021 4WD Toyota Tundra models.
Fitment:
Supreme Suspensions TYTU07FK3020
CA Residents:  WARNING: Cancer and Reproductive Harm - www.P65Warnings.ca.gov
Installation Info
Installation Time
(approx) 4 Hours
Difficulty Level:
Mechanical expertise or professional installation required.
What's in the Box
10 More Questions