Talk to a Wrangler Sales Tech
1-877-870-8556
M-F 8:30A-11P, Sat-Sun 8:30A-9P
Logo Image
$20K Sweeps! 10 Chances to Win! Enter Daily >

Teraflex Rzeppa High-Angle Factory Replacement CV Joint Kit (07-18 Jeep Wrangler JK)

Item J122784
Verify parts fit and get product recommendations.
Wrangler Sales Techs: Connect Now M-F 8:30A-11P, Sat-Sun 8:30A-9P
$0.00
Our Price

$184.99 (kit)

FREE Shipping Market Price $212.99 You Save 13% ($28.00) Up to 10% off for Military & First Responders! See Details

Will this fit your Vehicle?

Select a different vehicle Help?
Update or Change Vehicle
Ship to: Enter Zip
Sorry, please enter a valid US or CA postal code
We're sorry, zip can't be updated at this time.
    Create a list
    Add to New List

    Saved - View your saved items

    We're sorry. We couldn't save this product at this time.

    or use

      Product Videos

      Hey, guys. So, today, I'm here with the Teraflex Rzeppa High-Angle Factory Style CV Joint Replacement Kit, fitting all 2007 to 2018 JK Wranglers. So, in a nutshell, when you're lifting your Wrangler, you're creating a lot of hard angles with your suspension and your driveline, and can cause some accelerated wear and tear on a lot of key components that keep your Jeep running. So, one of those common failures is your factory style Rzeppa or your CV joint on your driveshafts. Now, when you're creating those hard angles from lifting your Wrangler, it can cause the boot on the driveshaft to rub up against the actual flange, and it can cause some ripping and tearing, and eventually, let the grease get out and contaminants get in, and have this thing prone to failure. So, this option by Teraflex is gonna be perfect for that JK owner, who is either experiencing that wear and tear after they've lifted their Jeep, roughly two-and-a-half to three inches and up, or is for that JK owner who is looking for are a preventative measure or a solution to that problem that may cause further down the road. Now, this option by Teraflex is gonna be a lot larger and wider on the flange, which is going to accommodate for that harder angle. So, it's not only gonna be a perfect replacement to a damaged part, but it is going to be a long-term solution added to their factory driveshaft. Now, not only is this just going to be for the JK owner who's looking for a replacement or a solution or even both, but it's gonna be for that JK owner who doesn't want to invest a lot of money in a new driveshaft because of those harder angles. So, it can get a little pricey if you're replacing this whole thing, but I think if this is still good, then only replacing the damaged or broken part is a perfect solution. So, speaking of prices, this is also gonna be very affordable at roughly $150. And I think for what this kit comes with, down to the Loctite and the grease, that this is, overall, a very quality and detailed kit perfect for that replacement and that long-term solution like I mentioned before. Now, more expensive solutions, like I just mentioned, are usually gonna be for those full driveshaft options, which are going to soften those harder angles that you create when you're lifting your Wrangler, but they're gonna be pretty pricey. So driveshafts can range anywhere from $400 and up. So, something for $150 that's going to fix the problem that you're experiencing is definitely something that I would keep in mind. So, we also have a more affordable solution than this, but that's going to be a baseline replacement. So Teraflex also offers just a standard factory style replacement, and that's gonna be more for the JK owner who has not lifted their Wrangler, but is just experiencing normal wear and tear, and is just looking for a replacement to the ripped boot or the failed joint. So, overall, I think this is a great kit. I think it's set at a very affordable price for a replacement as well as a solution. And honestly, you really can't beat it if you're not looking to replace your whole driveshaft. So install is gonna be a two out of three wrenches on the difficulty meter, probably taking you about three to four hours to get the job done in your driveway or your garage. Now, you are gonna need a couple of different specialty tools, however, a lot of basic hand tools as well. So, speaking of that install, let's jump into that now. The tools that I used for this install were impact wrenches, pneumatic and electric, a dead blow, a 15-millimeter, and 5/16-inch socket, a swivel socket, an 18-millimeter deep Impact socket, pair of needle nose pliers, a pair of snips, a pair of channel locks, a pair of standard pliers, a pair of snap ring pliers, PB B'laster, any penetrating catalyst, a pry bar, a couple of flathead screwdrivers, a bungee cord, a torque wrench, a series of extensions, and a couple of punches and chisels, and the provided Allen key. So this Teraflex CV joint is compatible with the front and the rear driveshaft. Now, the front driveshaft is usually the one that is more prone to failure because of that higher angle. And that's exactly what we're gonna replace on this Jeep behind me. So, our first step is to take off our transfer case skid plate. So we're gonna start with the transfer case skid plate. Now you don't necessarily have to take this off, but it's gonna be very helpful if you do and open up a lot of room. I'm gonna use an 18-millimeter deep socket to disconnect the four bolts that are holding it on. So, our next step after our transfer case skid plate is off is to remove the driveshaft from the axle side flange. I'm gonna be using a 15-millimeter socket and an extension with my impact to remove those four bolts. So, after the bolts are out, you may have to hit it with a hammer in order to disconnect it from the flange. Now, you will need to support this, so I would grab a bungee and just hang it from the front upper control arm, and then we can head to the back of our driveshaft. So, our next step is to disconnect our driveshaft at the transfer case. Now, I have a 5/16-inch socket, a five-inch extension on a swivel socket, and then a 15-inch extension just to clear this crossmember and the exhaust here. And I also have my impact wrench, and we're gonna remove all the bolts that are surrounding that Rzeppa joint. So, what I have here is a punch. There is a notch on either side of the flange that will allow you to get a punch in there, and that's gonna help the Rzeppa joint disconnect or separate from the flange on your transfer case. Now, I'm just gonna hit that with a hammer and continue to separate these two pieces. So after it's pretty separated, what I'm gonna do is just put a pry bar in there and get the flange out, and then we can go ahead and take this off, and put our driveshaft on the table. So now that we have our driveshaft on the table, our next steps include getting this flange off. So, we're gonna have to take this clamp off of the boot here. And then we're gonna have to knock off this cap so we can get to the inside, and eventually, take off this back part of the flange, so we can replace it. But our first step is gonna be for this clamp, so I'm gonna use a pair of needle-nose pliers and pinch the clamp so we can unhook it off of this little barb, and get it off. So after that clamp is off there, what we can do is grab a flathead and start to pop this cap off. I'm just gonna use a hammer and sort of chisel at it. So, after we have the cap off, there is gonna be a spring clip holding on the flange here. I'm gonna take a pair of spring clip pliers. So after we remove the cap, we do need to remove this snap ring. Now, you will need a pair of snap ring pliers. But after that's off, what we can do is hammer off this flange. So our next step is just to hammer off the flange. So, our next step is just to clean the shaft with some brake cleaner. Now we're ready for our new flange. So, like I mentioned to you guys before, this is a factory style setup and it mimics the factory design. So you're getting a new Rzeppa joint, which is going to basically be the same thing. It's those multiple ball bearings in this ball and socket style setup, and it's gonna move around and allow your driveshaft to move around freely. Now, where this factory joint fails is actually in the boot and the flange here. So, your boot at a hard angle will rub up against this flange, and that's because the flange is actually at a hard angle. Now, if you take a look at the Teraflex one, it's angled outward, so it's gonna be a lot wider, and allow that harder angle of your driveshaft, which is what happens when you lift your Jeep. So, essentially, what your driveshafts are doing when you lift your Wrangler, is going at a hard angle, and that's where this is going to tear. So when it tears, it's going to allow all that grease to go out. It's going to allow contaminants to come in, and that's why this is very prone to failure because ripping that boot is just inducing that failure. Now with this Teraflex one, this is going to prevent that because the boot should not rub up against the flange, and it's even gonna come with everything that you need to install it. We have new caps, the boot is on there, and it is a little bit more durable and a perfect replacement to a damaged or worn-out boot. And you even get the bolts for this with the threadlocker and a little clamp to install it. So enough about these two side by side on the table, let's go ahead and put together a new CV joint. So Teraflex includes low friction grease in the kit. And what we have to do next is pack our bearing. Now, putting grease on top and just spreading it around is not enough. We have to make sure that it is packed very tightly into each of the ball bearings, and that's going to reduce the opportunity for failure in our actual joint. So, just going to put a plop of grease, and we will have to use the whole tube of grease. You wanna make sure that this has enough grease as possible, and that's the exact amount that Teraflex provides in the kit. So, our next step once the joint is packed is just to clean it off. So, all of these holes around here are bolt holes, we wanna make sure that there is no grease in there. Also, we wanna make sure that there's no grease on the ceiling surface. If there is grease, it can compromise the seal. And if there's any grease in these bolt holes, it can compromise the strength of the threadlocker that's gonna be holding our bolts in. So, what we wanna do is just clean off this surface here. I'm using a clean rag as well as some brake clean. Wanna make sure that there's nothing on this surface. Now hat's gonna be a little bit hard to do, but just take your time because that is going to keep the longevity of the joint. So, you wanna make sure that you don't use the bolts that are provided. You probably could use a factory bolt but, putting a bolt through here will just compromise the threadlocker that's on it, so what I'm just doing is rolling up a paper towel and pulling it through the bolthole. That's gonna just push all of that grease out. So, our next step is to install our bolts on our dust shield here. So, we are going to put our brackets on here before we install our bolt. And this step is really important before we go ahead and actually install the dust boot on our Rzeppa joint. You wanna make sure that these are on first and then we can go ahead and install this boot on to our Rzeppa joint. Now these are just going to keep the structural integrity of the flange and add a little bit of strength to that and rigidity. And then once all of those are through, what we can do is grab our joint and install the dust boot on to our joint. Now, again, you wanna make sure that this surface where that seal is very clean. And you also wanna make sure that we're installing the dust boot on the tapered edge. So there's gonna be a stepped edge and a tapered edge, and we're gonna install the boot side on to the tapered edge, making sure that our clamp is also on there. We're gonna slide it on as far as we can. So, after the CV joint is on our driveshaft, we can take our new snap ring and put that into place where the old one was. Now, you wanna make sure that it sits fully in place. You can grab a flathead. So after the snap bring is on, you just wanna make sure that the surface, again, around the joint is clean to make sure that this is sealing properly. Now, what I also did was put the rest of the grease that they provided in the kit on to the cap here, that's just going to make sure that this is fully greased, making sure that this has the longest lifespan possible. Then we can go ahead and install the cap on to our CV joint. Now, this is actually going to set in place once we tighten it down on the transfer case, but you wanna make sure that it is seated properly. I just grabbed a pair of channel locks, just to make sure that this seats in place enough for when we install it on the Jeep. So, now we have to install our clamp and make sure that it is very tight, tight enough to make sure that this boot seals to our driveshaft. Grease can't come out and then contaminants can't come in. So, you are supposed to have a specialty tool for this, however, a lot of you guys at home will not, so I'm gonna show you the way to do it if you don't have this tool. I just tightened most of this clamp by hand. As you saw earlier, it was a lot wider. So, what I'm gonna do is just snip off a decent amount of this and we're going to roll the end of this tight. So after that is pulled tight, you may want to just clamp that down up against the actual clamp itself, and then we're going to set our locking tabs into place. Now, these are gonna be on either side. Make sure that you don't puncture the boot. You're just going to bend these in and we're just gonna hammer them down. So after we're all set from the table, what we can do is start to install our driveshaft. Now, I have the bungee still here because we do need to make sure that it's supported in the back. So what we have to do, at this point, is make sure that all these bolt holes are lining up, and we can start threading them in with our provided Allen key by Teraflex. So, you wanna make sure that you're tightening them down evenly. So, I'm just doing a couple of passes and going on to the next bolt. I'm also using a 10-inch extension and a hand ratchet because we don't wanna over-tighten these bolts. They're only going to be torqued to 15-foot-pounds. So, we don't wanna over-torque them because it will compromise the seal. So, our next step is to install the axle side of our driveshaft, reusing our factory four bolts, and we are provided with threadlocker to install these bolts with. So you wanna put a little bit of a coating on each, then we can thread those back into the factory holes. So after the bolts are threaded in, then we can tighten them back down with our 15-millimeter socket and 3-inch extension. All right, last but not least, we have to torque our flange bolts on the axle side to 81-foot-pounds, and on the Rzeppa side to 15-foot-pounds. So, our last step is just to reinstall our transfer case skid plate using the factory bolts. After that, we can just tighten it up with that 18-millimeter deep socket. After that's tightened down, then you're all set to go. So that's gonna wrap it up for my review and install. Make sure you like and subscribe. And for more videos and products like this, always keep it right here at extremeterrain.com.

      Product Information

      Features, Description, Reviews, Q&A, Specs & Installation

      Features & Specs

      • High-Angle Rzeppa Front or Rear CV Joint
      • Reduces Boot Damage and Failure
      • Includes Low-Friction Grease
      • Retains Factory Driveline
      • High-Grade Steel
      • Direct Fit Replacement Upgrade
      • Limited Lifetime Warranty
      • Fits 2007 to 2018 Jeep Wrangler JK Models

      Description

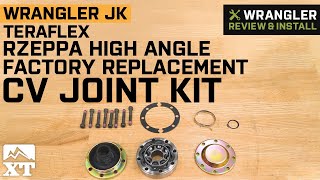
      Specially Designed Factory Replacement. The Rzeppa CV Joints can be pricey to replace when worn or damaged, often requiring an aftermarket U-joint and driveline upgrade. Fortunately, the Teraflex Rzeppa High-Angle Factory Replacement CV Joint Kit lets you replace the joint, hassle-free. Furthermore, this joint is high-angle-capable, minimizing damage to the boot that’s common to vehicles lifted 3 or more inches, like your Wrangler JK might be.

      Precision-Machined Steel. This Teraflex Rzeppa High-Angle Factory Replacement CV Joint Kit is precision-machined using high-grade materials to provide the off-road toughness and performance. It’s designed to provide long-lasting service.

      Includes Low-Friction Grease. In order to maximize the CV Joint’s lifespan, Teraflex engineered a special grease to lubricate it. This grease features a high-viscosity surface bonding characteristic to ensure proper adhesion during high-RPM conditions.

      Direct Fit Replacement. Installing the Rzeppa High-Angle Factory Replacement CV Joint Kit is straightforward as it’s made for a precise fit. Note that liberal packing of grease to the CV Joint is required for proper installation.

      Backed by Limited Lifetime Warranty. The Rzeppa High-Angle Factory Replacement CV Joint Kit is warrantied to be free of defects in materials or workmanship. This warranty is valid for as long as the original purchaser owns the vehicle on which it was installed. Exclusions will apply.

      Application. This Teraflex Rzeppa High-Angle Factory Replacement CV Joint Kit is specifically designed for 2007-2018 Jeep Wrangler JK models.

      Fitment:

      Teraflex 1744014

      CA Residents: WARNING: Cancer and Reproductive Harm - www.P65Warnings.ca.gov

      Installation & What's in the Box

      Installation Info

      What's in the Box

      • (1) CV Joint
      • (1) CV Cap
      • (1) CV Dust Boost and Housing Assembly
      • (8) Bolt M8 x 1.25 x 50mm Long Socket Head Cap Screws
      • (5) Grease Tube
      • (1) Boot Clamp
      • (1) Retaining Snap Ring
      • (2) CV Boot Side and Cap Side Gaskets (Pre-Installed)
      • (2) CV 3 and 1/2 Bolt Flanges
      • (1) Turbo-Lock Blue Thread Locker
      • (1) 6mm Hex Socket
      4.8

      Customer Reviews (215)

        Questions & Answers

        10 More Questions

            Related Wrangler Categories