 FREE 1 to 3-Day Delivery on Orders $119+ Details

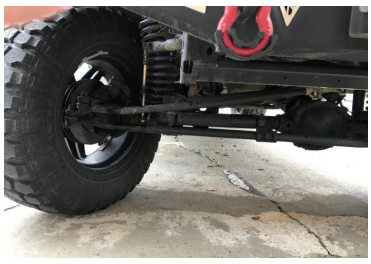
How to Install Steer Smarts YETI HD 26 No-Drill Draglink - Top Mount (07-18 Wrangler JK) on your Jeep Wrangler
Installation Time
30 minutes
Tools Required
- Hammer
- Torque Wrench
- 21mm Socket
- 10mm Socket
- 15mm Socket

Shop Parts in this Guide
1. It may be necessary for you to turn the wheel fully to the right to gain easier access to the nuts.
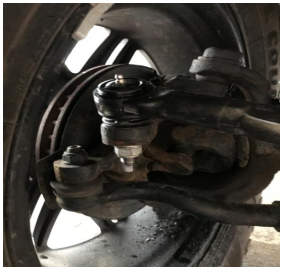
2. Loosen, without removing the ball stud nuts on the tie rod assembly using a 21mm socket.
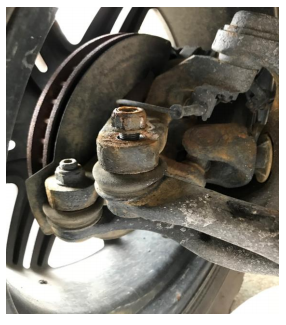
3. Unscrew the nuts until the top of the nut is above the end of the ball stud to prevent damage to the ball stud. Using a hammer, break the stud tapers loose separating the studs from the knuckles, and remove the drag link from the knuckle.
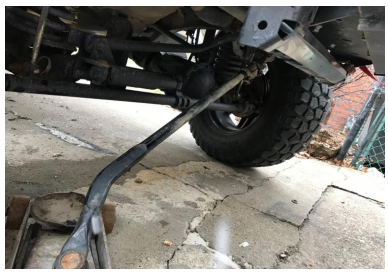
4. Using a 15mm socket, loosen the nuts on the drag link adjusting sleeve. Once loosened you can unscrew the drag link. Count the number of times you rotate the drag link until it is removed. Record this number down.
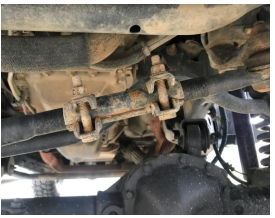
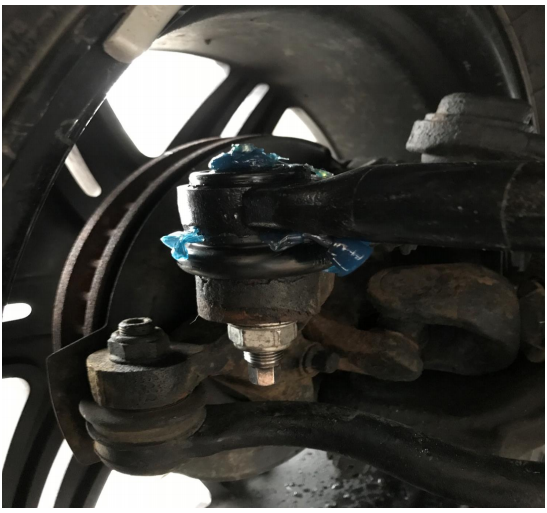
5. Take your new top mount drag link and screw it into the adjusting sleeve. Screw it in the exact number of times as you did when you unscrewed it. If you’re installing a top mount draglink using the reverse taper mount, twist the self-locking tapered sleeve into the bottom of the knuckle mounting hole Install the top mount drag link into the knuckle hole from the top side and tighten the nut until the nylok on the nut engages.
6. Hold the hex, using a 10mm wrench, on the end of the ball stud to keep the stud from turning in the socket while tightening the ball stud nut using a 21mm wrench. Tighten until approximately 40 ft. lbs of torque is achieved. Once the 40 ft. lbs of torque is achieved, the nut is to be tightened to 100-110 ft lbs. using a 21 mm socket.

7. Make sure toe and clear vision (straightness of steering wheel) are set correctly and all nuts are tightened to the specified torque. The last step is to grease both drag link sockets through the zerks until grease purges around the boot seal; wipe off excess grease.
Installation Instructions Written by ExtremeTerrain Customer Robert Cox 03/28/18.