 FREE 1 to 3-Day Delivery on Orders $119+ Details

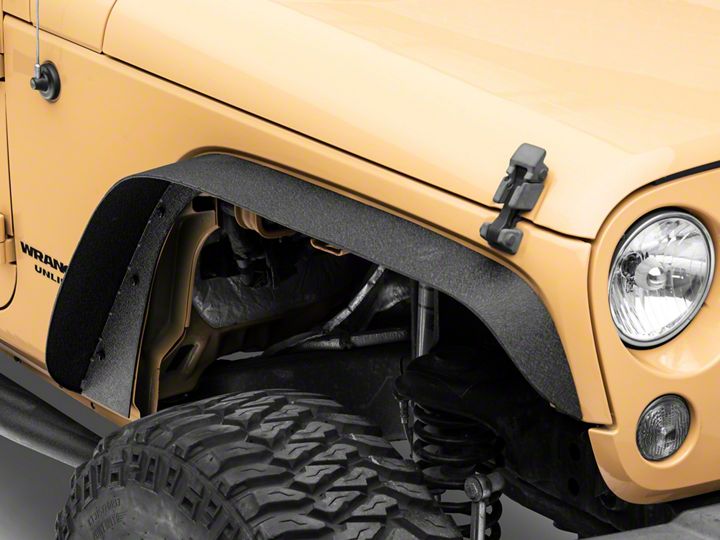
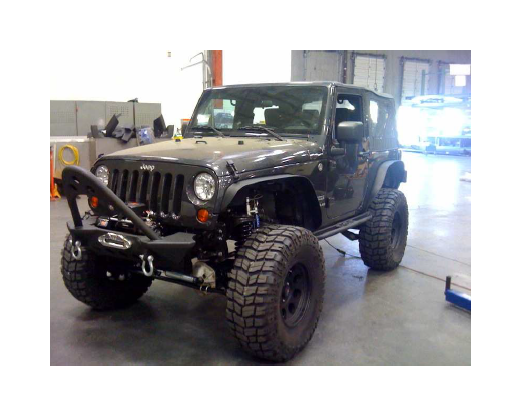
How to Install Smittybilt XRC Fender Flares on your 2007-2013 Wrangler
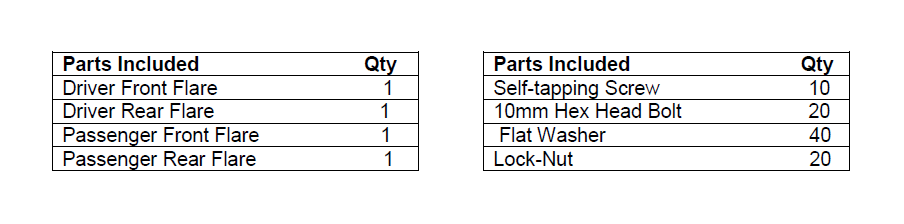
Shop Parts in this Guide
Step 1: Remove the five 10mm bolts holding the inner liner on. Four are visible, one is located towards the back on top which you gain access to through a hole in the inner liner.
Step 2: Disconnect the front turn signal plug.
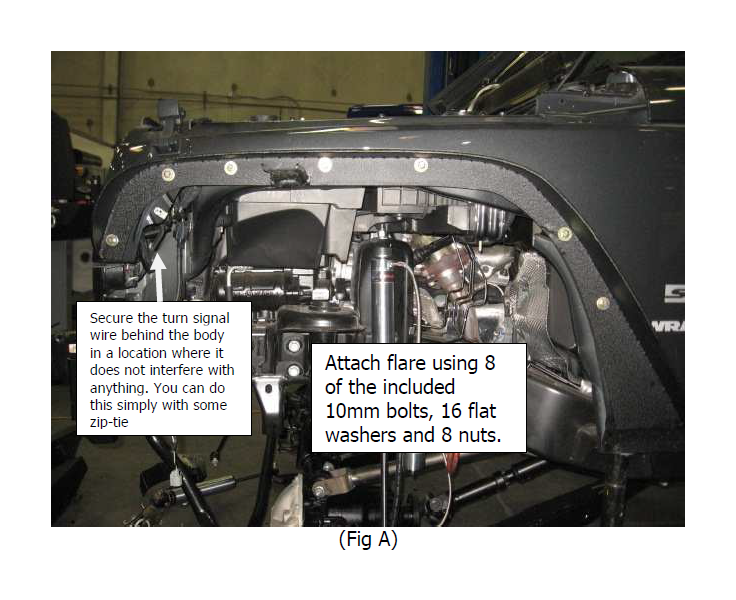
Step 3: Starting at the front of the factory flare and working your way towards the rear pull firmly outward to disconnect the flare from the body of the vehicle. NOTE: You will here cracking/popping noise this is from the clips snapping, which is normal. (They will not be re-used) After the flare and liner are removed make sure to remove any plastic clips that may remain in the holes on the vehicle. This can be done with a flat screwdriver or panel puller. Secure the turn signal wire behind the body in a location where it does not interfere with anything.
Step 4: Hold new flare up against body, lining up the holes in the flare with the holes in the body. Loosely attach using 8 of the included 10mm bolts, 16 flat washers and 8 nuts. Position flare into the best fitment and then securely tighten all hardware. (Fig A) Due to some variations in hole locations on the vehicles you may need to slightly enlarge holes with a drill. Use caution when drilling.
Note: With some effort you can re-use the inner liners. This would require precise trimming and secure with the previously removed hardware form Step 1 and some large O.D. flat washers.
REAR FLARE INSTALLATION
Step 5: Using a panel puller or flat head screwdriver remove the 5 black plastic plug fasteners from the wheel-well area which hold on the inner liner.
Step 6: Starting at the front of the factory flare and working your way towards the rear pull firmly outward to disconnect the flare from the body of the vehicle. NOTE: You will here cracking/popping noise this is from the clips snapping, which is normal. (They will not be re-used) After the flare and liner are removed make sure to remove any plastic clips that may remain in the holes on the vehicle. This can be done with a flat screwdriver or panel puller.
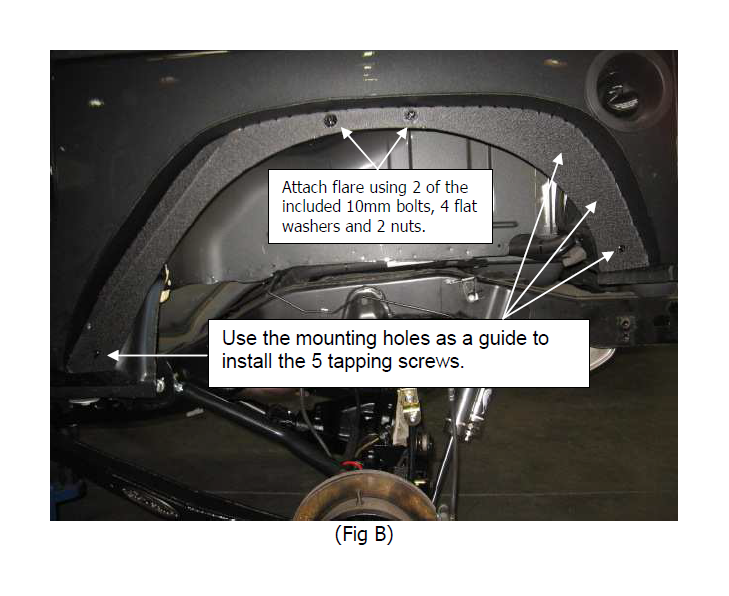
Step 7: Hold new flare up against body, lining up the holes in the flare with the holes in the body. Loosely attach using 2 of the included 10mm bolts, 4 flat washers and 2 nuts. Position flare into the best fitment location and then securely tighten all hardware. (Fig B) Due to some variations in hole locations on the vehicles you may need to slightly enlarge holes with a drill. Use caution when drilling.
Step 8: After top two bolts are secured, install the self-tapping screws into the 5 remaining holes. Be careful not to over-tighten
Note: With some effort you can re-use the inner liners. This would require precise trimming and secure with the previously removed hardware form Step 1 and some large O.D. flat washers.
Installation is now complete
CARE AND MAINTENANCE
To protect your investment it is recommended to regularly wash and wax this part. Do not use any type of cleaners that contain abrasives that may damage the finish of your part.
