 FREE 1 to 3-Day Delivery on Orders $119+ Details

Top Sellers for Wrangler


How to Install Smittybilt Gen2 XRC 9,500 lb. Winch on your Wrangler
Installation Time
2 hours
Tools Required
- Work Light
- Box Cutter
- 10mm Open End Wrench
- 13mm Open End Wrench
- 14mm Open End Wrench
- 18mm Open End Wrench
- Dielectric Grease
- Ratchet
- Socket Extension
- 18mm Socket
- 10 Zip Ties
Shop Parts in this Guide
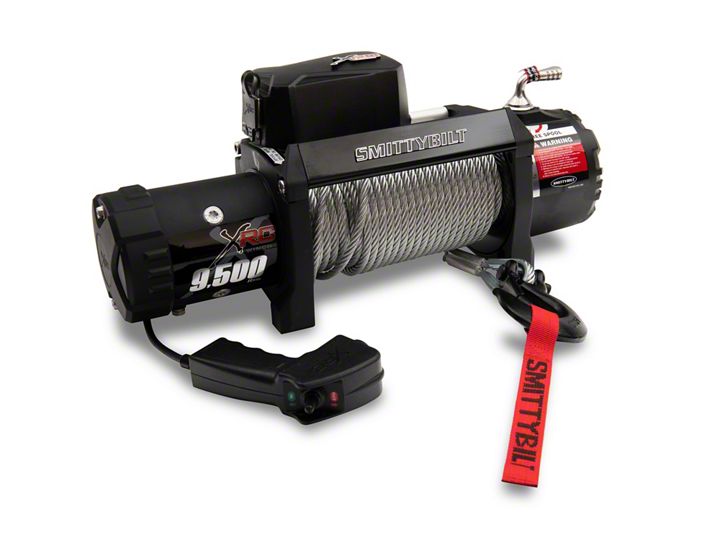
This guide is for installing the Smittybilt Gen2 XRC 9,500 ib. Winch (J106786) on a 2007-2015 Jeep Wrangler. The images show an aftermarket bumper with the winch mounting plate built in. If you do not have a bumper with an appropriate winch mount, you will also need a winch mounting plate which should be installed before starting the winch installation. Read all instructions carefully before starting.
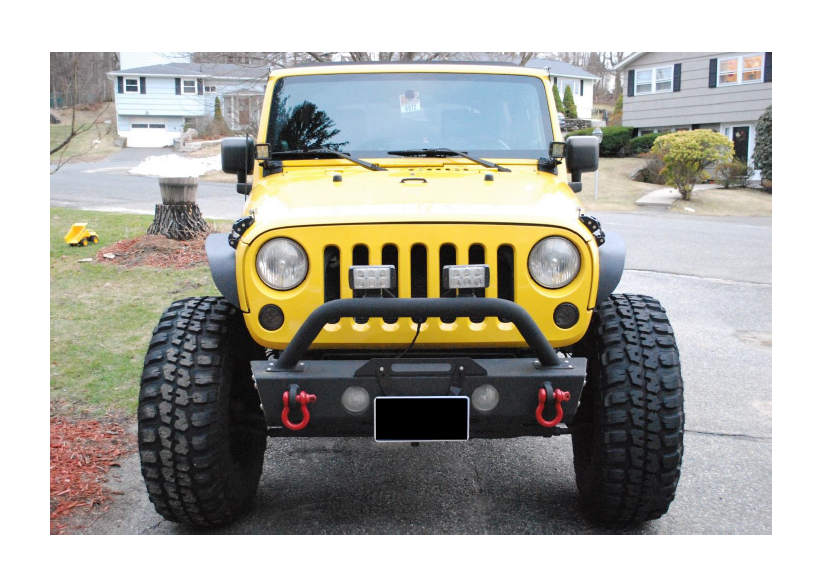
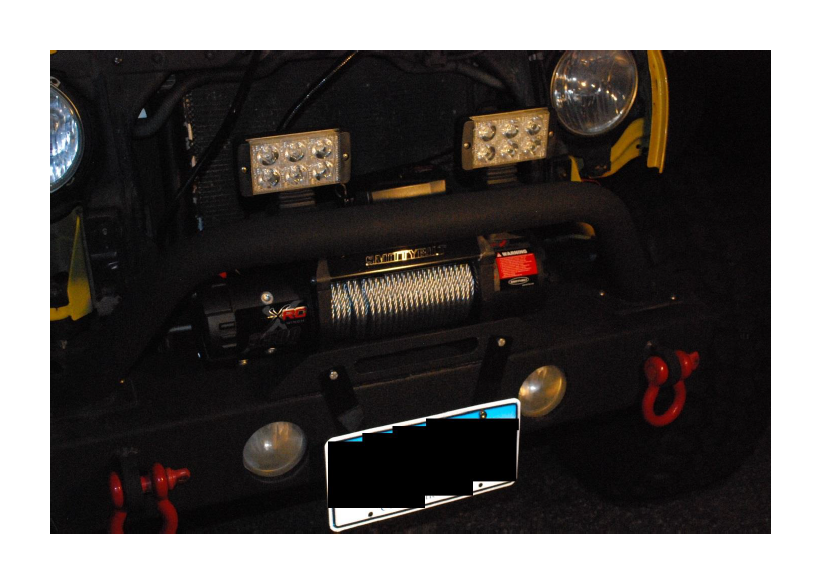
Before
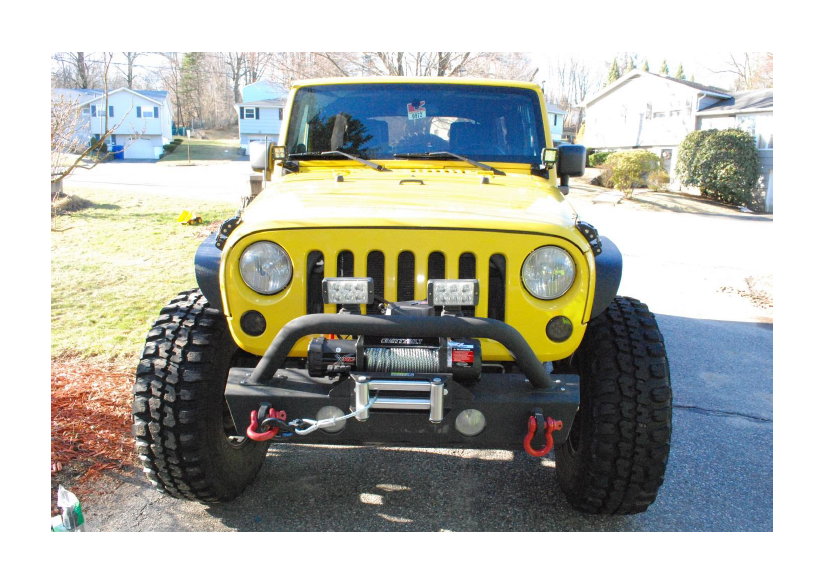
After
Installation Instructions:
1. Using the 10mm Open End Wrench, loosen and remove the negative battery cable from the battery.
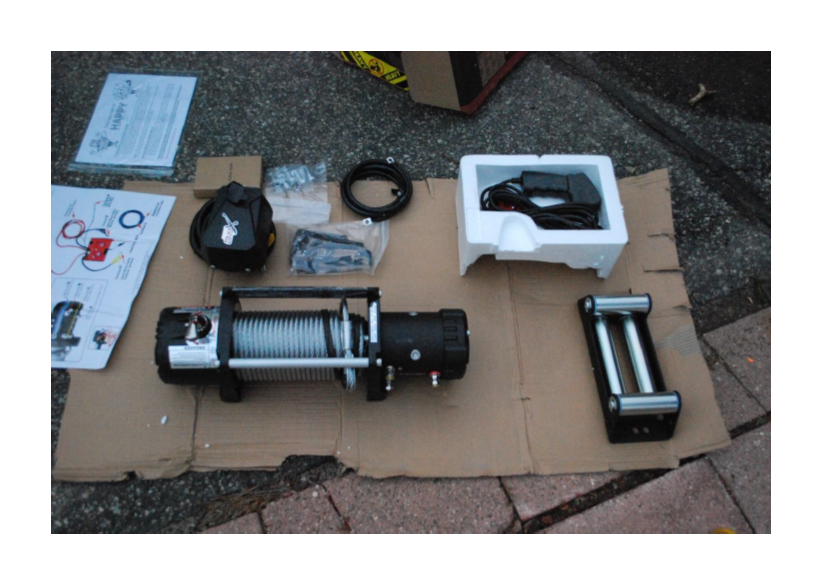
2. Using the box knife, cut the outer portion of the winch box open and lay it flat to use as a work area while pre-assembling the winch. You want to be working on a clean, dry surface.
3. Remove the winch and all of the accessories from the box and lay them on the cardboard from the previous step. Verify that all of the parts are there by checking it against the parts list in the included instructions. This is a good time to verify that the finish on the winch has not been damaged during shipping.
4. Using the long allen bolts and allen key included with the winch, bolt the control unit brackets to the bottom of the control unit. Use the included plastic spacers between the bracket and the control unit. These spacers have a slight taper, put the larger end up (toward the control unit). Tighten by hand firmly, but do not over-tighten.
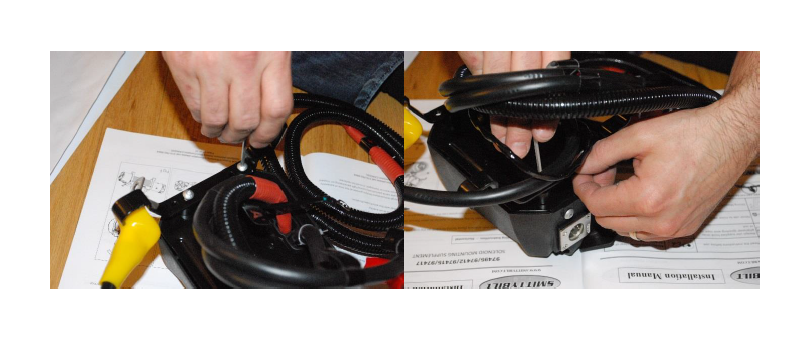
5. Clip the front of the control unit brackets onto the front top bar of the winch and lower the rear of the control unit until the brackets are sitting on the rear bar of the winch unit. You will have to pull the wiring out of the way. Secure the back of the brackets with the two supplied allen screws and lock washers using the included allen wrench. These screws do not thread into anything except the control unit bracket, they will just be hooked under the rear bar of the winch unit
6. Each wire from the control unit is labeled and each terminal on the winch motor is labeled. Attach the wiring per the included wiring diagram matching wire A to terminal A and wire B to Terminal B, etc. Terminal A uses a 13mm open end wrench, Terminal B, C, and D use a 14mm Wrench. Terminal A will have the small black ground wire from the control unit running to it and will also have the long black ground wire connected to it (labeled Wire A). Connect both of these wires at this time as the terminal will be difficult to reach once the winch is mounted.

7. Before pushing the boot from the wire over each terminal, fill each boot with dielectric grease. This will help prevent water from infiltrating and corroding the electrical connections. There is no boot for the ground (Terminal A), I recommend coating this with dielectric grease as well.
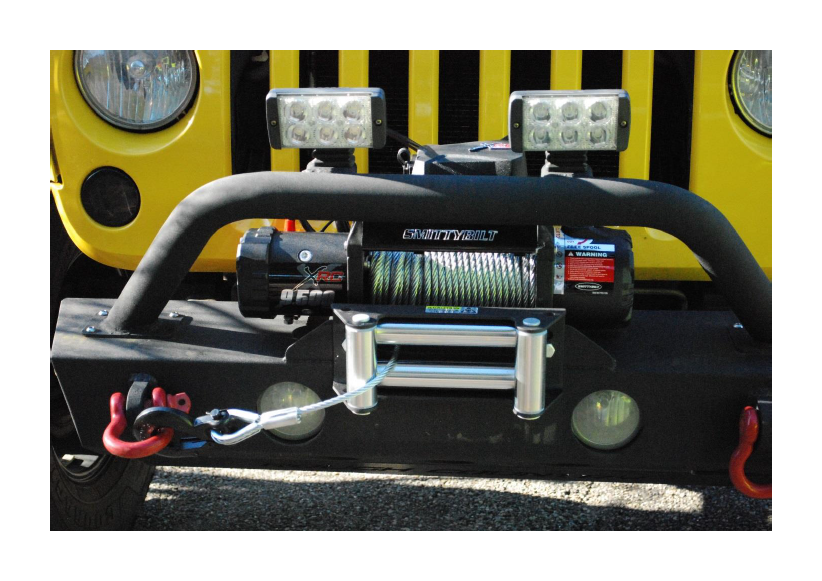
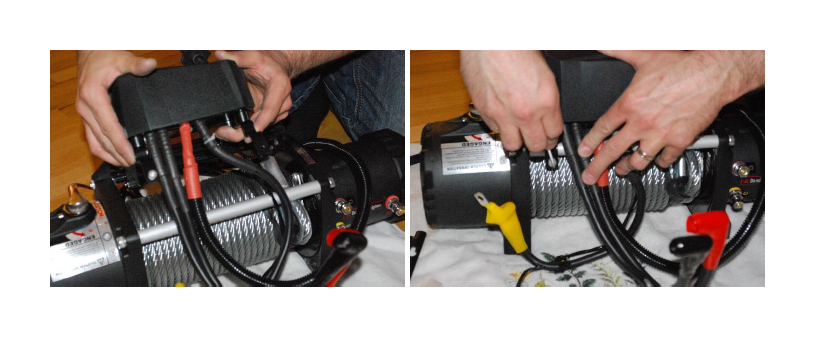
8. With the help of a friend, lift up the winch unit and set it into your winch plate or winch bumper. Line up the holes in the mounting plate to the holes in the base of the winch.
9. Place the 4 square nuts included with the winch in the base of the winch and from the bottom of the bumper, install the included winch mounting bolts and lock washers using the 16mm socket, ratchet, and socket extension. Tighten to 80 foot pounds.
10. Carefully run the long black and long red wires under the grille and up to the battery. Using the zip ties, carefully tie the wires away from any moving parts in the suspension, belt-driven engine accessories, and the exhaust. There is a factory wiring harness running down from the battery in this area and you should be able to zip tie the cables to this existing harness.
11. Using the 10mm open end wrench, loosen the terminal nut on the positive battery cable end and attach the red wire to this terminal. Reinstall the nut with the 10mm wrench.
12. Using the 10mm open end wrench, connect the black wire to the disconnected negative battery cable end.
13. Reconnect the negative battery cable to the battery and tighten the cable end with the 10mm open end wrench.
14. Install the included winch fairlead on the front of the winch plate or winch bumper using the included bolts, nuts, and lock washers. Tighten with the 18mm open end wrench and 18mm socket and ratchet. Tighten to 90 foot pounds.

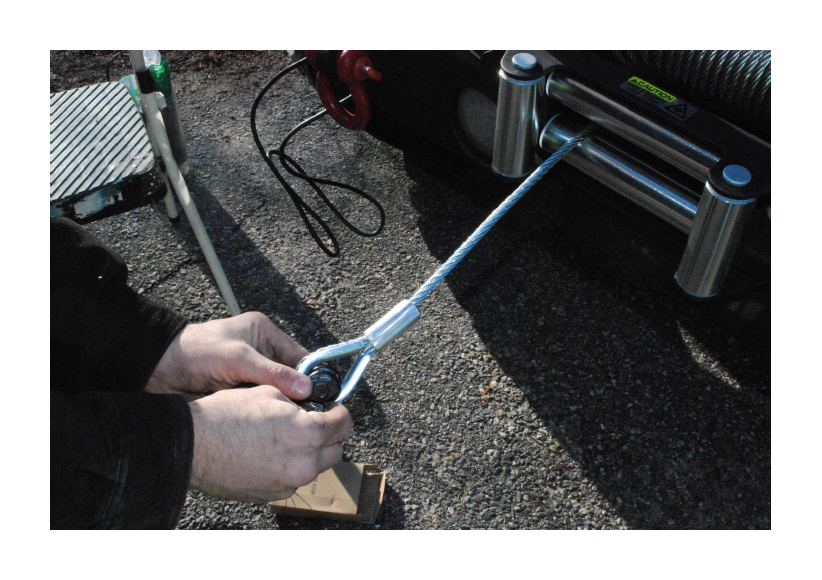
15. Remove the rubber band holding the end of the winch cable on the winch. Carefully pull the end of the winch cable through the fairlead and attach the included hook using the clevis pin. If you have to unwind the winch cable a little to get slack, you can do so by turning the transmission lever on the winch to free spool and turning the winch by hand. Before the cable is through the fairlead, it is unsafe to power the winch out to unwind any cable.
16. Re-check all electrical connections and bolts to make sure they are tight.
17. Follow all included instructions when using the winch.
Top Sellers for Wrangler
Word On The Trail
This is the 3rd time I have ordered and each time very satisfied with the experience, shipping, and the quality of the parts
Meet Our Team

I have been into Wranglers since I was young. My dad has owned quite a few over the years and if I wasn’t in a lifted wrangler I was in something lifted. When I was old enough to drive I bought a Cherokee and went through 3 of them before deciding I wanted a Wrangler. So I sold my Cherokee and sat o...
