Talk to a Gladiator Sales Tech
1-877-870-8556
M-F 8:30A-11P, Sat-Sun 8:30A-9P
Logo Image
$20K Sweeps! 10 Chances to Win! Enter Daily >

SkyJacker 2.50-Inch Front / 1-Inch Rear Coil Spacer Leveling Kit (20-24 Jeep Gladiator JT, Excluding Mojave)

Item JG1010
Verify parts fit and get product recommendations.
Gladiator Sales Techs: Connect Now M-F 8:30A-11P, Sat-Sun 8:30A-9P
$0.00
Our Price

$376.23 (kit)

FREE Shipping Market Price $432.99 You Save 13% ($56.76) Up to 10% off for Military & First Responders! See Details

Will this fit your Vehicle?

Select a different vehicle Help?
Update or Change Vehicle
Ship to: Enter Zip
Sorry, please enter a valid US or CA postal code
We're sorry, zip can't be updated at this time.
    Create a list
    Add to New List

    Saved - View your saved items

    We're sorry. We couldn't save this product at this time.

    or use

      Product Videos

      Merideth: Hey, guys. So, today we're checking out the Skyjacker 2.5-Inch Front, 1-Inch Rear Coil Spacer Leveling Kit, fitting all 2020 and newer Gladiator JTs, excluding the Mojave models.Now, this kit will be a great addition to your Gladiator if you're looking for an affordable way to get some better capability for your JT, whether that's some better ground clearance or fitting a larger tire for some better performance off-road. This will also be a great pick if you're looking to level out the factory rake, creating a more aggressive stance and more defined appearance to the truck.This kit will feature spacers for the front and rear, giving you that 2.5-inch lift in the front and, again, the 1 in the rear. Now, that will bring up the nose of the jeep, allowing you to crawl over obstacles a little bit easier and fit up to a 35-inch tire comfortably inside the wheel well. Now, this kit will also feature accommodating components like longer sway bar end links and shock extension brackets to keep the factory drivability.The spacers and shock brackets will be made of a heavy-duty steel material and it will have a nice textured black powder coat finish on top to resist any rusting. Now, supporting components will also be durable as well, including the tough sway bar end links with long-lasting bushings, compared to the factory ones that can tend to get brittle over time. The bump-stop extensions will also have a solid heavy-duty plastic construction, making sure that they hold up as well.This kit will be generally affordable for a leveling kit, coming in at roughly $425. Now, when shopping around for lift kits or leveling kits, usually, the rule of thumb is that the more components that they come with, usually, the more expensive they are gonna be, and vice versa. Now, this kit will be right in the middle, being pretty inclusive, but it's not going to include every single bell and whistle, like upgraded shocks or additional correcting hardware like a track bar relocation bracket or brake line brackets. However, in this case, it's not necessary. So, I think if you're trying to save a couple of bucks while still getting the appearance and capability out of your Gladiator, then this is a great option.This will be a two out of three wrenches on the difficulty meter, and it will probably take you about four hours to get the job done with some pretty basic hand tools. At this point, we can head over to the shop and check out a detailed breakdown of the install. So, that's gonna wrap it up for me, let's go ahead and jump into it.Man: Tools required for this install include an impact gun, an air gun, a drill, an electric ratchet, a couple of different-sized hand ratchets, a 13, 14, 18, and 19-millimeter wrench, a 10, 14, 18, and 19, and 21-millimeter ratcheting wrench, a hanger, a pry bar, a 1/2-inch drill bit, a few different-sized extensions, a 14-millimeter swivel socket, a 10, 13, 14, 15, 18, 19, and 21-millimeter sockets, a swivel adapter and a 6 and 8-millimeter Allen bit, and a clip remover tool.What's up, guys? Today we're installing a lift kit on our Gladiator. So, let's get started. So, our first step is to disconnect our bolt holding in our track bar on the passenger side. It's gonna be a 21-millimeter bolt. It's right below our sway bar here. We have a tab with a welded nut on the back, that's gonna grab, so we don't have to get a wrench on the backside. We'll just get our 21-millimeter socket on the front and remove our bolt.So, now our next step is to remove our sway bar end link. We have an 18-millimeter bolt on the bottom and an 18-millimeter nut on the top. Now, I'm gonna be using an 18-millimeter ratcheting wrench for the bottom, since there's not enough room for a gun. And then we can also remove our tab with our welded nut. And then for the top, we can just grab an 18-millimeter socket on an impact gun to take that nut off. And then we can just pop our end link out, and do the same thing for the other side's end link.So, our next step is to disconnect our lower shock mount. We have an 18-millimeter wrench we're gonna put on our nut side, and an 18-millimeter ratcheting wrench for our bolt side. So, next, we can disconnect our lower shock mount. I'm grabbing an 18-millimeter wrench for our nut side and an 18-millimeter socket for our bolt side. And now we can go up to the top of our shock and disconnect our other bolt. It's gonna be that same 18-millimeter socket. And then we can do that same thing on the other side.So, next, we can pop out these two clips, as well as this nut that's holding on our bracket holding our brake line. So, grab a clip remover tool to pop these two clips out. And then we can grab a 15-millimeter socket to remove our nut on the bracket.So, next, we can pop out this push clip up here, as well as our connector to our four-wheel drive actuator. So, I'll get a clip remover tool for our top clip. And then we just need to pop out this little white tab and then press down on it to remove our connector. So, I'm gonna grab that clip tool just to pop that out. And then we can disconnect that. So, now we can begin to lower our pole jack to free up enough space to pull our spring out. And then we can do that same thing on the other side.Now, our first step is to install our spring spacer. So, we're gonna grab our isolator and wiggle that off. And then we'll be putting our isolator on the bottom of our spacer. And then we can slide that back up into place. The isolator is gonna be able to hold on to that well enough where we don't have to hold this, so then we can just get our spring and put it in.So, next, we can reinstall our spring. Now, on the bottom side, we're gonna have our bump-stop extension that's gonna go on the bottom. So, we're gonna slide that in and install it as one unit. So, next, we can remove our brake line bracket because we're gonna have to get a hand up in here to thread a nut on the bottom side of our bump-stop spacer. So, I'm gonna grab a 10-millimeter ratcheting wrench just to break this bolt loose, and then we can unscrew it the rest of the way by hand. And then we can pop that bracket out of place.So, next, we can take our Allen head bolt with a flat washer and drop it through the top of our spacer. And then, on the bottom side, we can get our hand in there to get our nut on. And then we can grab a 5-millimeter Allen head bit for our top bolt. And on the bottom, we can grab a 14-millimeter swivel socket, and then we can tighten our bolt down. And then we can reinstall our brake line bracket and tighten that bolt most of the way by hand, and then we'll grab our 10-millimeter ratcheting wrench to finish it off. Now, at this point, you're gonna wanna catch up with what we've done on this side on the other side so that we can start to raise our axle and install our shocks.Now, our next step is to install our lower shock mount extension bracket. Now, there's a hole in the bottom of the mount that you are gonna have to drill out to a 1/2-inch. Ours has already been drilled out in a previous install. However, you would just need a 1/2-inch drill bit just to open up that hole. So, then our bracket, the curved side is gonna be facing the front. And then from the bottom, we can add our bolt with a flat washer followed by another flat washer on the inside and then our locking nut.Our next bolt with a flat washer. We also have this crush sleeve that's gonna go in the middle of our mount. We're gonna slide that in. Slide our bolt through to the other side. And then on the other side, we'll just add another flat washer followed by our lock nut. And then to tighten down our side bolt, we'll be using a 19-millimeter socket and a 19-millimeter wrench. And now to tighten up our side bolt, we'll be using a 19-millimeter socket and a 19-millimeter wrench. And now to tighten up our bottom bolt, we'll be using a 15-millimeter socket and a 15-millimeter wrench.So, now we can reinstall our two brake line brackets. So, we'll reinstall our factory 10-millimeter bolt, then we can tighten that down with a 10-millimeter socket. And then we'll reinstall our two push clips. And now coming to the bottom, slide our bracket over our stud and reinstall our factory 15-millimeter nut and tighten that down with a 15-millimeter socket. And next, we can reconnect the harness for a four-wheel drive, and then we'll press that white tab in to lock it into place. And then we can reinstall our push clip.Next, we can reinstall our factory shock. So, we'll get it up into our top mount first and get our bolt a couple of threads. And then we can line it up into our bottom mount, raise our axle a little bit just to line up our hole, and then we'll be reusing our factory lower bolt and our factory nut on the other side. And then we can tighten our top bolt down with an 18-millimeter socket. And then on the bottom, we'll grab an 18-millimeter socket with a swivel adapter and an 18-millimeter wrench to tighten that down. So, now we can reconnect our two lines by popping our clips into place.Next, we can install our new sway bar end links. So, we have a bolt with a washer going through one side, and then a flat washer and a locking nut for the other side. And then for our bottom mount, we're gonna be reusing our factory hardware. So, we'll slide our bolt. And then we'll get our nut that's welded to a tab on the other side. And then for our bottom mount, we're gonna be using an 18-millimeter ratcheting wrench to tighten this down. And then for the top, we'll get a 19-millimeter wrench on our nut side and a 19-millimeter socket on our bolt side to tighten this down. And then we can repeat that whole process on the other side.So, now moving on to the rear, we have to remove our shock. We've got a 21-millimeter bolt and nut on the bottom, as well as the top. So, I'll grab a 21-millimeter socket and a 21-millimeter wrench to get these out. So, now once we have our shock removed, our next step is to come up to our brake line bracket, remove this 10-millimeter bolt, and pull our bracket out of the way.So, our next step is to remove our sway bar end link. We have an 18-millimeter nut on the bottom and an 18-millimeter bolt on top. So, we'll grab an 18-millimeter socket for our top bolt. For our bottom ball joint, we're gonna be using an 18-millimeter ratcheting wrench with a 6-millimeter Allen bit to prevent our ball joint from spinning. And then we'll grab our 18-millimeter socket for our top bolt. And then we can do that same thing on the other side. So, now we've lowered down our axle to get enough room to pull our spring out, so we can pull that out now.So, our next step is to remove our brake caliper to relieve some of this tension on our lines. So, I've got a caliper hanger. I'm gonna throw into this hole up here. And then we have two 10-millimeter bolts that we can remove to remove our caliper. And then we can wiggle this out of place, and then we can hang that up on our caliper hanger. And then we can pop our ABS wire out of these little clips because we do have a lot of slack on that one. And now once we have everything removed that we need to remove on this side, we can do that same thing on the other side.So, now we can install our spring spacer into our factory spring and reinstall it. So, we have this smaller circle on the bottom, and that's gonna go into the hole in our isolator. And then we can slide that whole unit up into place.So, next, we can reinstall our caliper and reconnect all of our brake line connections, and then we'll tighten those up with a 10-millimeter socket. And then we can remove our hanger and reinstall our bracket. And we'll tighten that up with that same 10-millimeter socket. And then we can reconnect all of our clips.Next, we can reinstall our factory sway bar end link. We'll get it into our bottom hole. And then we can reinstall our factory bolt. And we'll get our factory nut on the bottom. And now we can tighten down the top with an 18-millimeter socket. And then on the bottom, we're gonna get an 18-millimeter ratcheting wrench with a 6-millimeter Allen bit just to prevent our ball joint from spinning.Next up, we can reinstall our factory shock. So, we'll get it into our top mount first and get our nut on the backside. And then we can get that into our lower mount. You might have to raise or lower your axle a little bit just to get it into that bottom mount. And then we'll get our nut on the other side. Now, both of our bolts and nuts are 21 millimeters, so we'll grab a 21-millimeter socket and a 21-millimeter wrench to tighten these down. Now, at this point, we can repeat that same process on the other side.So, that'll wrap up this review and install of the Skyjacker 2.5-Inch Front, 1-Inch Rear Coil Spacer Leveling Kit for your 2020 and newer Jeep Gladiator JT, excluding the Mojave. Thank you for watching. And for all things Gladiator, keep it right here at extremeterrain.com.

      Product Information

      Features, Description, Reviews, Q&A, Specs & Installation

      Features & Specs

      • Excellent Front and Rear Coil Spacer Leveling Kit
      • Raises the Jeep’s Front by 2.50-Inches and Rear by 1-Inch
      • For a Stronger Off-Road Ready Look
      • Boasts Durable Metal Coil Spacers
      • Accommodates Larger Tires
      • Moderate Mechanical Expertise Is Needed
      • Made in the USA
      • Comes With a Limited Lifetime Warranty
      • Fits 2020-2024 Jeep Gladiator JTs, Excluding Mojave Models

      Description

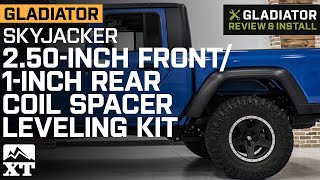
      Streamlined Look. Give your Jeep Gladiator JT a beefier stance with the help of SkyJacker’s 2.50-Inch Front / 1-Inch Rear Coil Spacer Leveling Kit. This high-quality upgrade is designed to improve your vehicle’s off-road-ready look by raising its front by 2.50 inches and its rear by 1 inch. This’ll eliminate your Jeep’s factory rake, giving it a more streamlined appearance.

      Impressive Construction. Each of the kit’s components is constructed from heavy-duty material. As a result, it has the durability to withstand the toughest off-road terrains and harshest climates. It also has the strength to carry your Jeep’s weight.

      No Drilling or Cutting Needed. SkyJacker’s Front and Rear Coil Spacer Leveling Kit is made for convenient, no-drill installations. However, it still calls for moderate mechanical expertise to ensure that the kit properly installed to your Jeep.

      A Limited Lifetime Warranty Is Included. This leveling kit is covered by a limited lifetime warranty. If you’re interested to learn more about the warranty’s terms, conditions, and exclusions, visit SkyJacker’s website.

      Application. The SkyJacker 2.50-Inch Front / 1-Inch Rear Metal Coil Spacer Leveling Kit is compatible with all 2020-2024 Jeep Gladiator JTs, excluding Mojave models.

      Fitment:

      Details

      SkyJacker G250MSB

      CA Residents: WARNING: Cancer and Reproductive Harm - www.P65Warnings.ca.gov

      Installation & What's in the Box

      Installation Info

      What's in the Box

      • (2) Front Metal Coil Spacers
      • (2) Rear Metal Coil Spacers
      • (2) Front Shock Extension Brackets
      • (2) Front Bump Stop Extensions
      • (2) Sway Bar End Links
      • Installation Hardware
      • Installation Instruction
      4.8

      Customer Reviews (4)

        Brand Image

        Reviews of SkyJacker Suspension products have an average rating of 4.6 out of 5

          Questions & Answers

          10 More Questions

          Will It Fit My Gladiator

          • 3.0L V6 EcoDiesel - 21, 22, 23
          • 3.6L V6 - 20, 21, 22, 23, 24