 FREE 1 to 3-Day Delivery on Orders $119+ Details

How to Install Rough Country 1.25" Body Lift Kit on your 2007-2013 Wrangler
Tools Required
- 18mm Wrench
- 16mm Wrench
- 3/4" Wrench
- 9/16" Wrench & Socket
- Phillips Screw Driver
- Jack Stands
- Wood Block
- Hammer
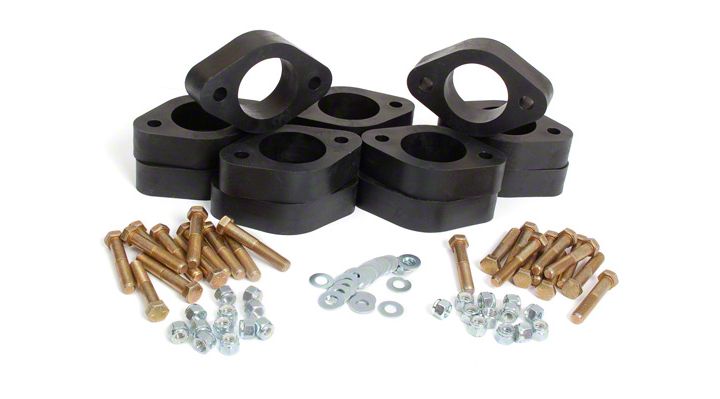
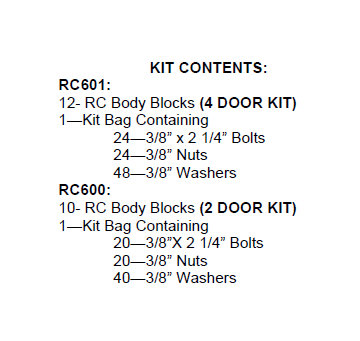
Shop Parts in this Guide
INSTALLATION INSTRUCTIONS FOR JEEP JK 2 AND 4 DOOR BODY LIFT
1. Place Jeep on clean, dry, level surface. Installation is done one side at a time.
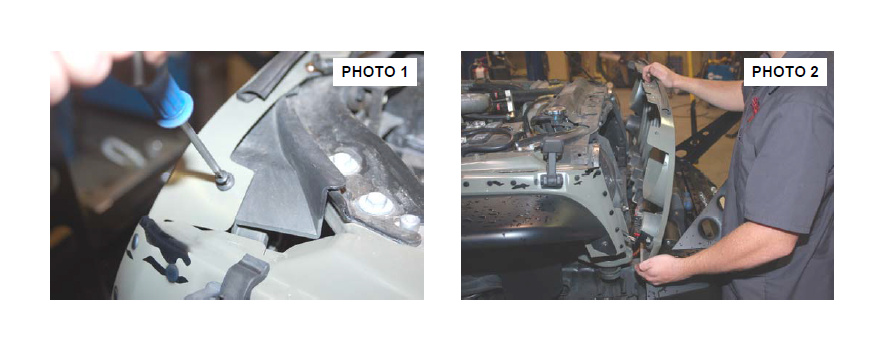
2. Raise hood. Using a Phillips screw driver, remove the (6) push pin inserts from grill on top side as shown. Retain for re-use. See Photo 1.
3. Pull grill toward you to release the three lower clips. See Photo 2.
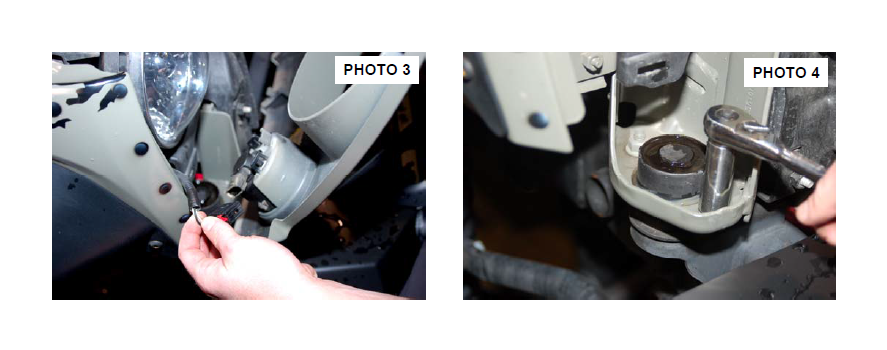
4. Disconnect the parking light electrical connecter and remove grill assembly. See Photo 3.
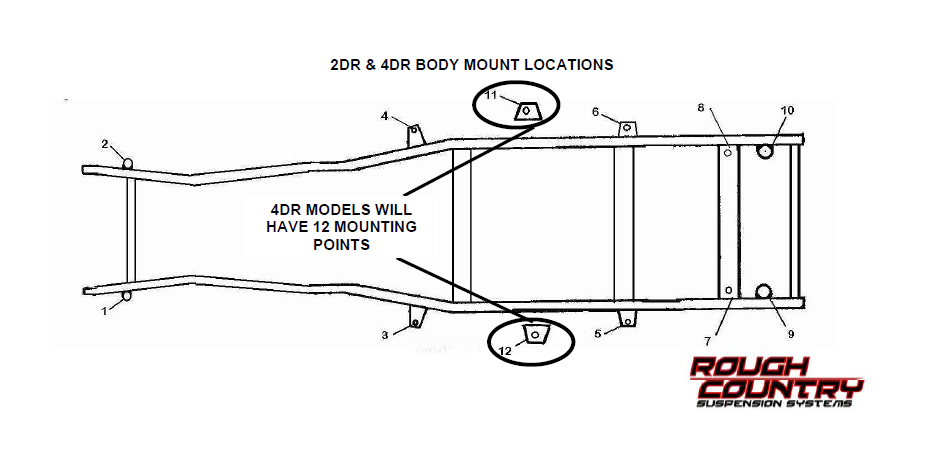
5. Using a 16mm wrench remove the 2 stud nuts from the stock body mounts as shown (12 mounts for 4 door and 8 mounts for 2 door), removing only the passenger side first. See Photo 4.
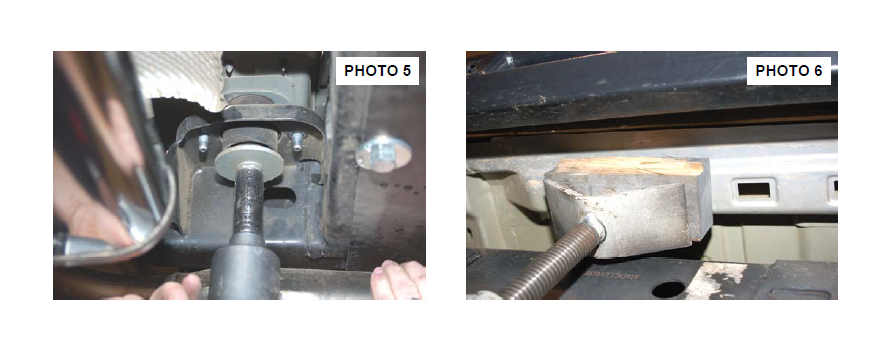
6. After completion of removing the stud nuts, remove the center stud bolt and washer from the passenger side body mounts using a 18mm wrench . See Photo 5
7. After all isolator nuts and center mounting bolts are removed from the passenger side, position a wood block and (2) jack stands under the body as shown. Lift the body upwards and begin removing the body mounts. See Photo 6.
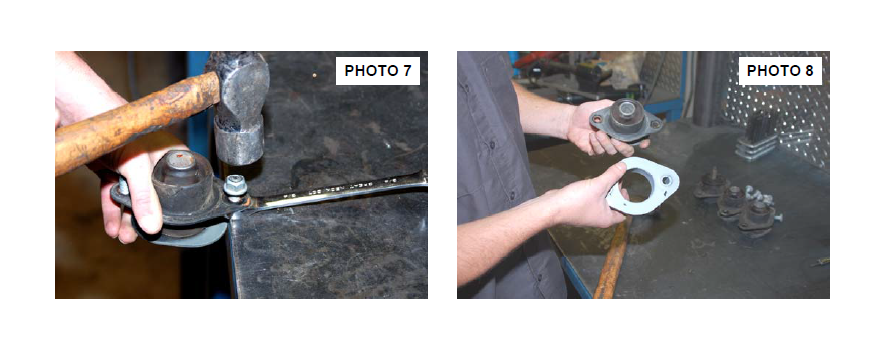
8. After removing the stock body mounts from your vehicle, replace the nut on the stud and tighten the nut only until the stud thread and nut are even. Using a 3/4” wrench and hammer, place the head side of the stud inside the wrench and then place onto a flat surface. Strike the nut side of the stud until the stud releases. Proceed with stud removal of all body mounts. See Photo 7.
9. After stud removal is complete, place the Rough Country body block onto the stock mount as shown. See Photo 8.
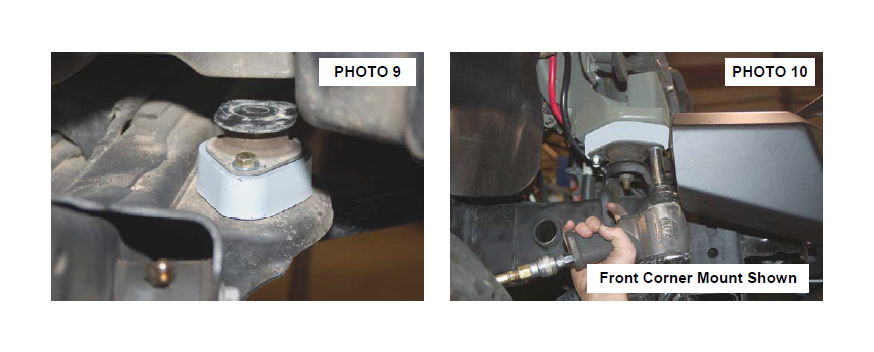
10. Re-install the body mount using the 3/8” x 2 1/4” bolt / washers and nuts supplied. Secure these bolts into place using a 9/16 wrench and tighten to 40ft/lbs. Note: The RC block will mount towards the body on the front two mounts. On the rear mounts, the RC block will mount to the frame side. See Photo 9 & 10.
11. Lower the jacks so that body mount meets with the frame mount and remove the jacks.
12. Using a 18mm wrench secure center mounting bolts, only hand tight.
13. Repeat all above steps to driver side.
14. After completion of installing all body blocks and mounts, completely remove jacks and wood block. Using an 18mm wrench torque center mounting bolts to 80 ft/lbs on all body mounts.
15. Reattach grill parking light electrical connectors. Snap grill into lower clips and using a Philips screw driver, secure the grill with the factory pin fasteners (6) on the top side.
16. Close hood. Recheck torque after 500 miles on all bolts. The 3/8” bolts should be 40ft/lbs and the stock mounting bolts should be at 80ft/lbs.
INSTRUCTIONS FOR 2 AND 4 DOOR JEEP JK MANUAL TRANSMISSION
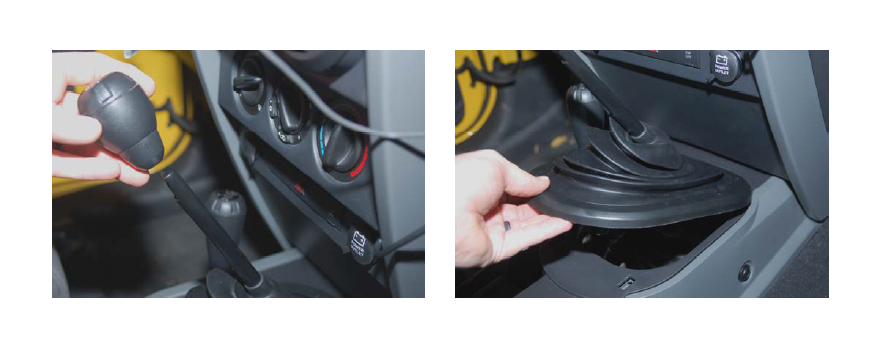
1. Remove shifter knob by pulling the knob off the shifter. See Photo 11.
2. Lift shift boot from floor panel and remove. See Photo 12.
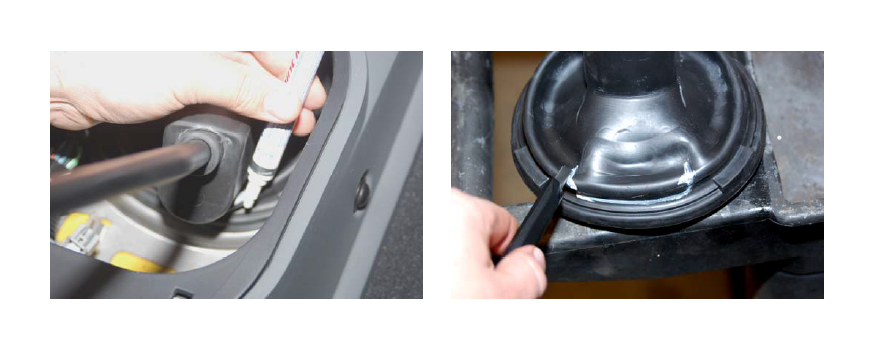
3. Engage shifter into second and the reverse gear and mark the rubber inner shift boot as shown. See Photo 13.
4. Remove inner shift boot. Using a razor blade, begin cutting along the lines as shown. See Photo 14.
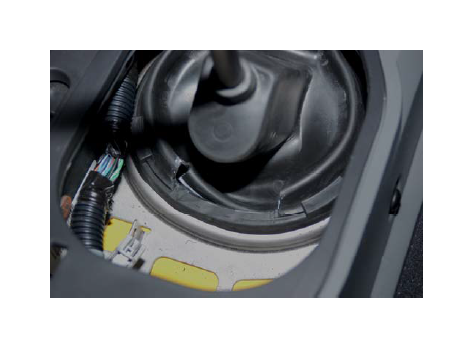
5. After cut is complete, reattach inner shift boot and push cut section inward as shown. See Photo 15.
6. Check shifter are reinstalling the inner boot to ensure there is no shifter interference. Modify as needed.
7. Reattach outer shift boot
8. Reattach shift knob.
POST INSTALLATION
1. Check all fasteners for proper torque. Check to ensure there is adequate clearance between all rotating, mobile, fixed and heated members. Check steering for interference and proper working order.
2. Re torque all fasteners after 500 miles. Visually inspect components and re torque fasteners during routine vehicle service.
