 FREE 1 to 3-Day Delivery on Orders $119+ Details

How To Install a RedRock 4x4 3 in. Curved Round Side Step on your 2007-2015 Wrangler JK 4 Door
Installation Time
1 hours
Tools Required
- 2x Side Steps
- 6x Mounting Brackets
- 4mm Allen Wrench
- Wrench with 16,13,and 10mm socket
- 6x 10-1.5mm bolts with washers and nut plates
- 6x 8-1.25mm x 35mm bolts and washers
- 12x 8-1.25mm x 25mm bolts and washers
- 12x 6-1.0mm x 25mm bolts, washers and nuts
Shop Parts in this Guide
Pre-Install Notes:
Ensuring you have all the tools when you begin can cut the installation time down to 30 minutes
Installation Instructions:
1. Check and ensure all hardware is accounted for.
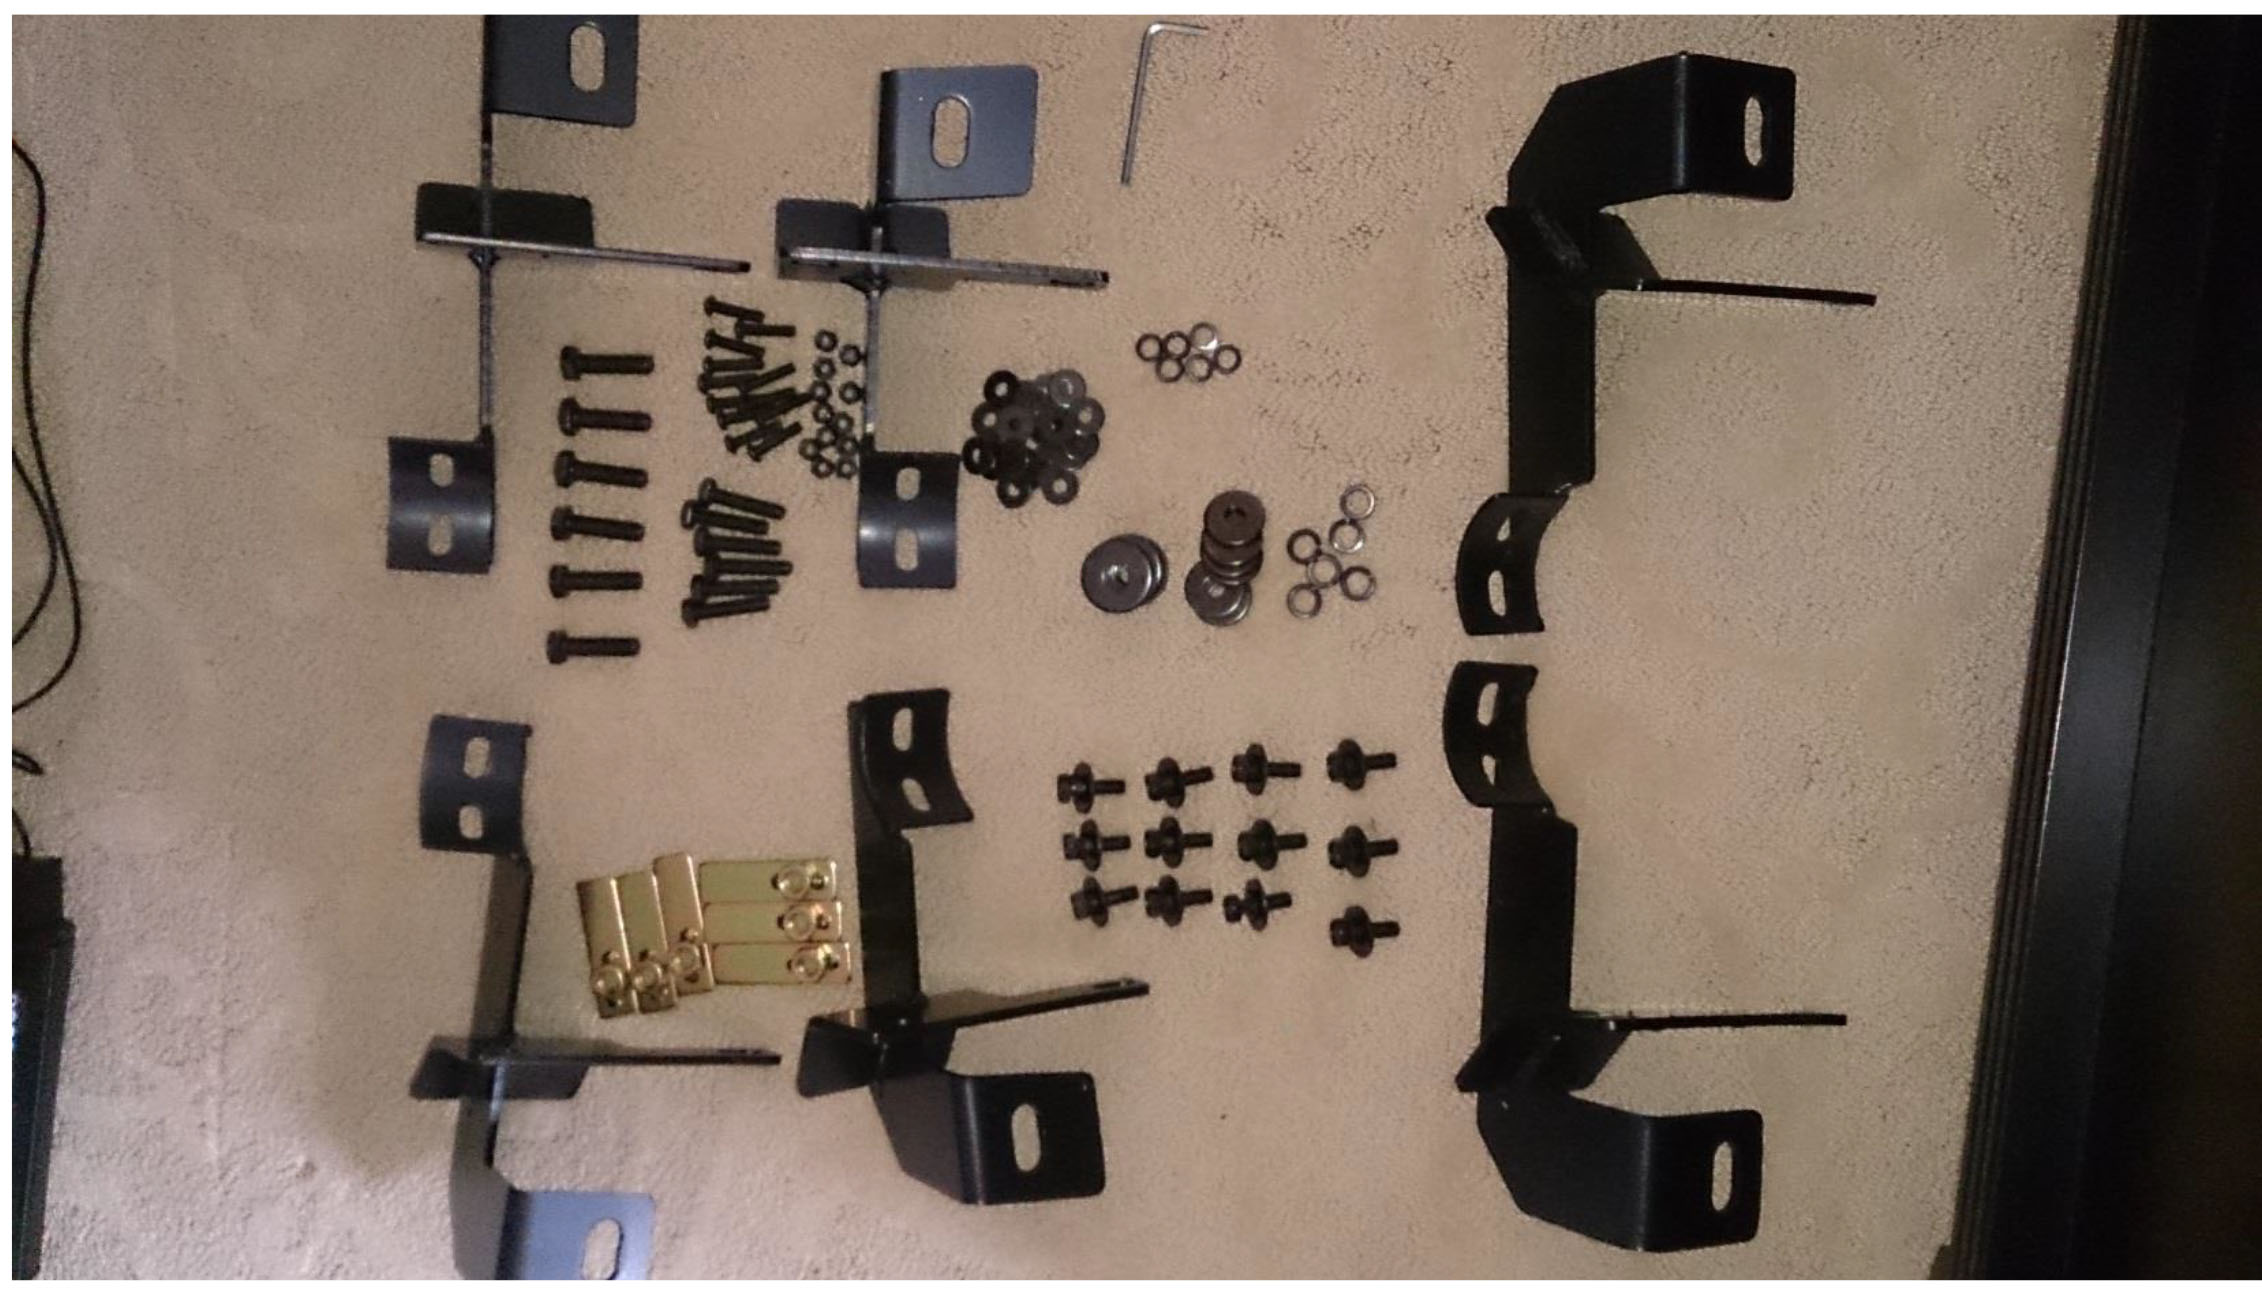
The kit includes all mounting hardware, 6 different mounting brackets and 2 Side Steps.
2. Identify the locations of the individual brackets. They are labeled with DF, DC, DR, PF, PC, PR, which represent Driver front, Driver Center, Driver Rear, Passenger Front, Passenger Center, and Passenger Rear.
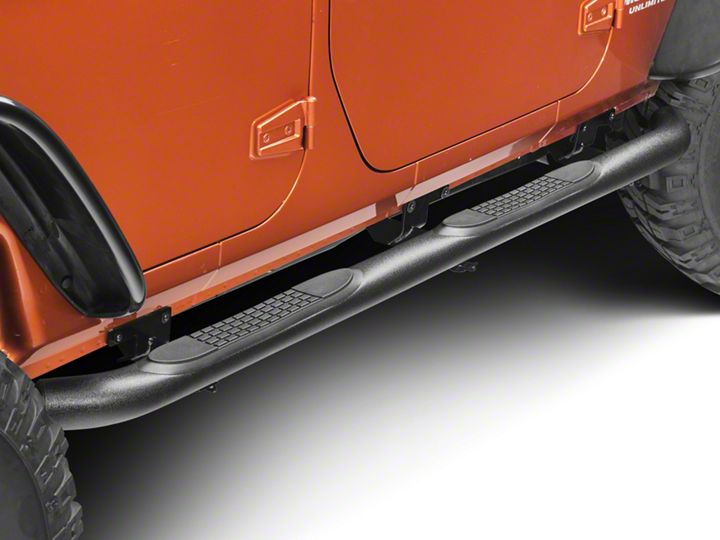
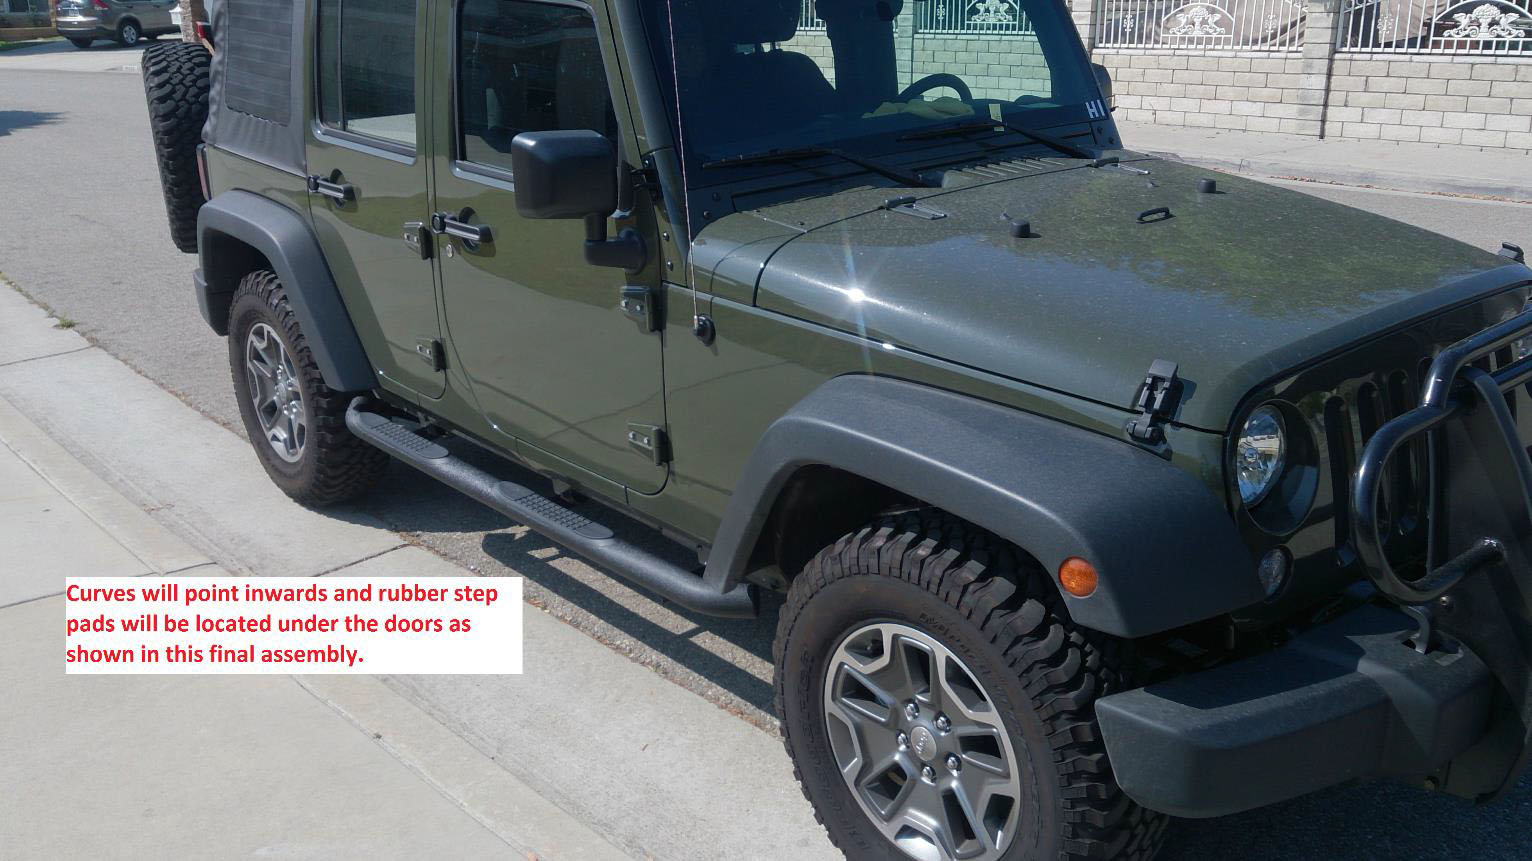
3. Identify the Driver and Passenger side steps. Use the curved ends and rubber step pads to determine the correct side.
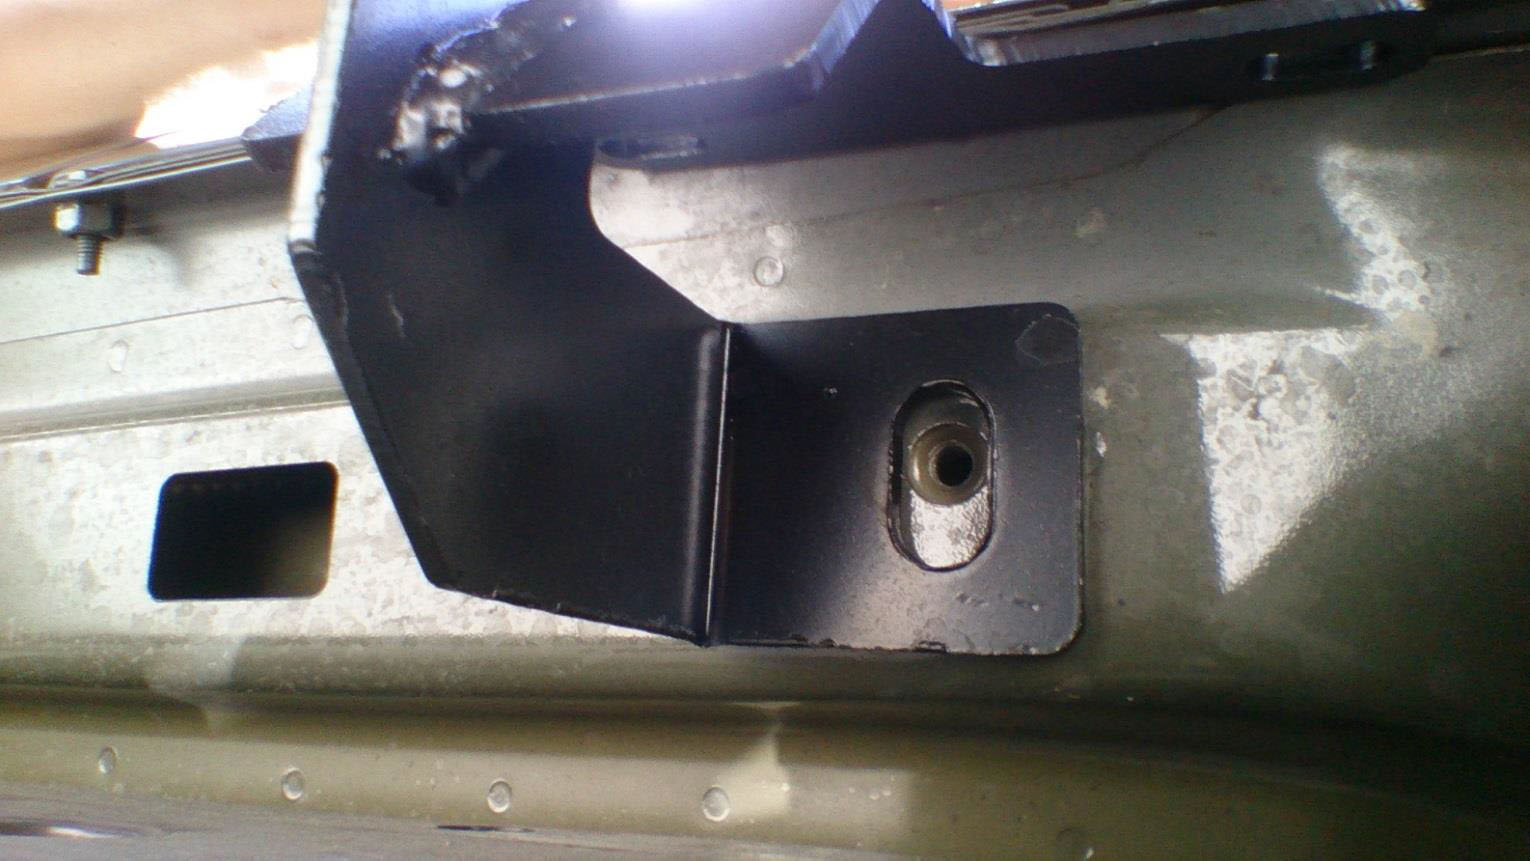
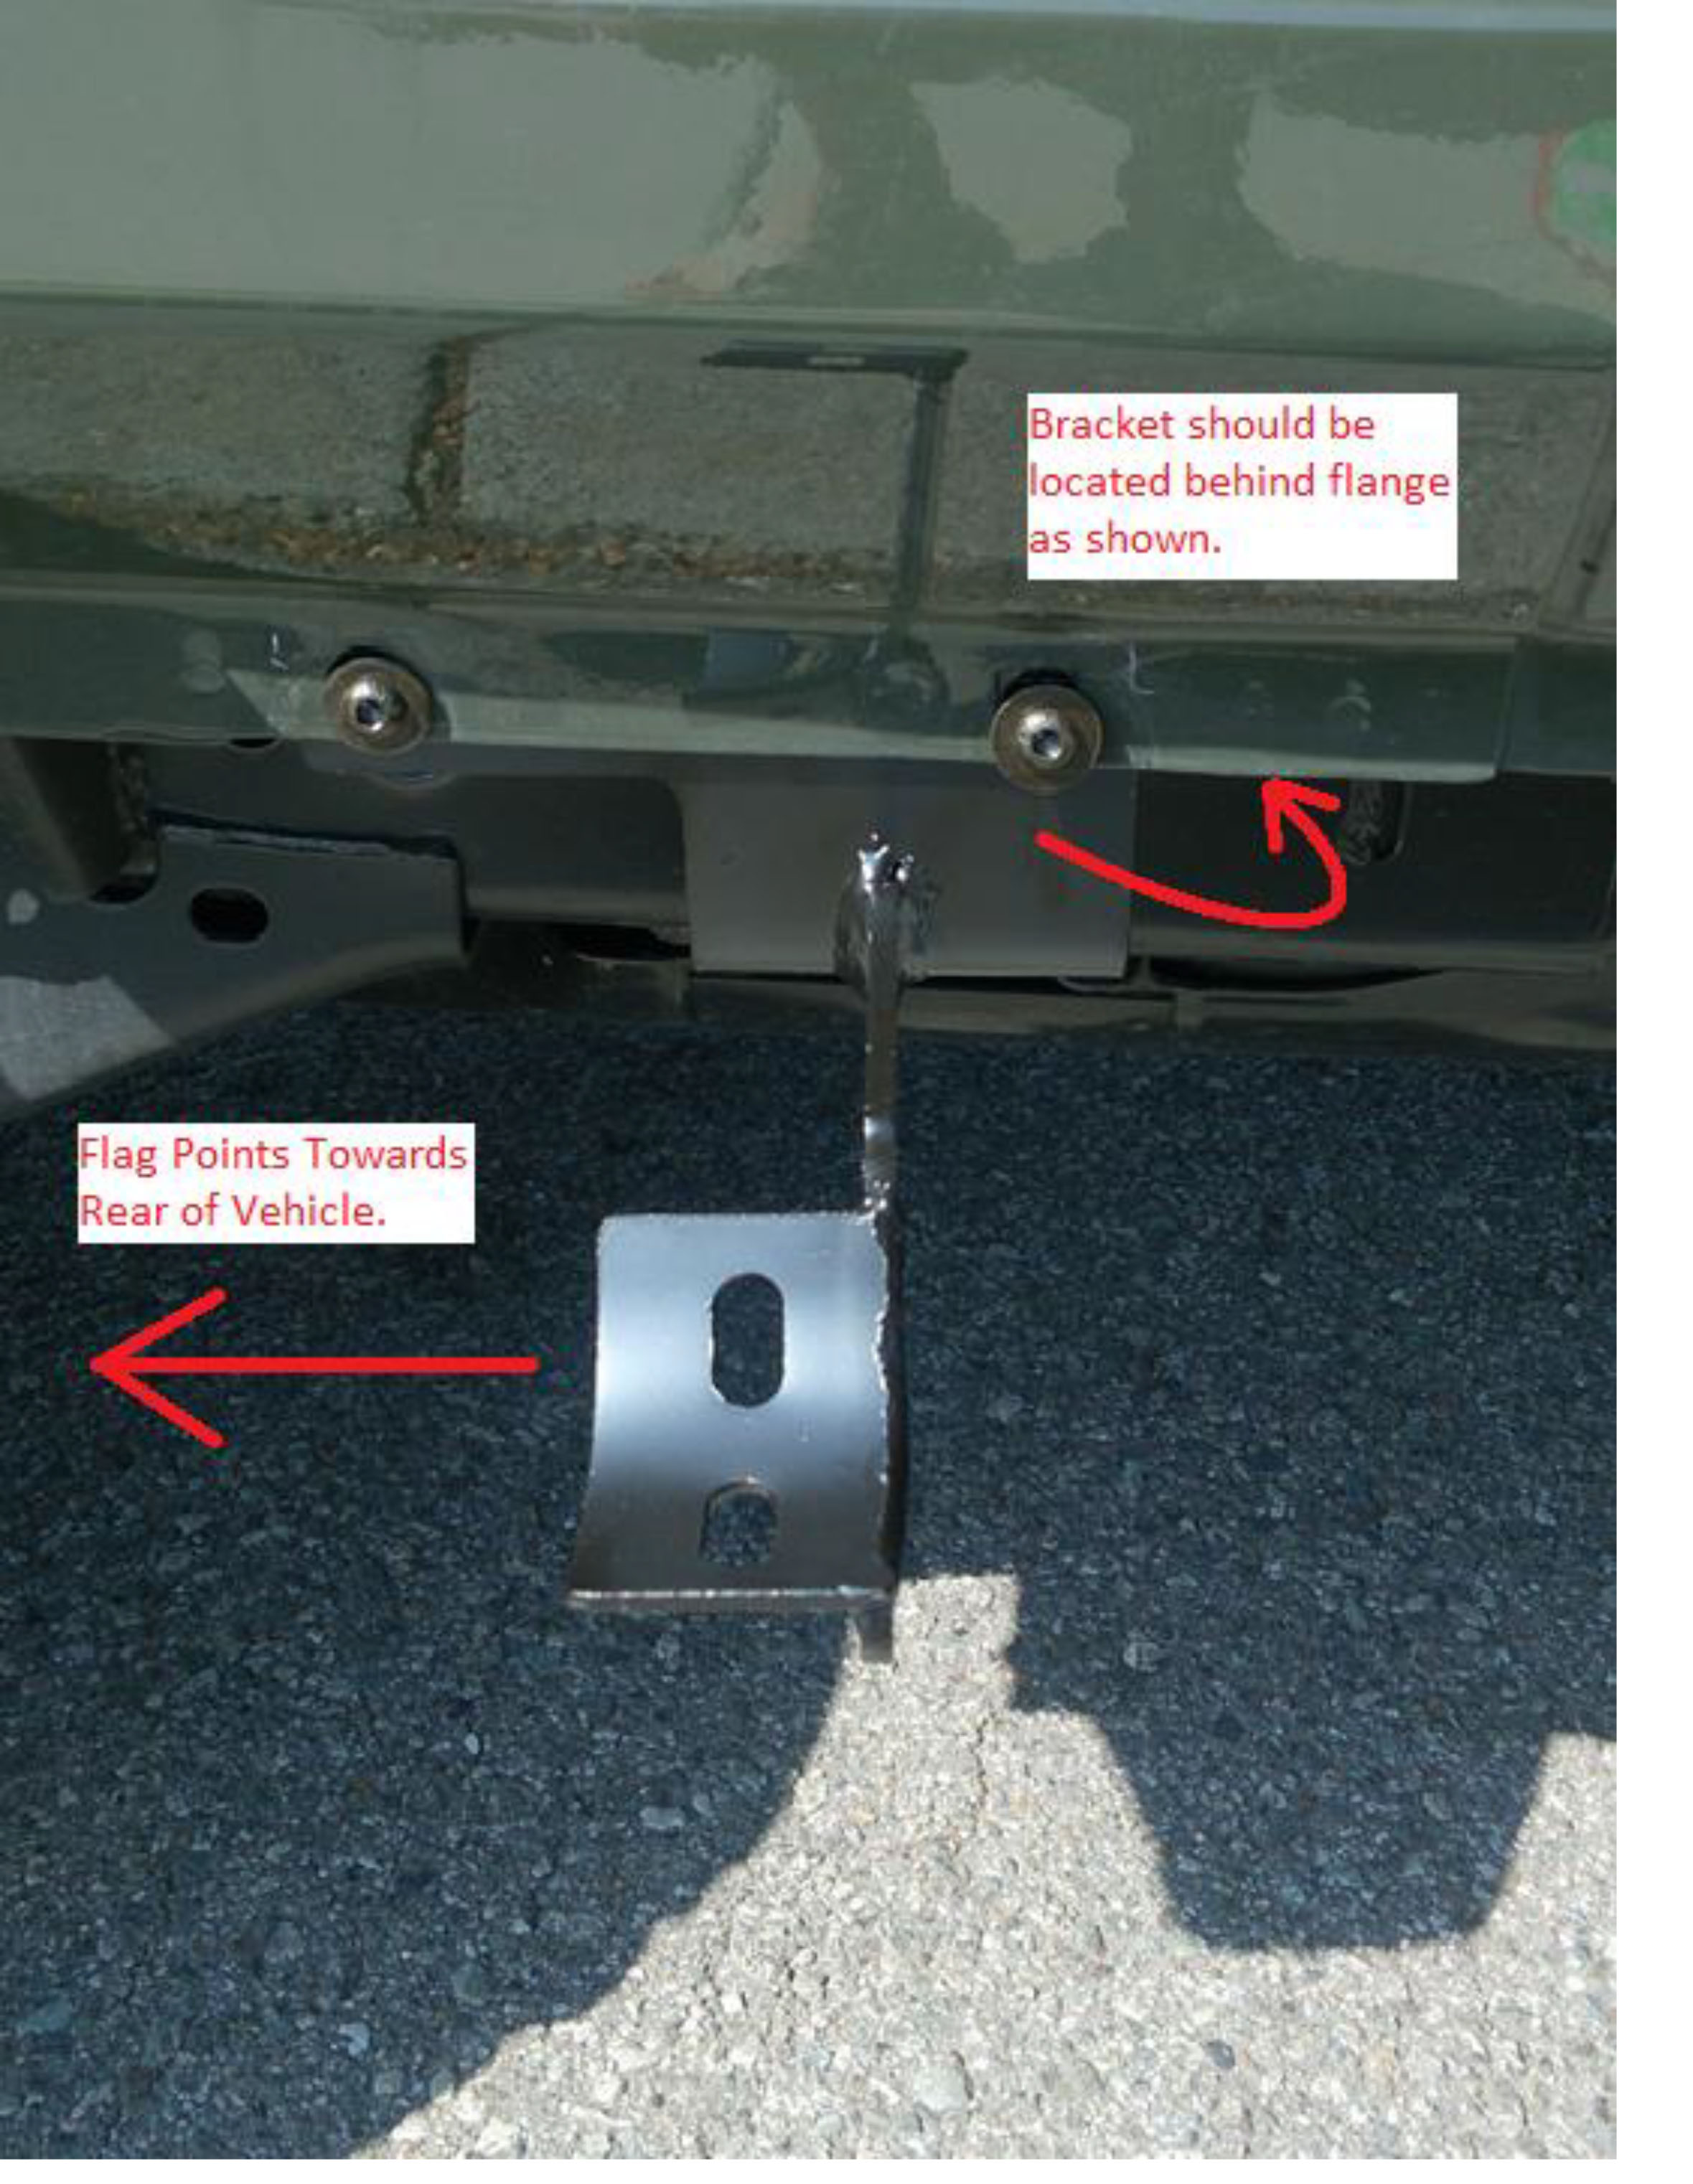
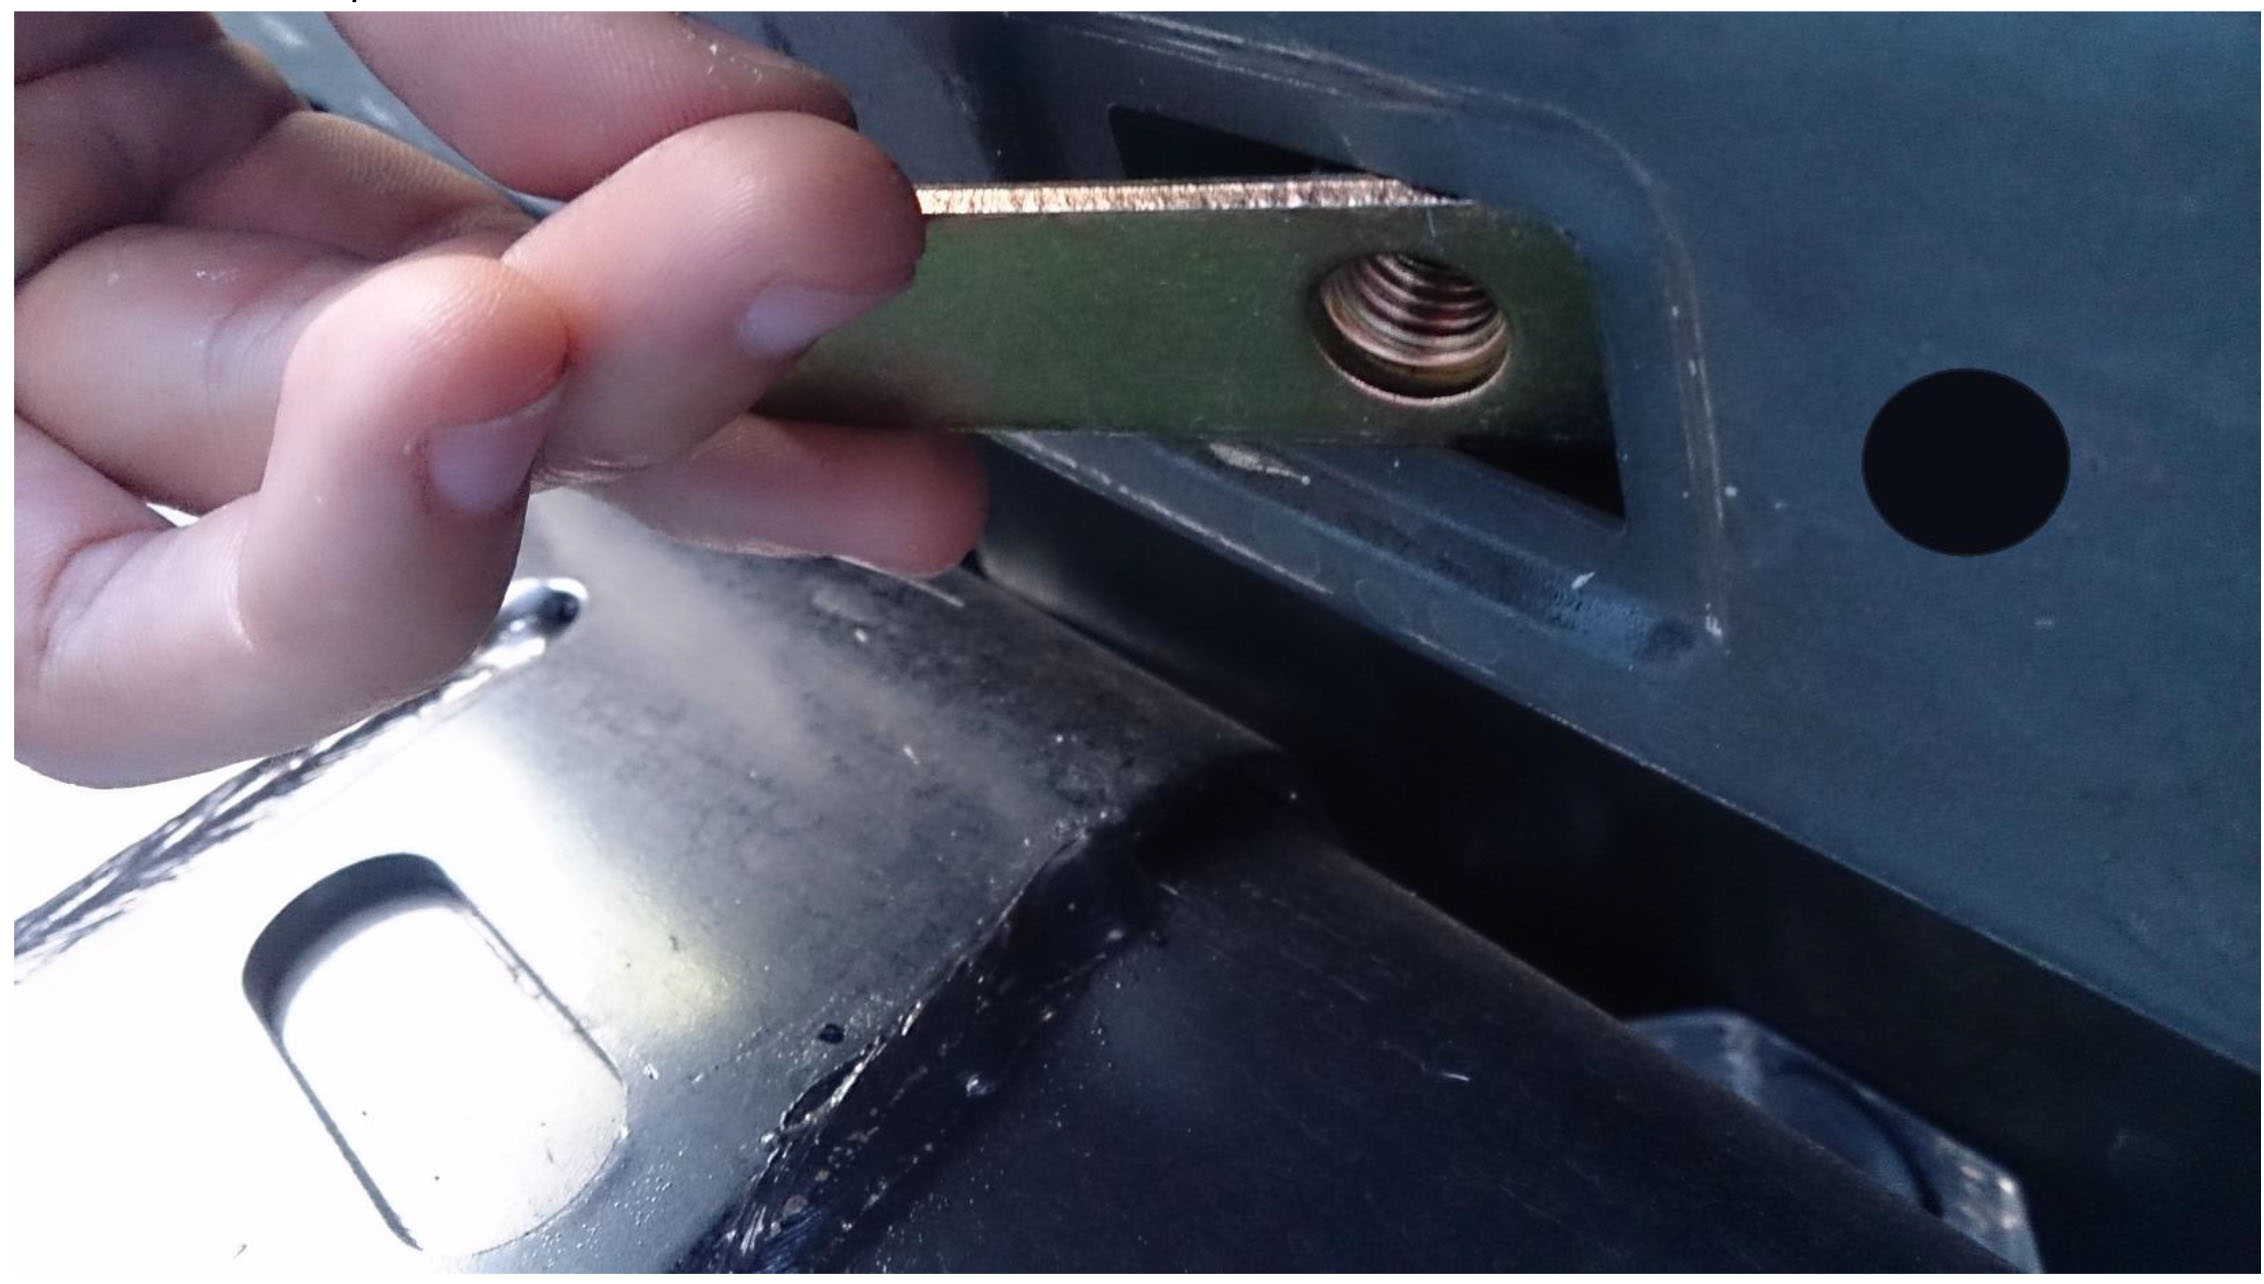
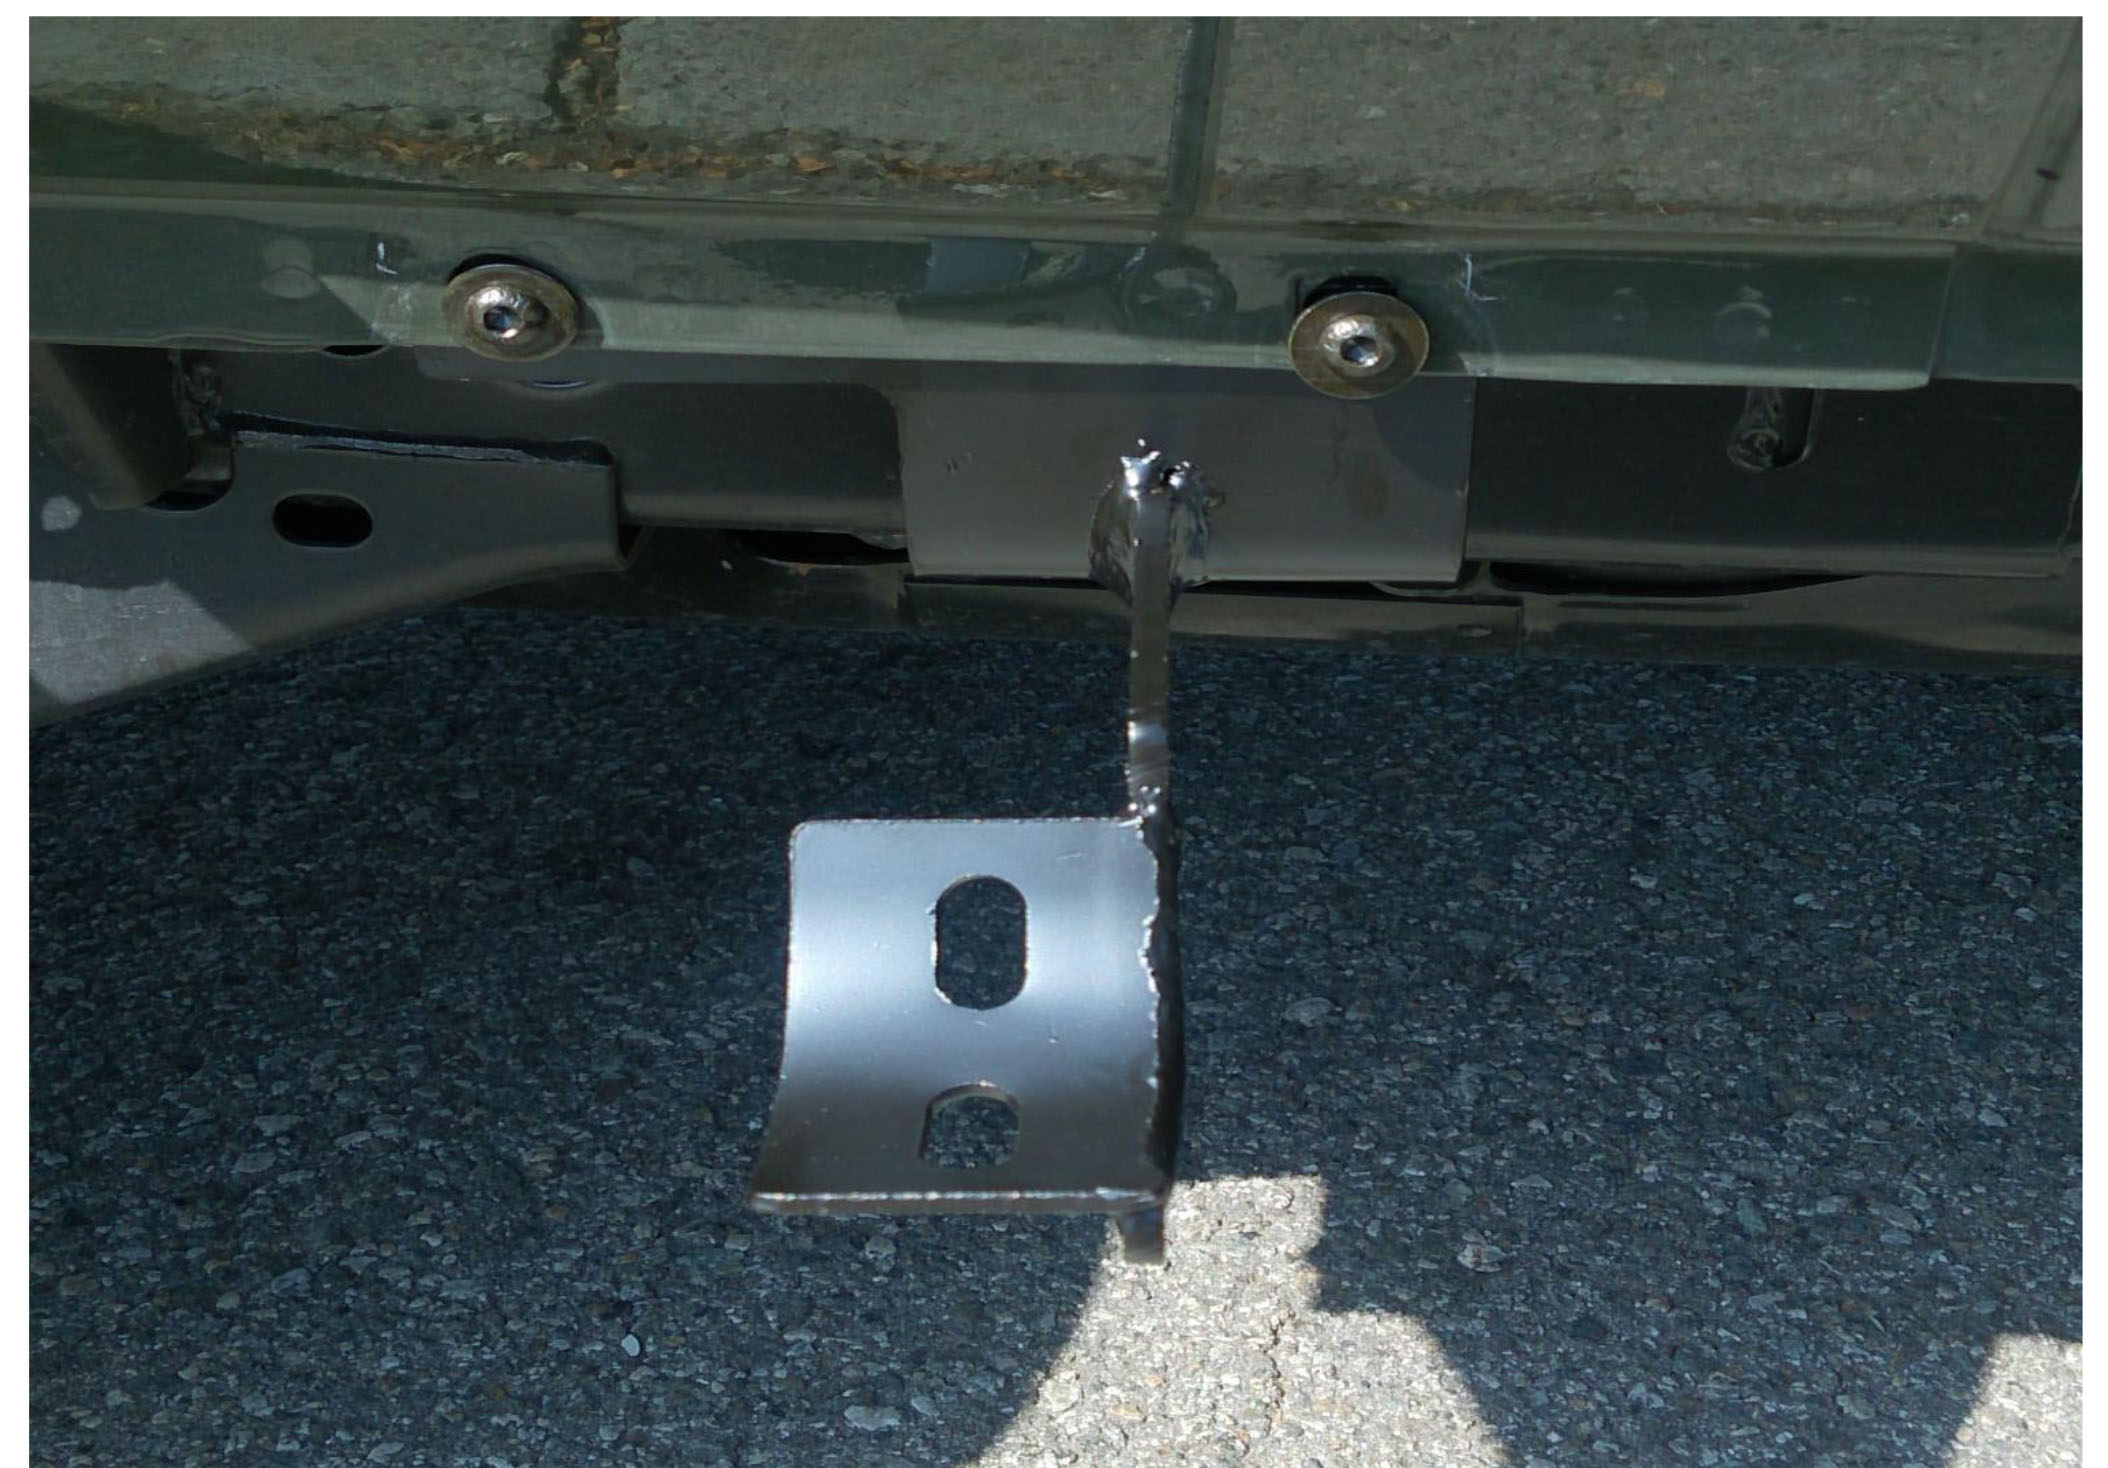
4. Locate the mounting brackets in their correct locations to the vehicle. There should be threaded inserts on the vehicle for lining up the brackets.
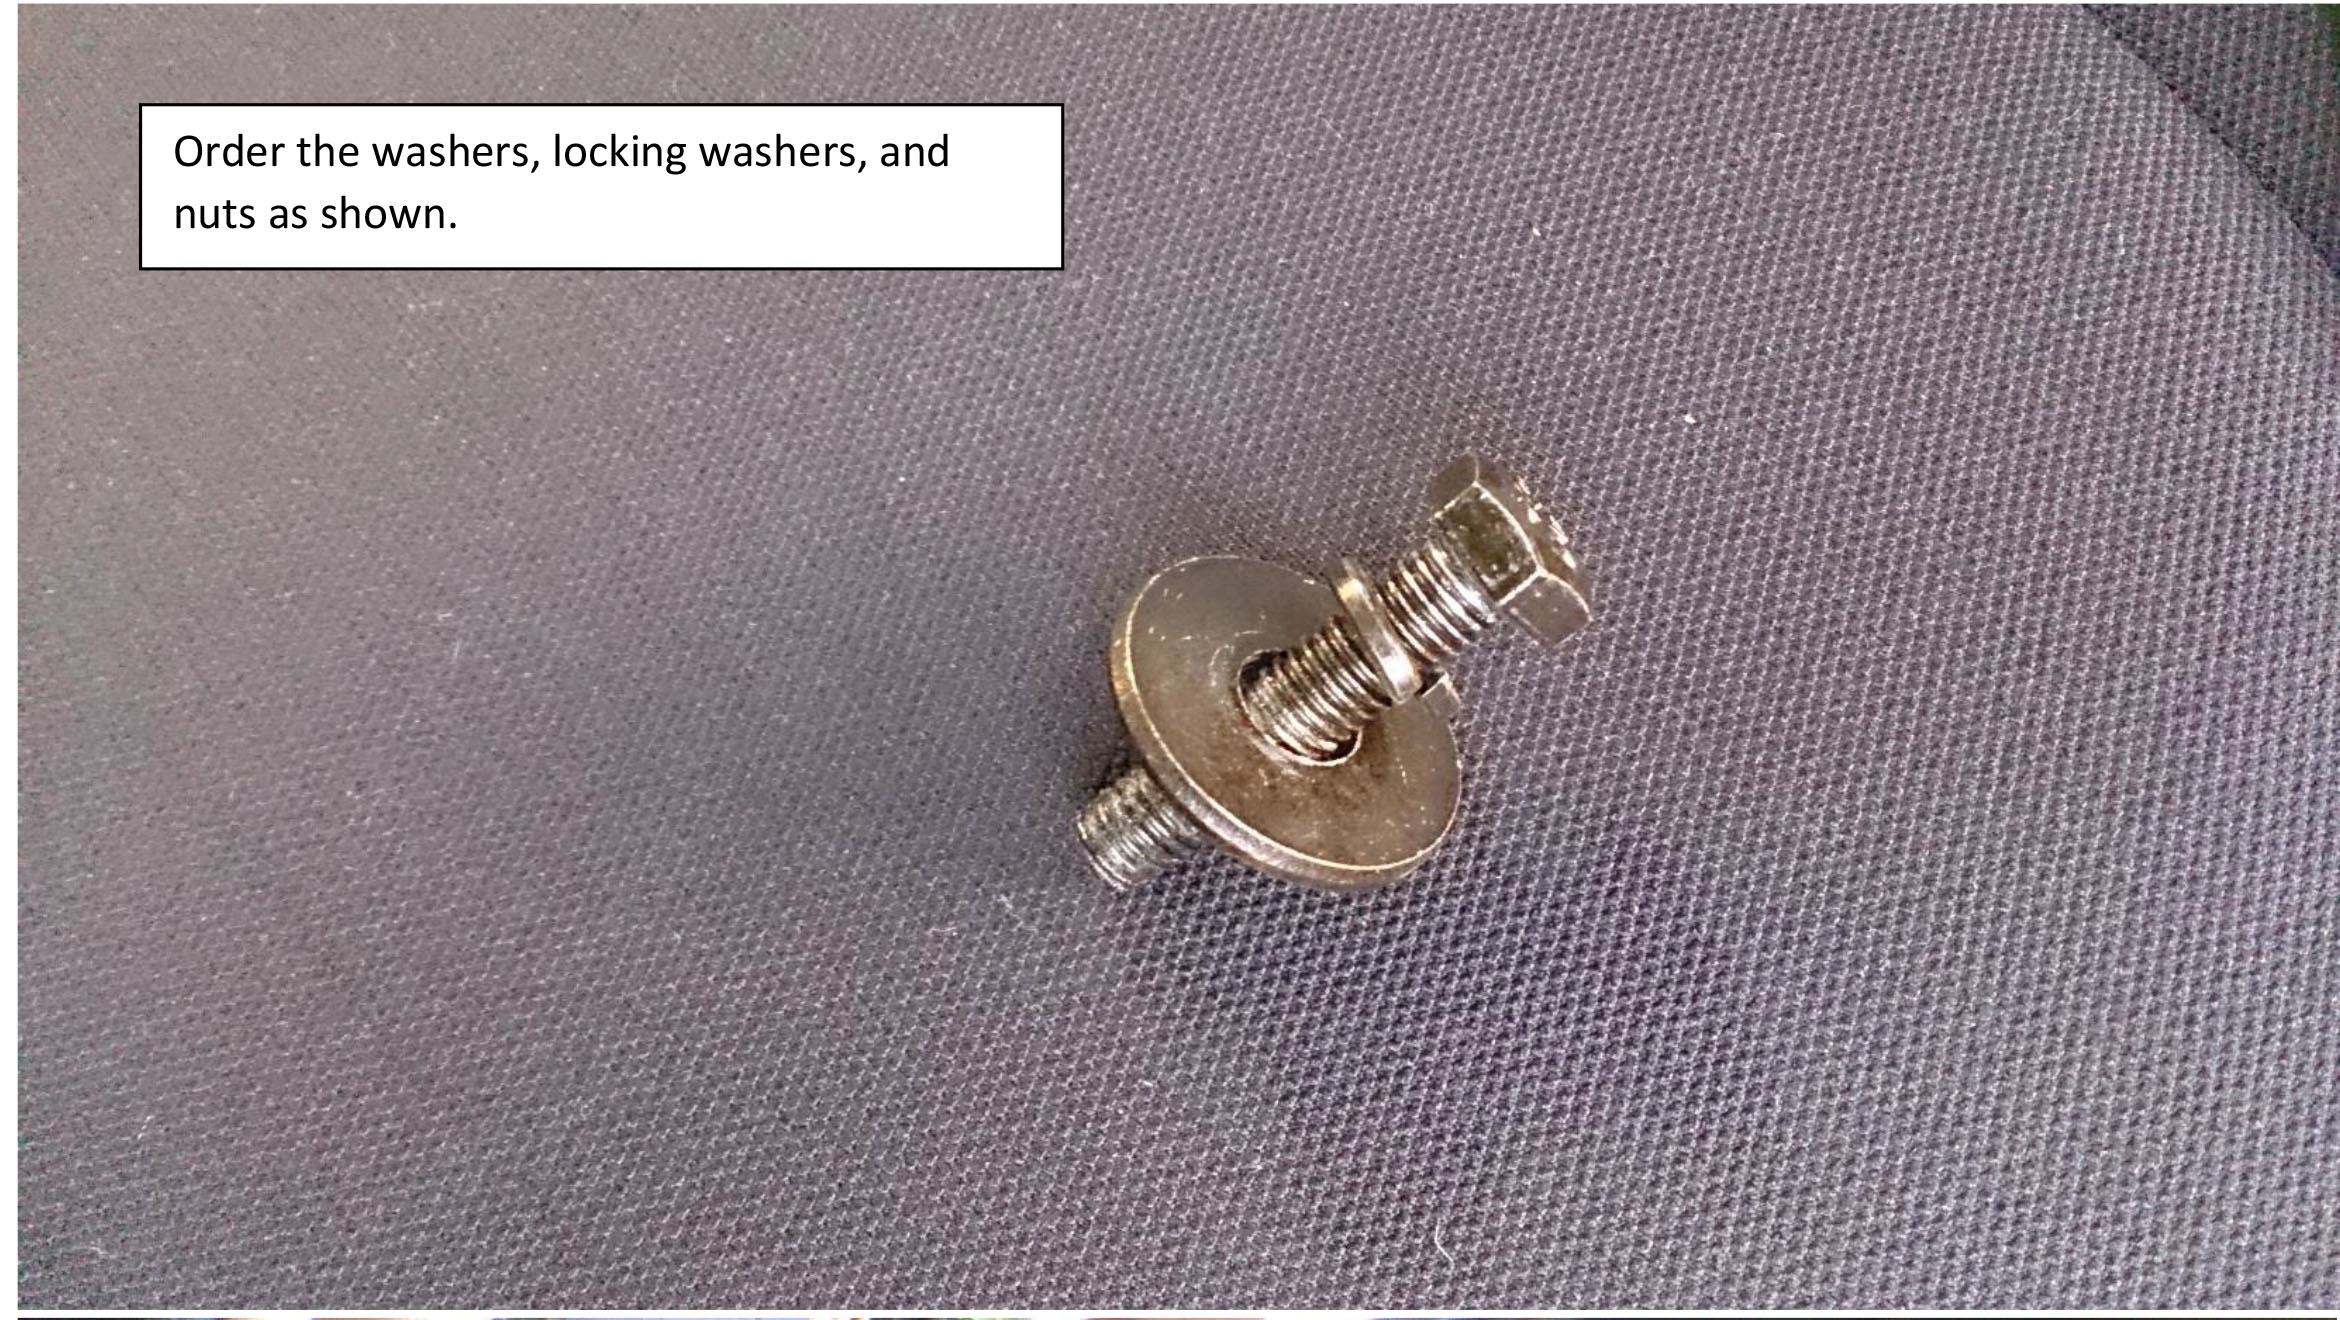
5. Use the 8-1.25 mm x 35mm nuts and washers to secure the brackets. Loosely secure the nuts using the 10mm socket with a wrench.
6. In case there are no threaded inserts on the bottom of your vehicle, there should be an opening that will allow for the use of nut plates. Use these to secure the brackets with the 10-1.5mm nuts and 13mm socket wrench.
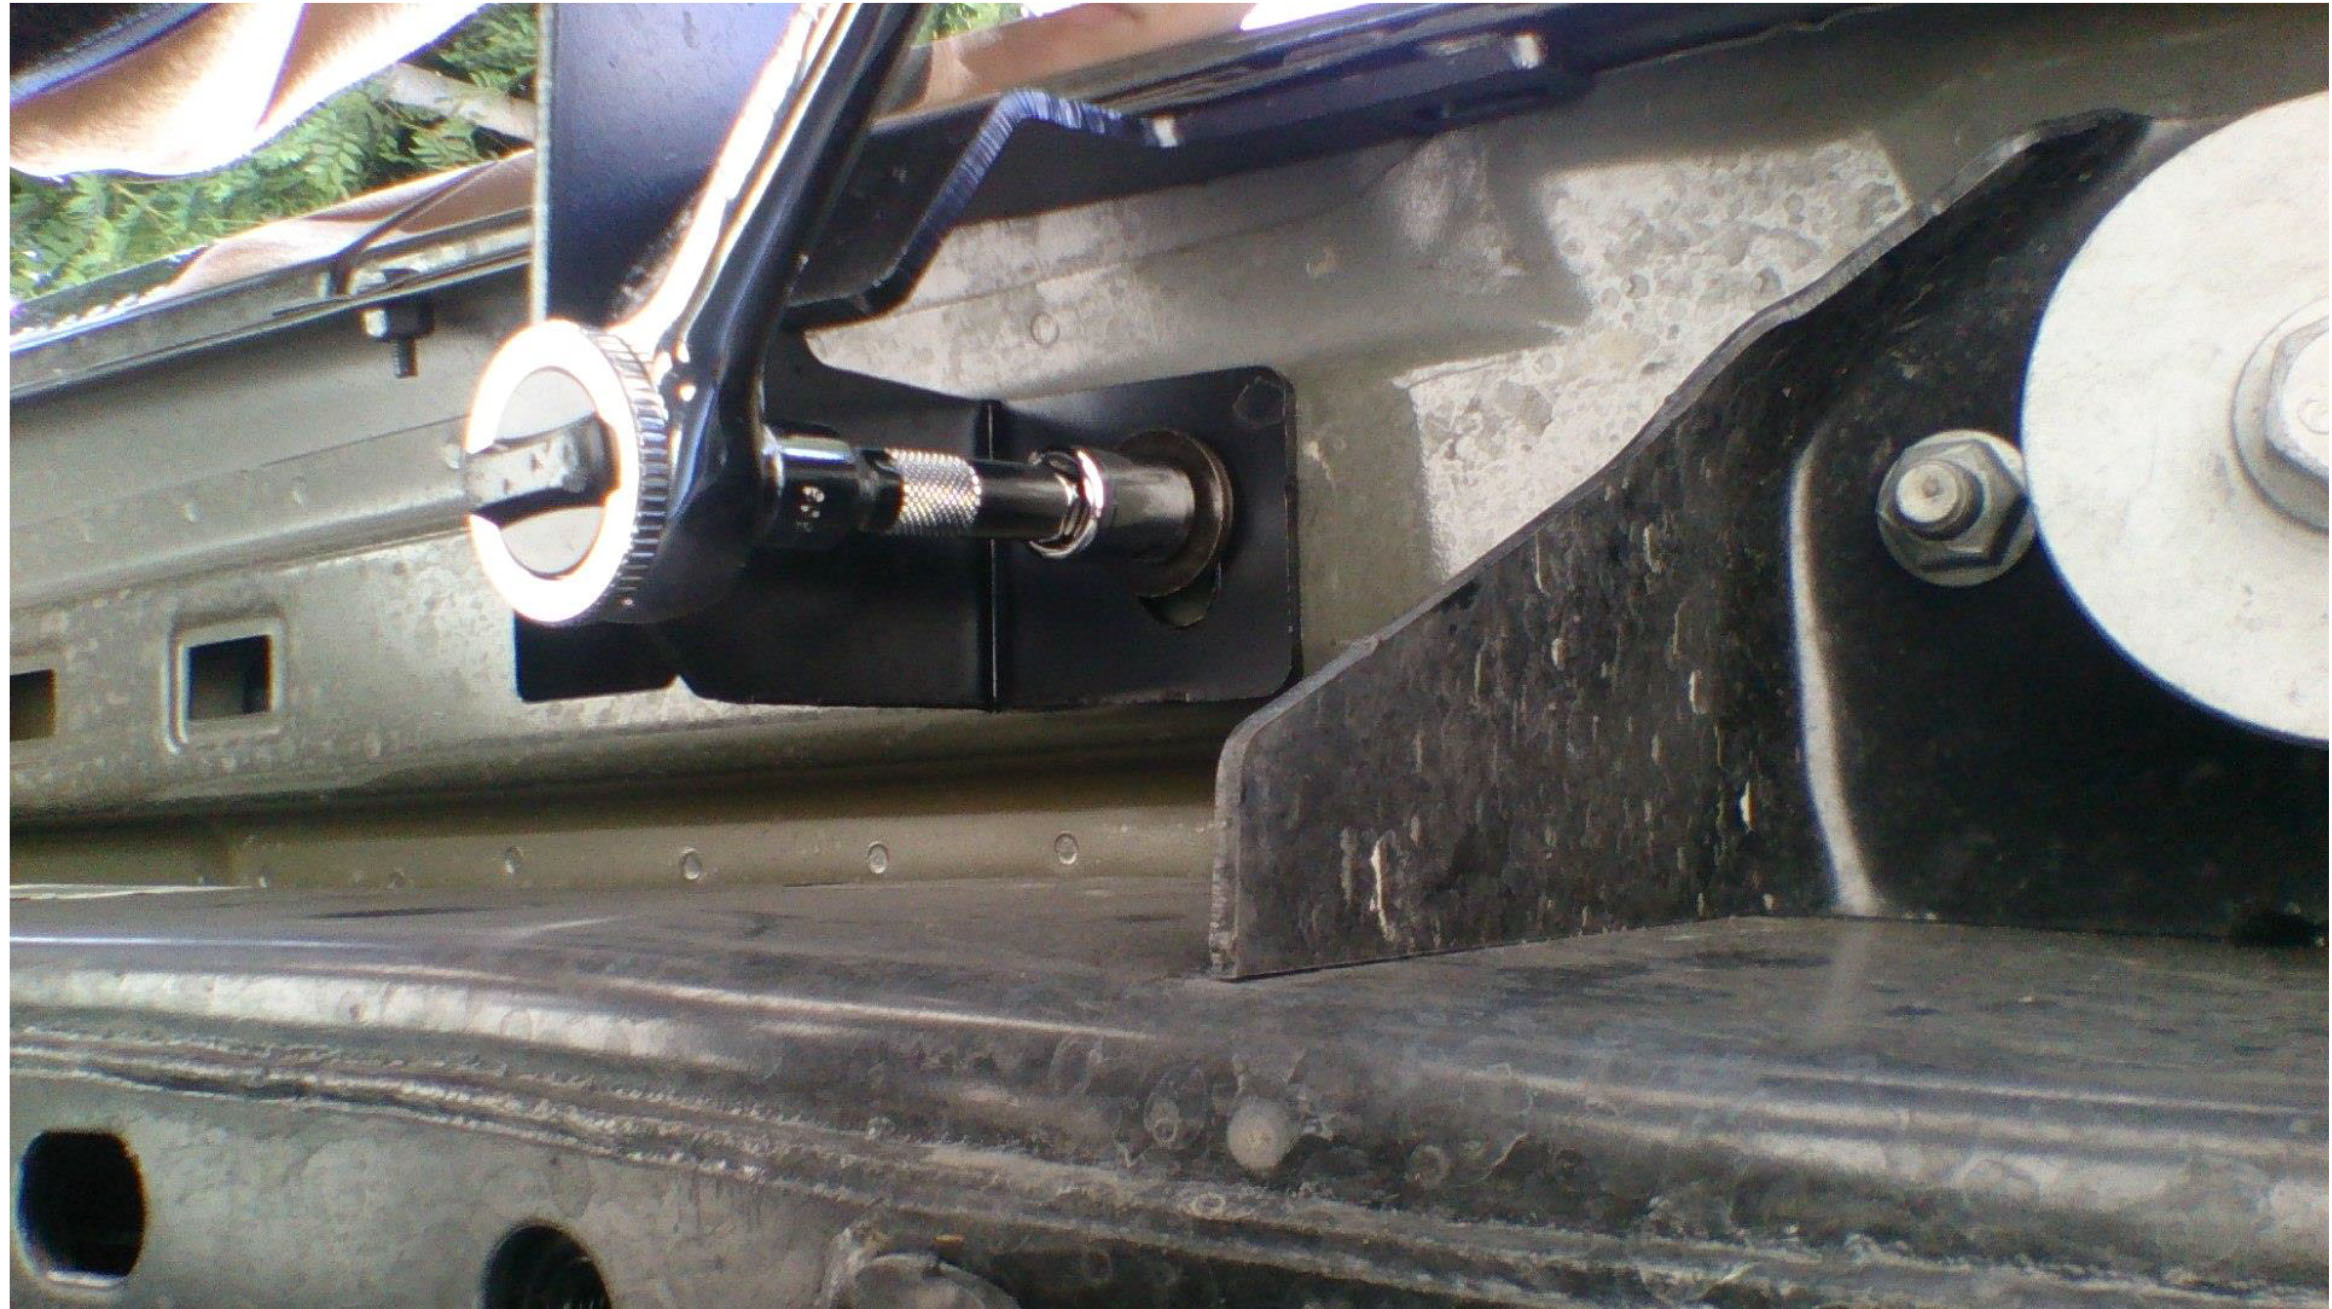
7. Secure the brackets to the flanges using the 6-1.0mm x 25mm bolts, washers and nuts. Use a 10mm Socket wrench with a 4mm Allen wrench to secure.
8. Position the Side Steps over the brackets.
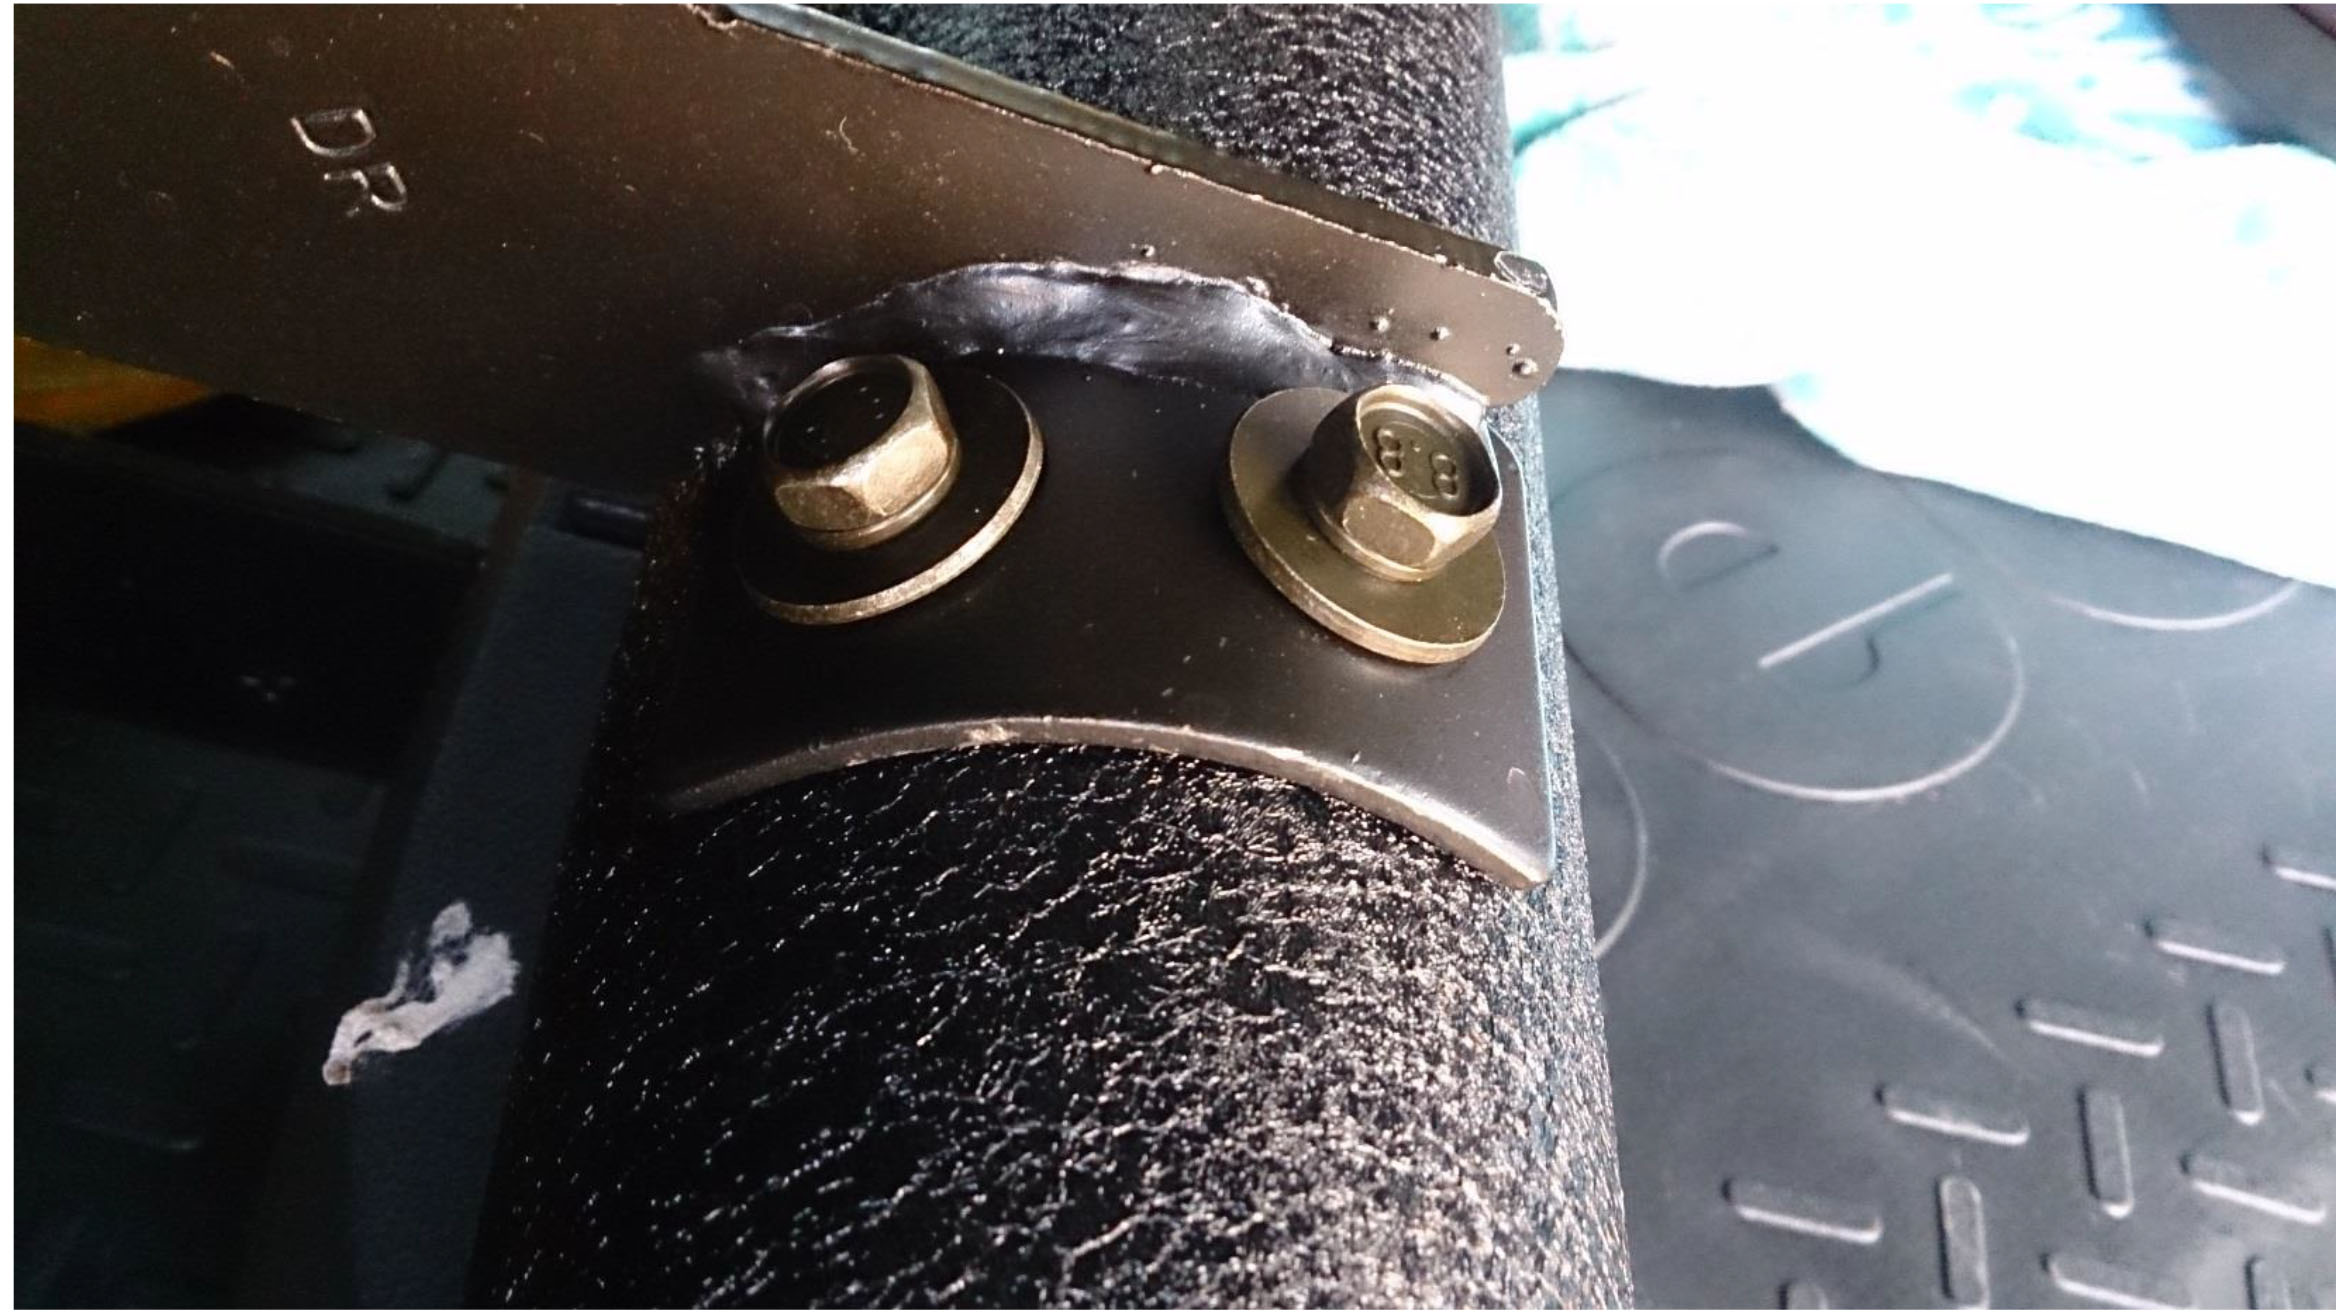
9. Use the remaining 8-1.25mm x 25mm bolts and washers to secure the side steps to the brackets. Use a 10mm Socket wrench to secure.
10. Revisit all bolts and nuts to tighten.
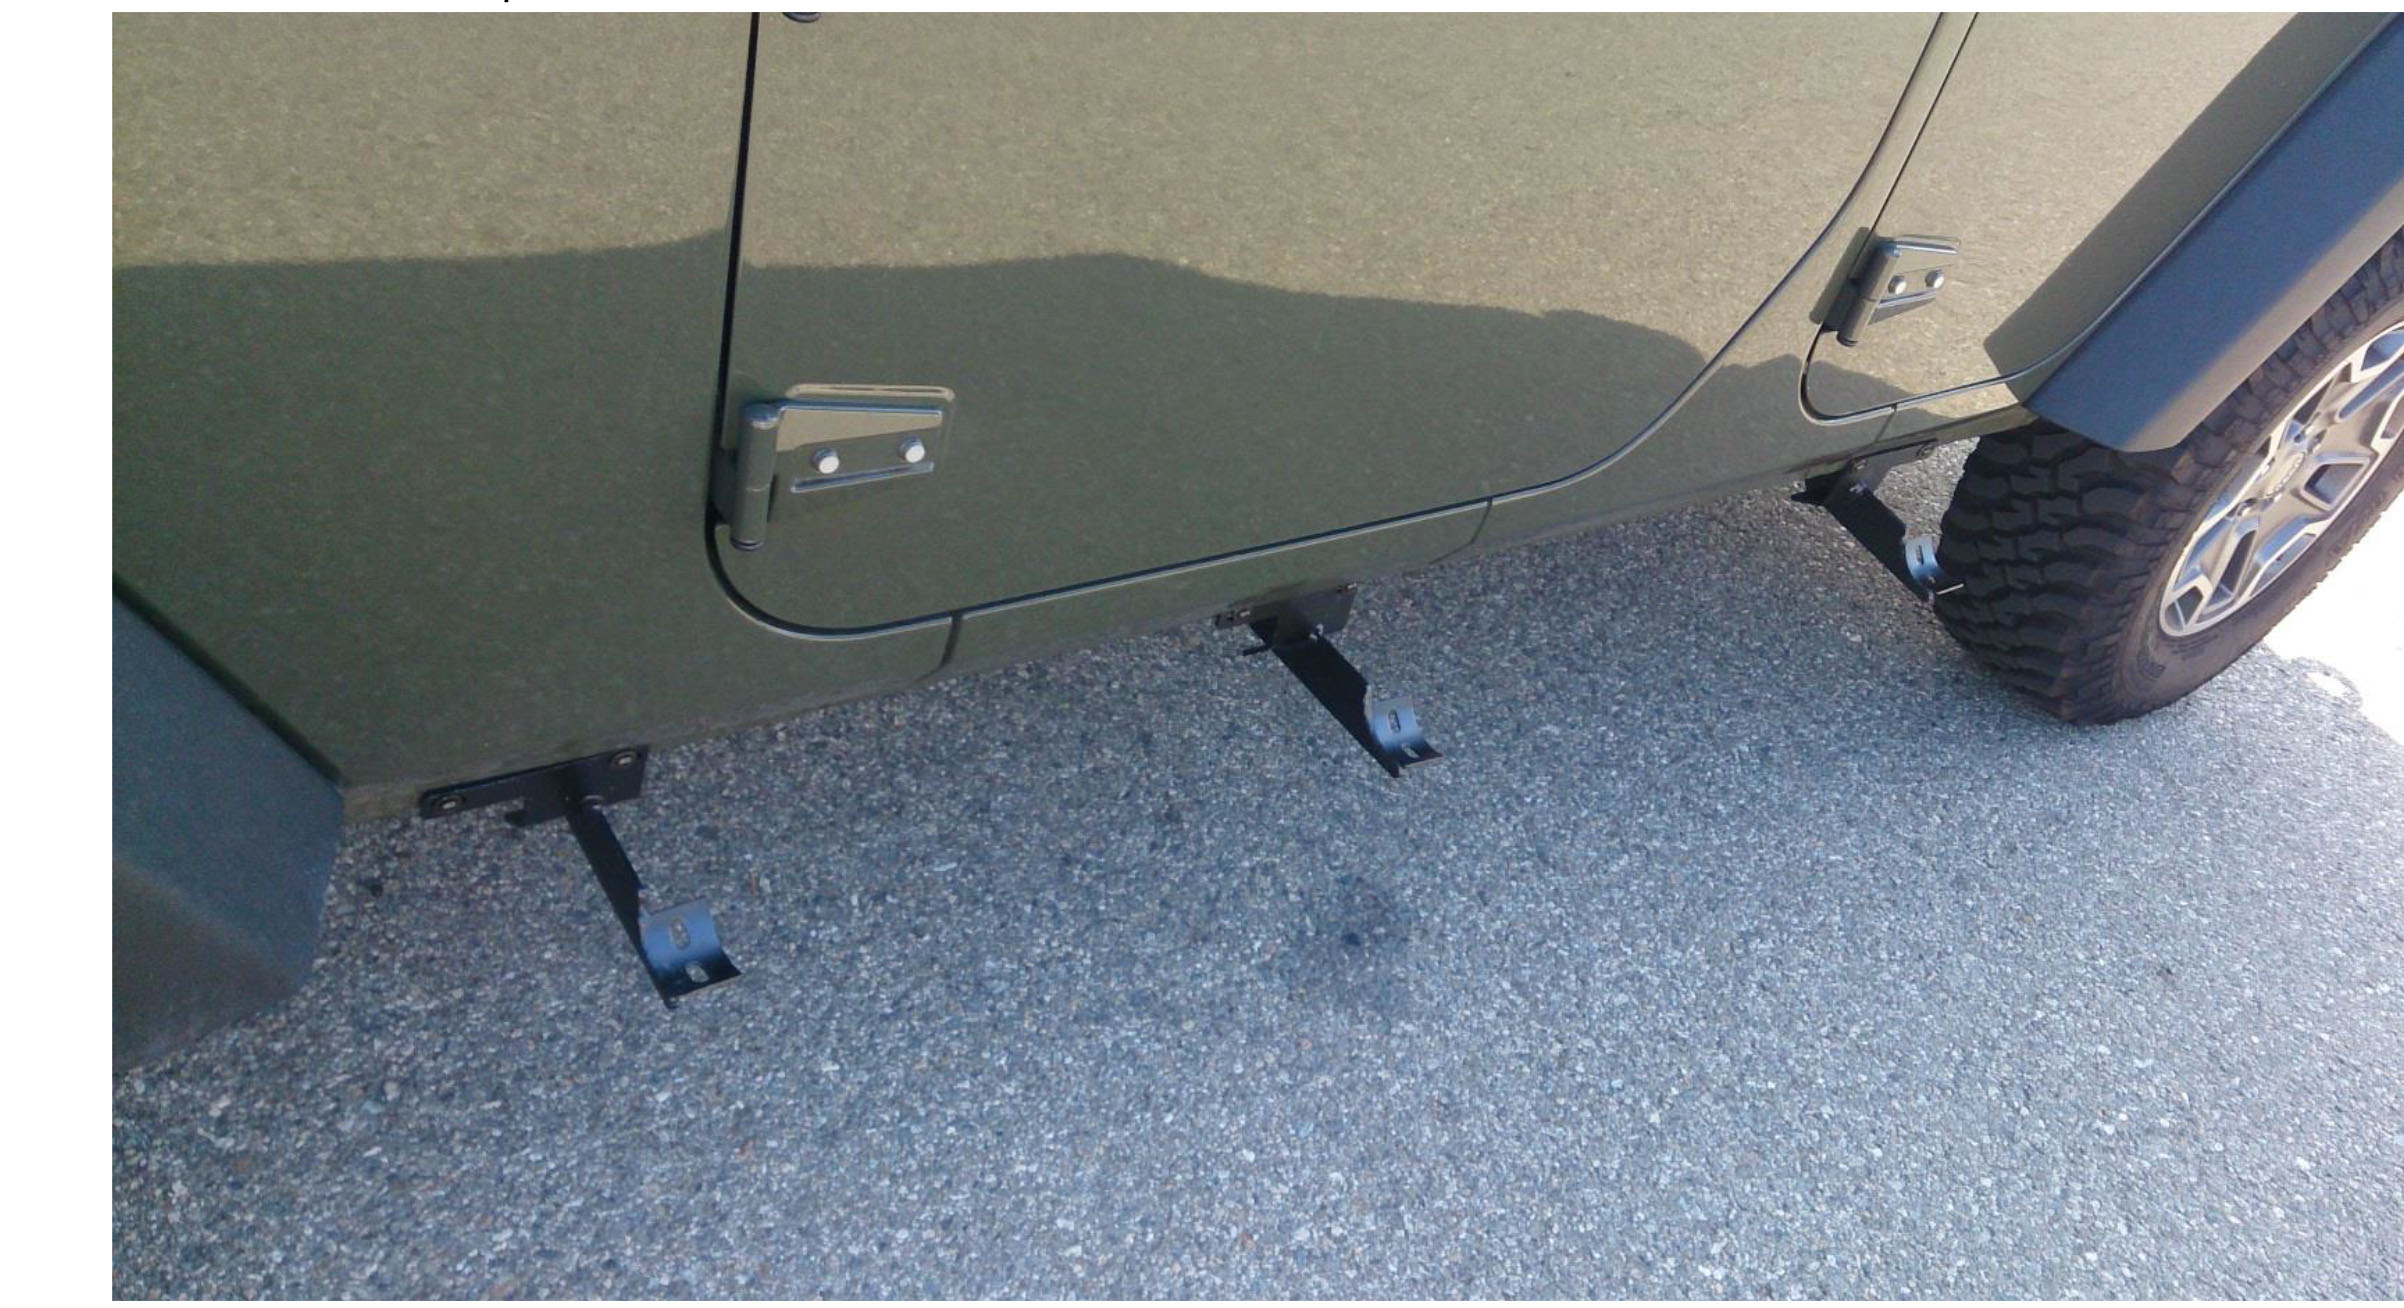
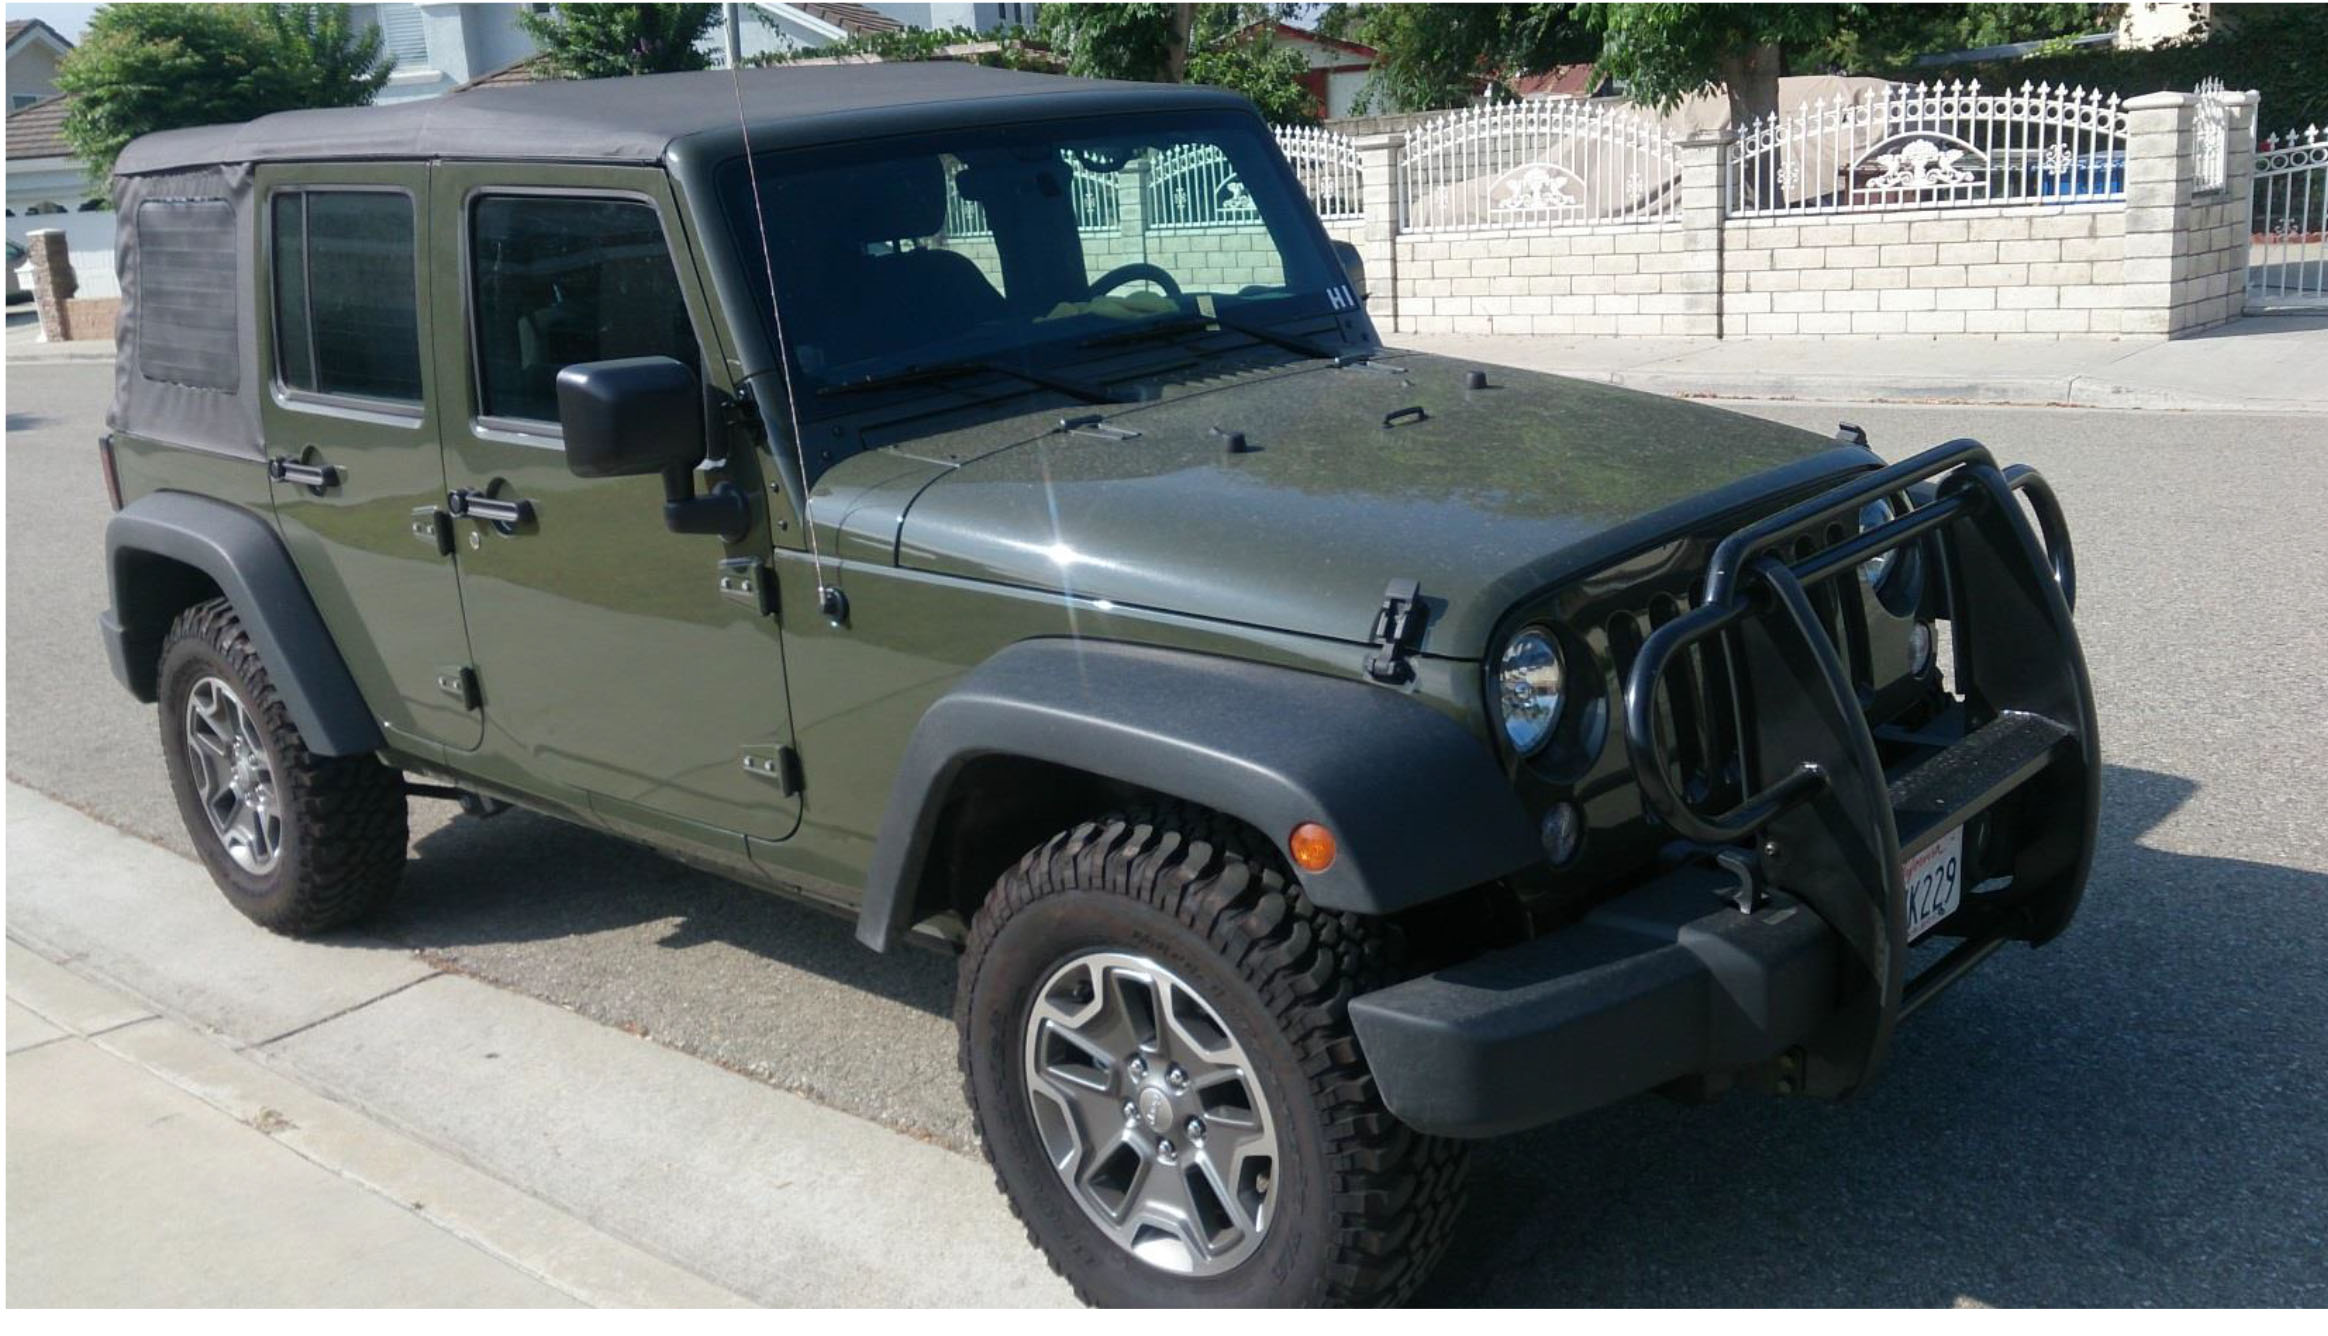
Before:
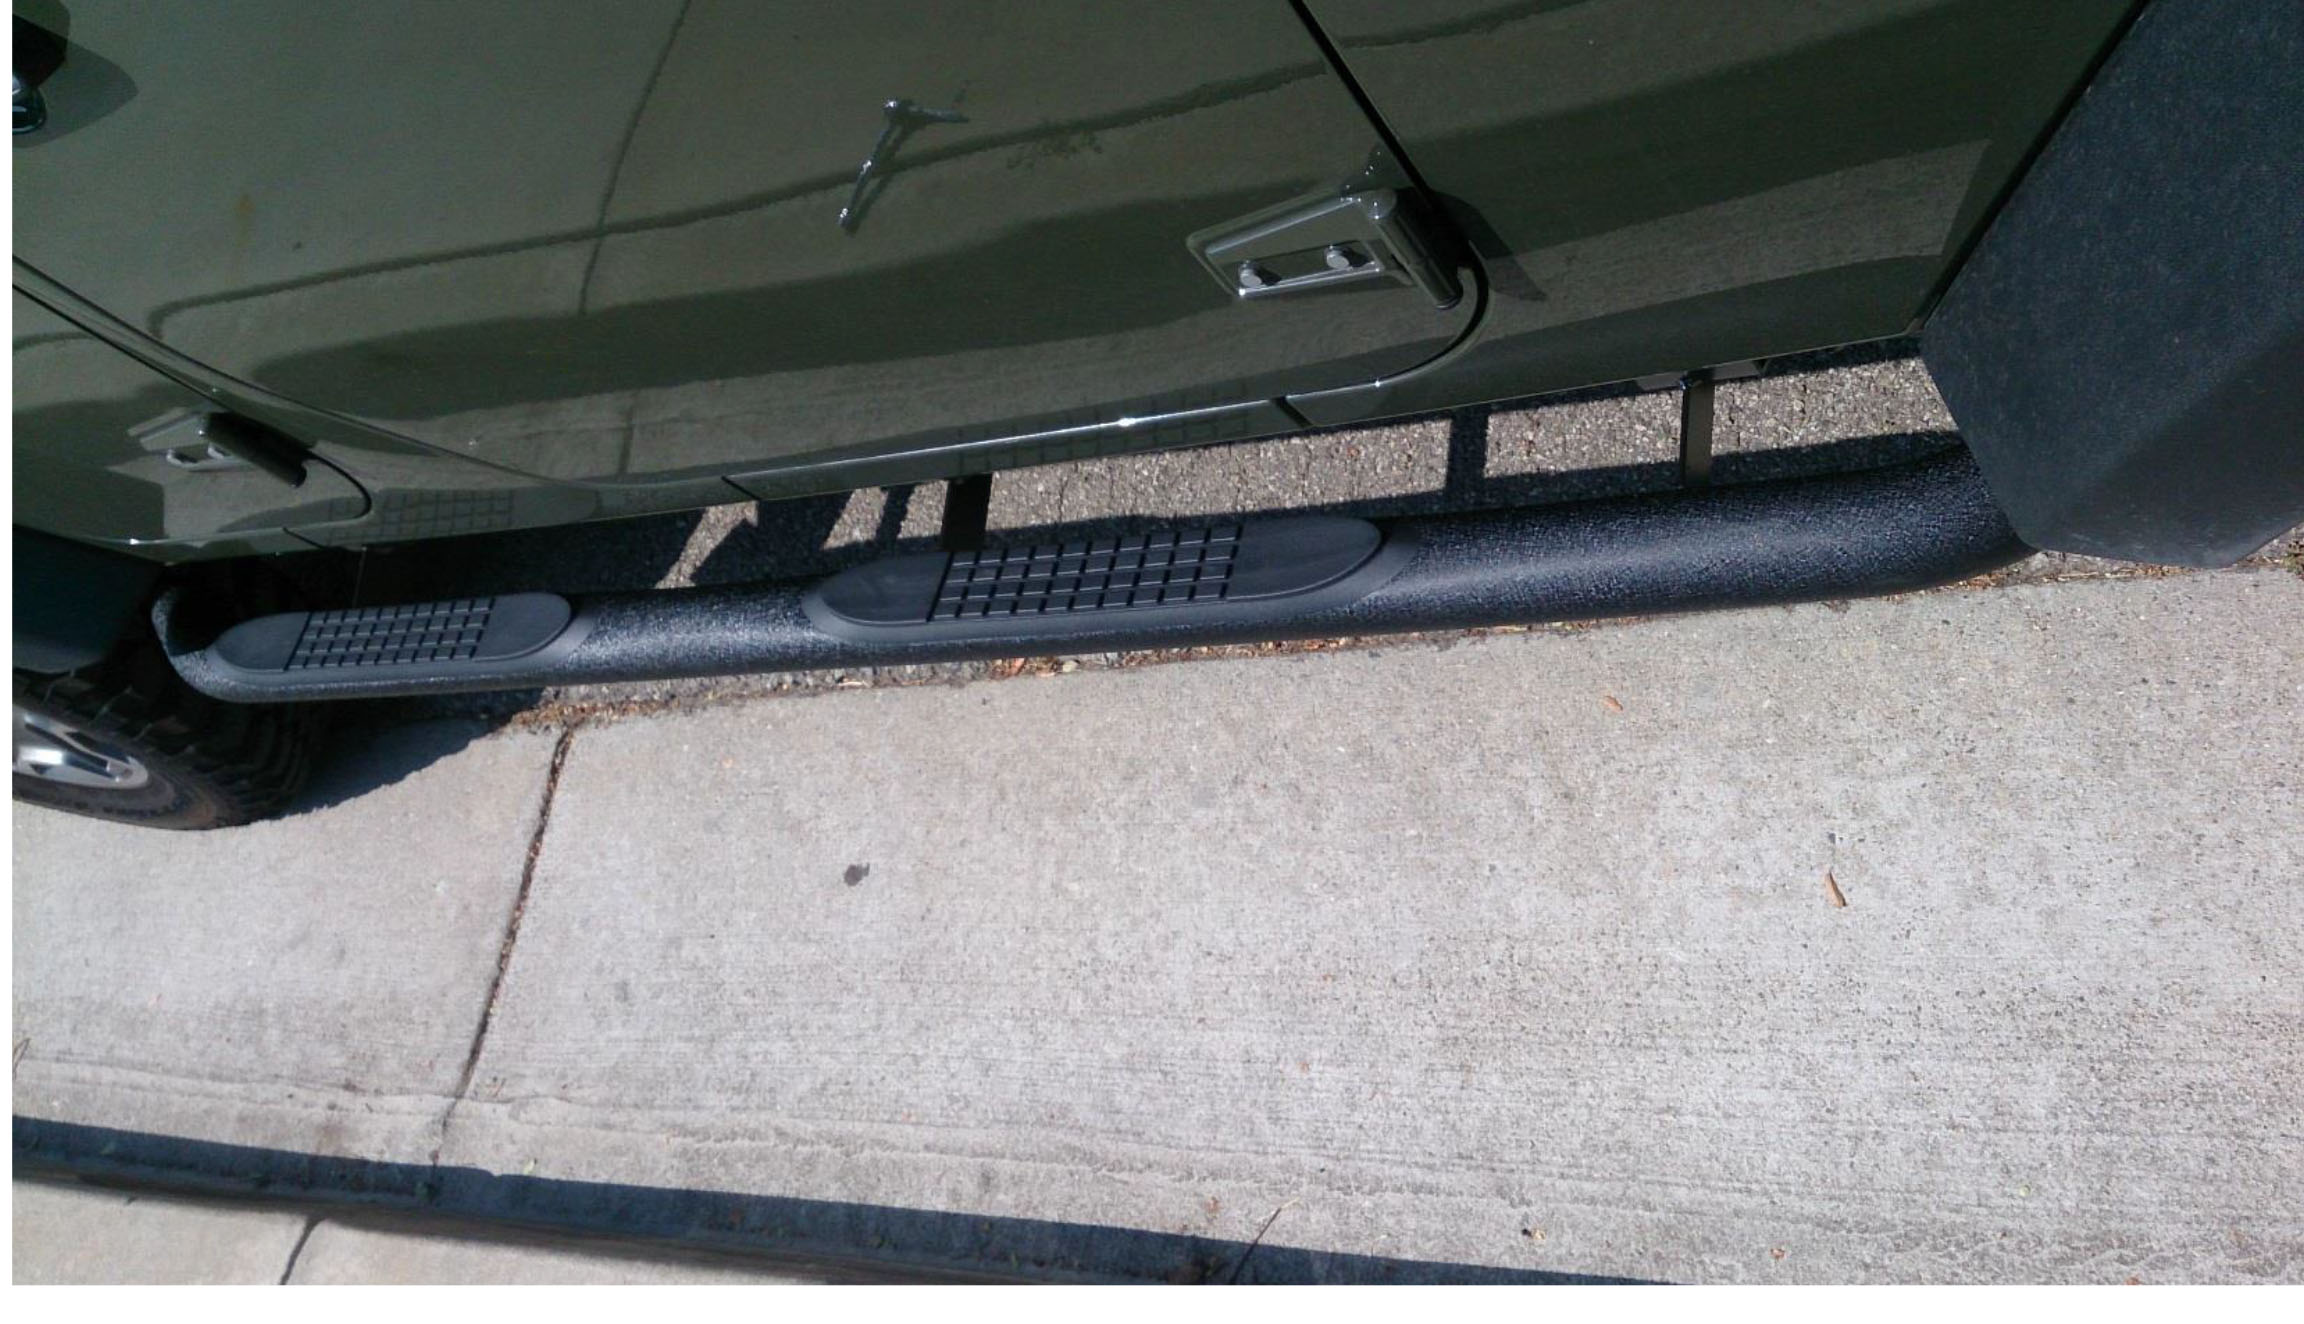
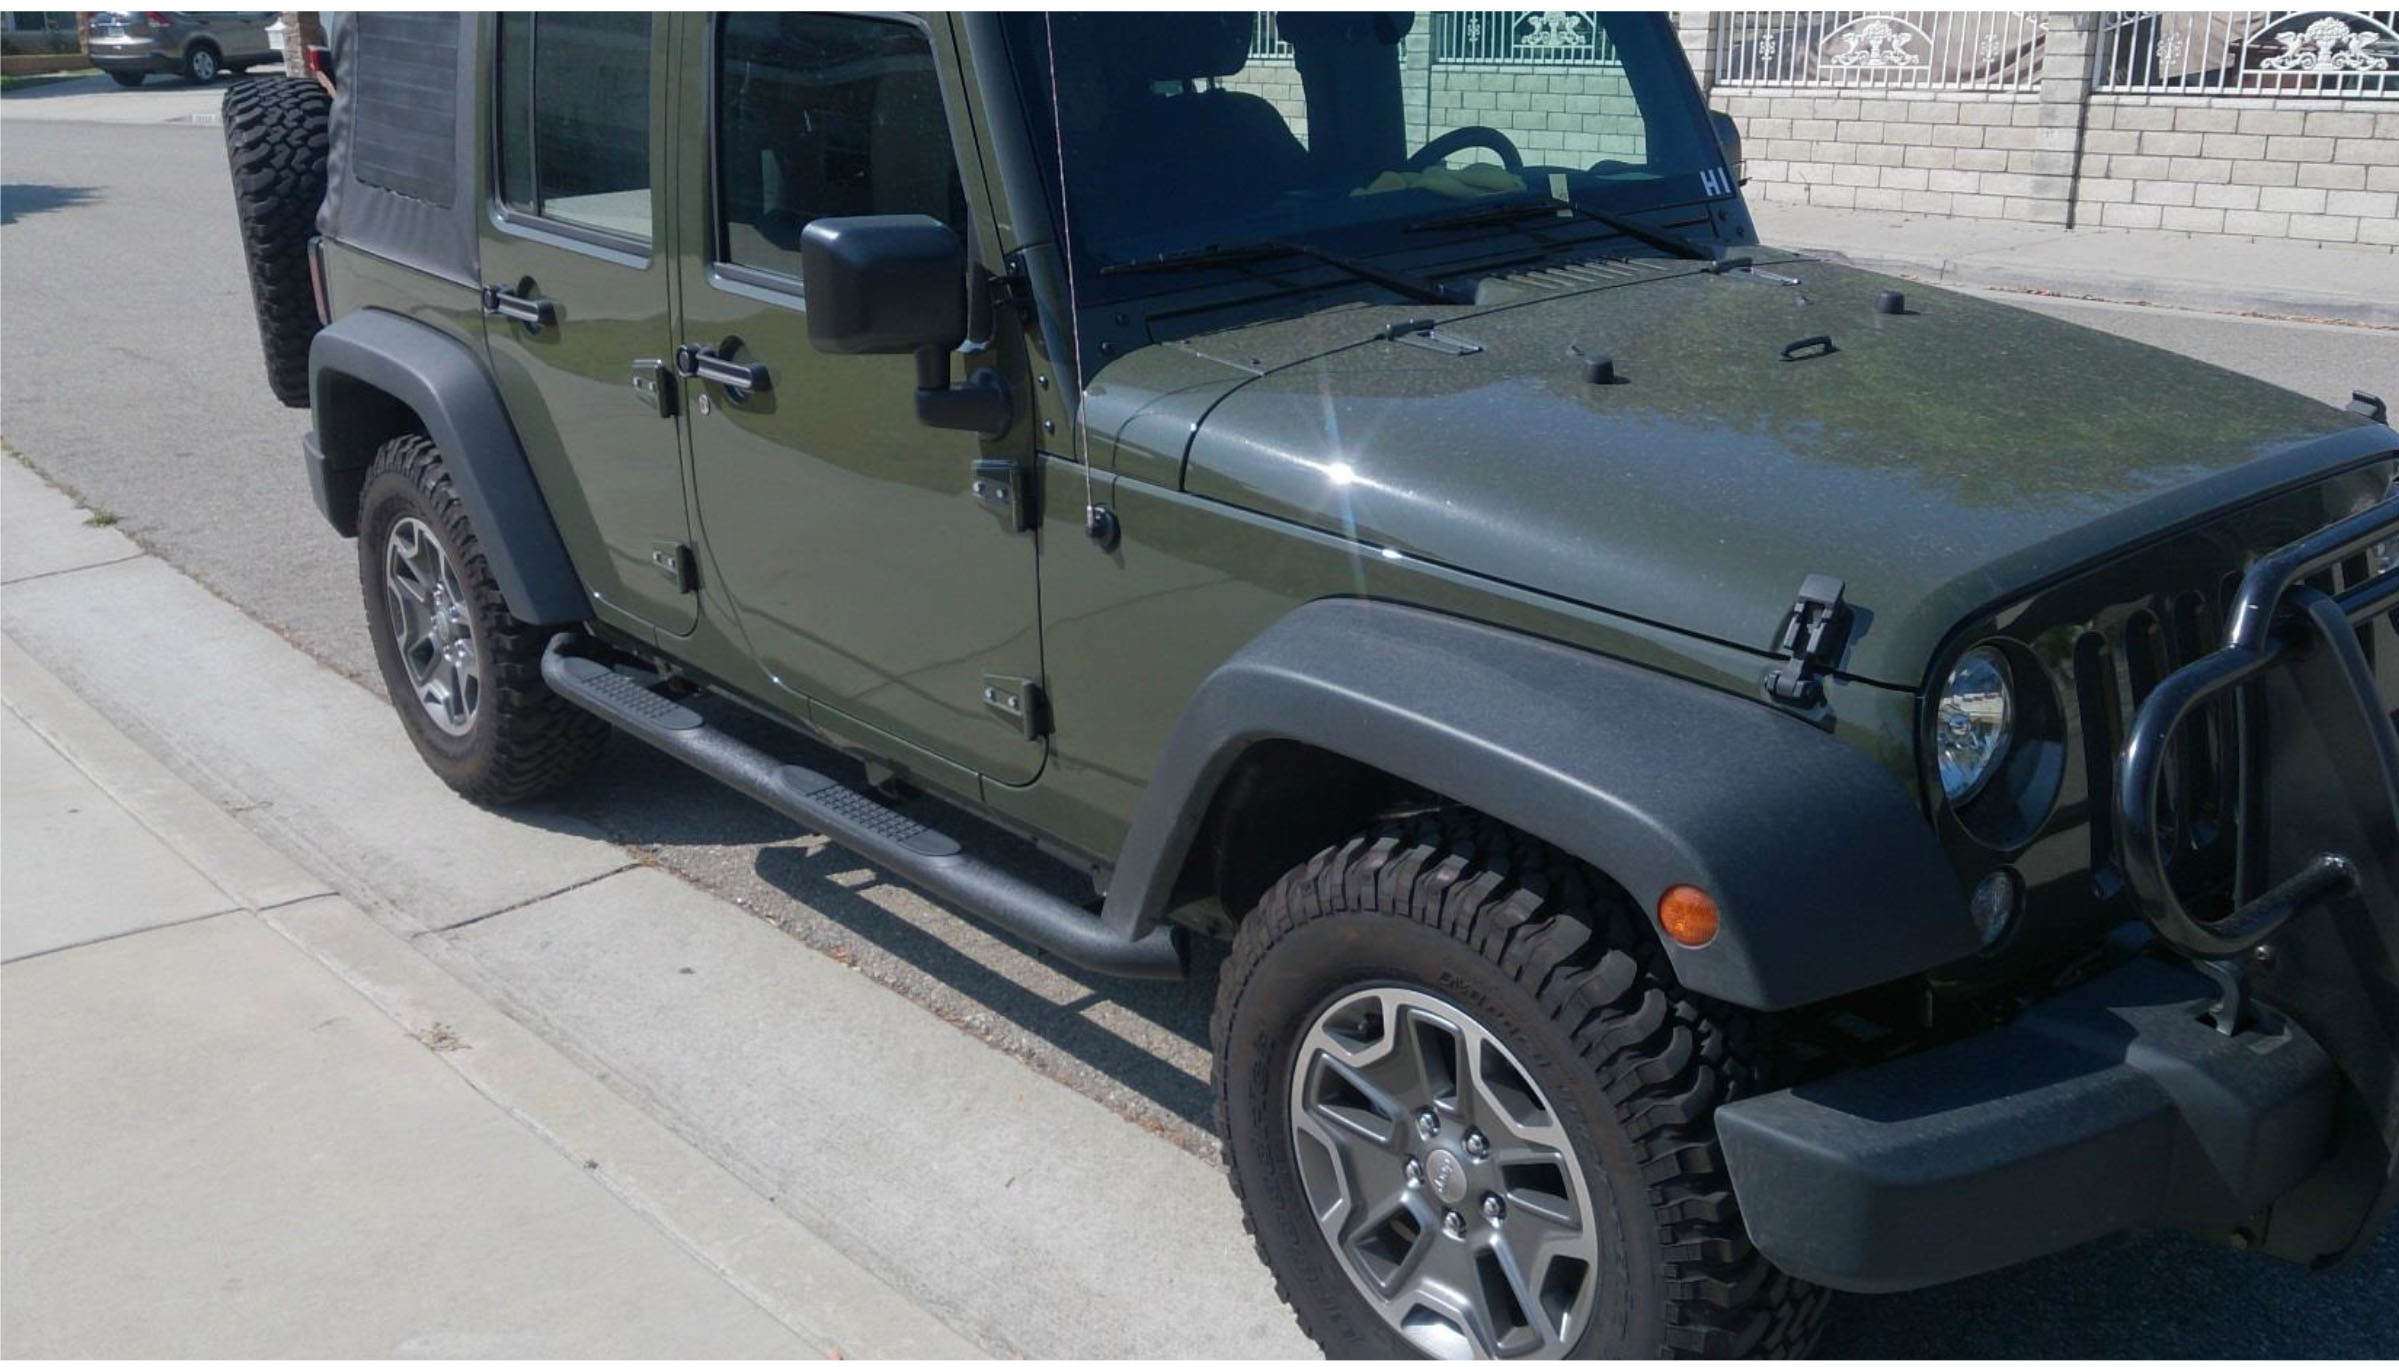
After:
Installation Instructions Written by ExtremeTerrain Customer Winston Huang 07/13/2015
