 FREE 1 to 3-Day Delivery on Orders $119+ Details

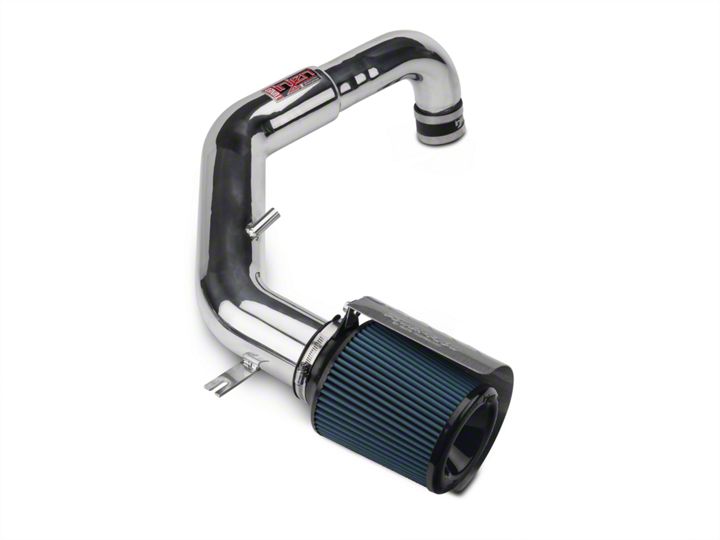
How to Install an Injen Polished Power-Flow Cold Air Intake w/Heatshield on your 1997-2006 Jeep Wran
Installation Time
2 hours
Tools Required
- 3/8” ratchet
- 10mm socket
- 8mm nut driver
- flat head screw driver
- Pliers
Shop Parts in this Guide

Note:
The installation of this cold air intake does require mechanical skills. Removal of the front bumper requires loosening and removing several plastic plugs and screws that may be difficult. In addition to removing the bumper, you will also have to remove the air resonator box, battery and tray when beginning this installation. Injen strongly recommends that this system be installed by a professional mechanic.
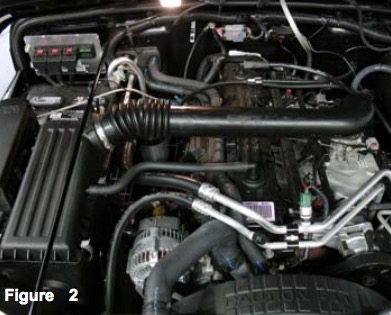
Stock air intake box cleaner
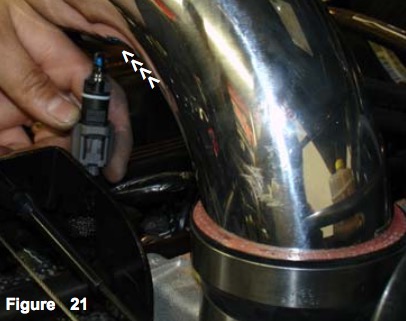
Remove the air temperature sensor from the air intake duct. (note: for Jeeps not equipped with air temp sensors, skip this step.)
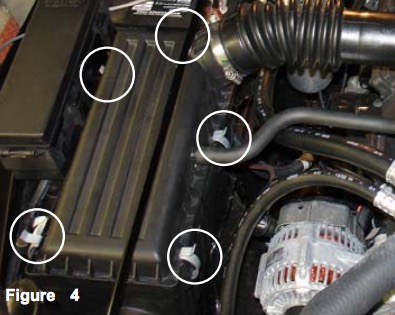
Remove or unhook the clips holding the air box top.
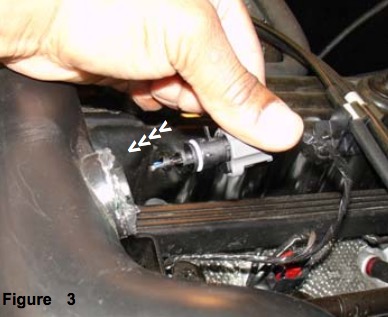
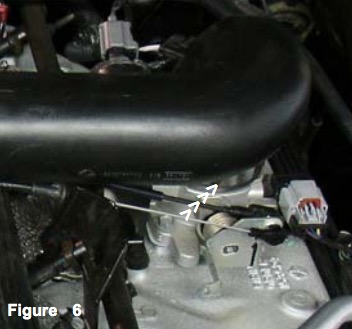
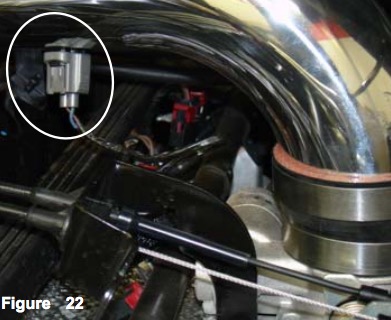
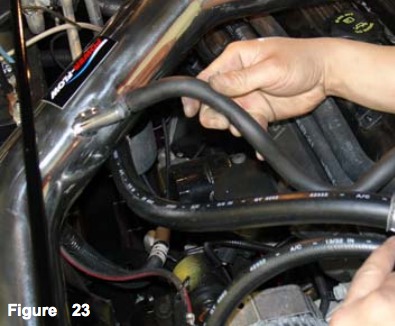
Disconnect the breather line from the air box port as shown above.
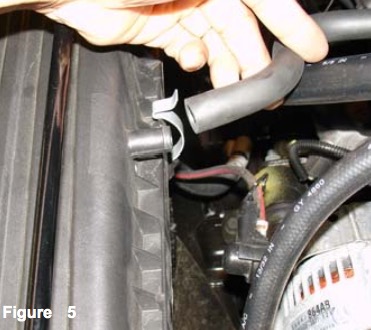
Loosen the clamp on the air duct inlet that connects the intake tube to the throttle body
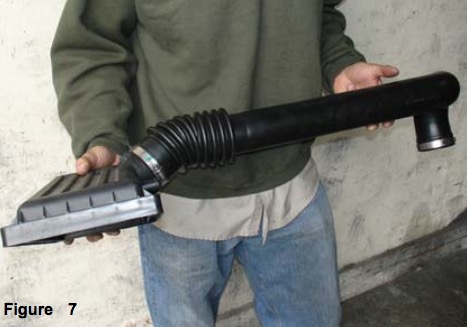
Once the you have loosened the throttle body clamp and removed the clips from the air box top, continue to separate and remove the upper air box and air intake duct from the engine compartment.
In order to proceed, you will need to remove the air filter panel from the lower air box cleaner.
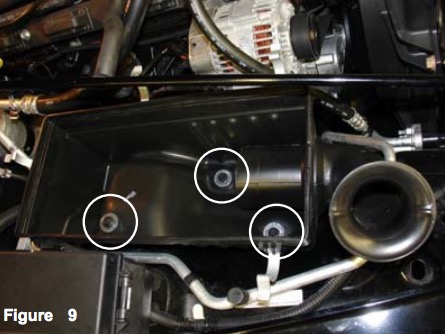
Loosen and remove the three m6 bolts from the lower air box section. This will allow you to pull the air box bottom out of the engine compartment.
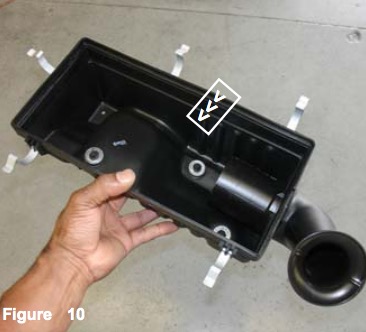
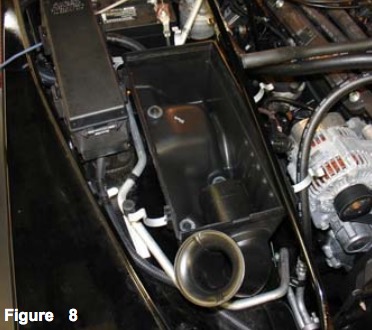
The lower air box bottom is now removed from the engine compartment.
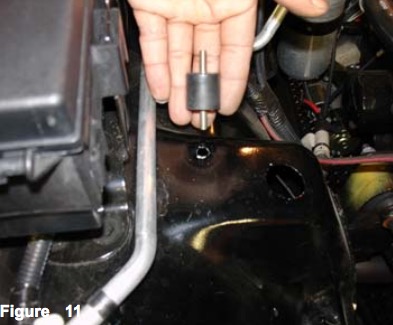
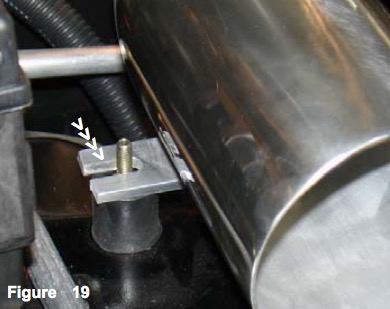
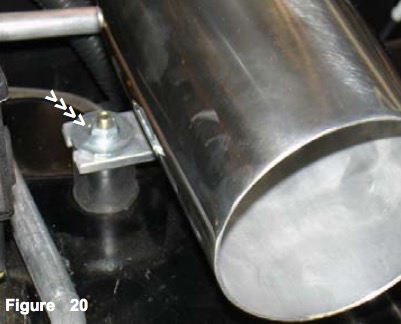
The vibra-mount is placed over the pre-drilled hole located on the fender well.
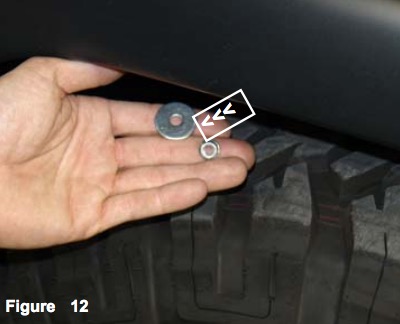
Use the fender washer and m6 flange nut to fasten the vibra-mount in place.

Using the fender washer and m6 flange nut the vibramount is now firmly in place.
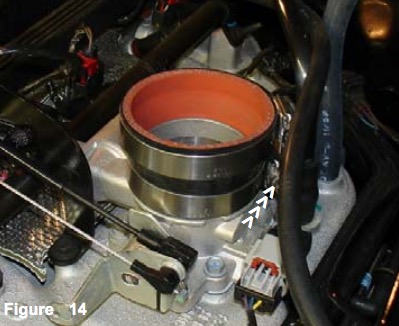
Press the 2 3/4” straight hose over the throttle body. Place two power-bands over straight hose, tighten the clamp located on the throttle body.
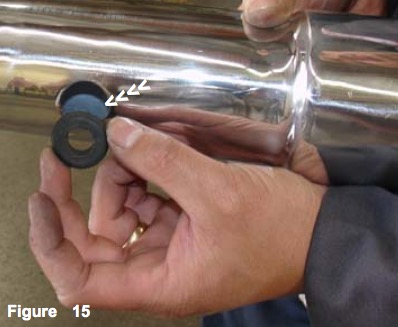
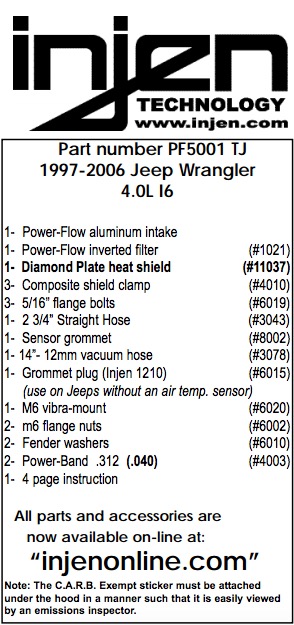
Press the Injen grommet into the pre-drilled hole in the intake as shown above. (Use the included grommet plug if Jeep is not equipped with an air temp sensor)
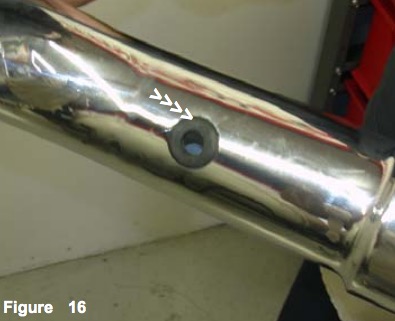
The grommet is now sitting flush in the 3/4” pre-drilled hole.
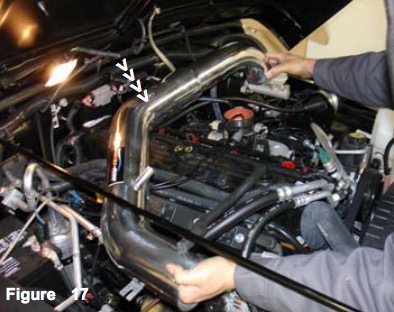
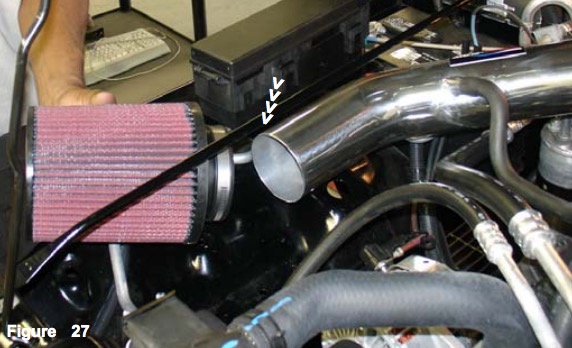
Lower the intake into the engine compartment as shown above.
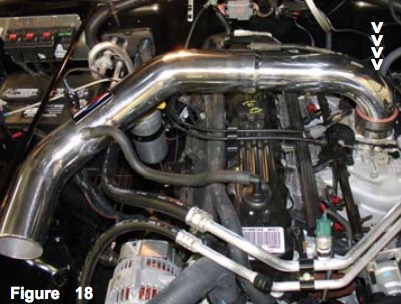
Press the upper end into the 2 3/4” straight hose located on the throttle body. Lower the filter end and align the intake bracket to the vibra-mount.
The intake bracket is now sitting flush over the vibramount.
Use the remaining fender washer and m6 flange nut to secure the intake bracket to the vibra-mount.
Insert the air temperature sensor into the sensor grommet installed earlier in figure 16.
The air temperature sensor is pressed firmly into the sensor grommet.
Press the stock crank case hose over the intake port as shown above.
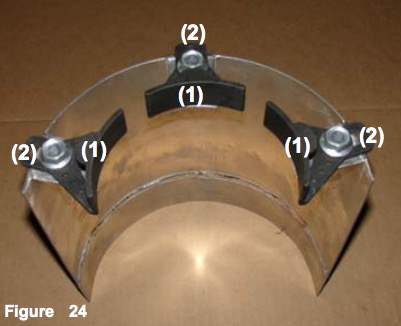
One by one, the composite brackets (1) are lined up to the heat shield tabs and a 5/16” flange bolt (2) is used to secure the brackets in place. The filter clamp is opened and set over the composite brackets.
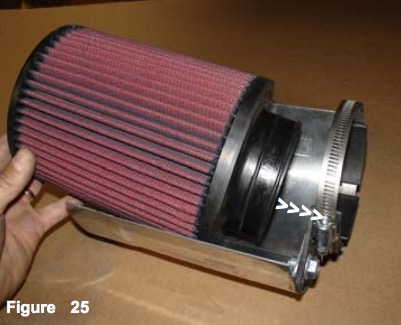
Take the filter and slip it into the metal clamp between the composite brackets.
Adjust the clamp so that it sit between the filter beads located on the filter neck.
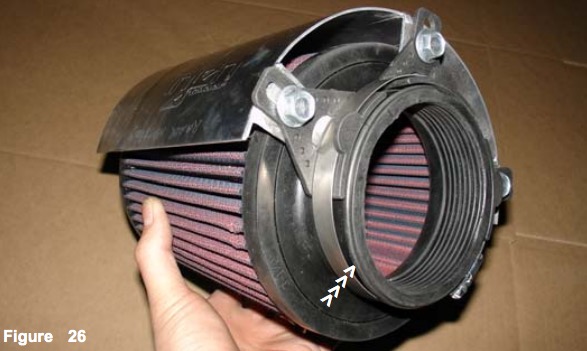
The assembled filter and heat shield is now aligned and pressed over the intake end.
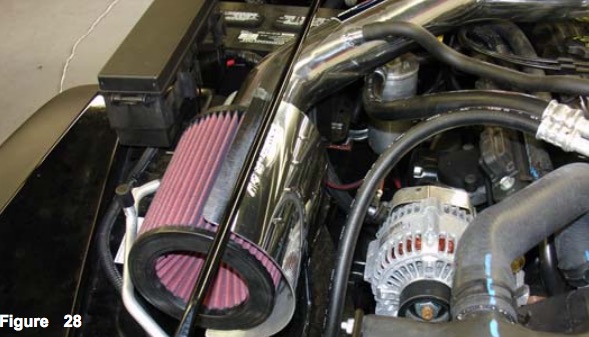
The filter and heat shield is pressed on over the end of the intake with the shield facing the motor. The assembled filter and heat shield are now aligned for best fit.
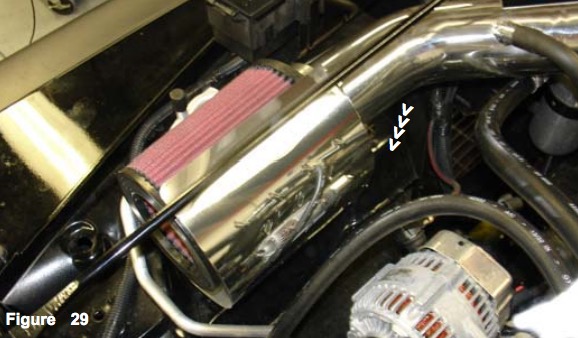
The filter and heat shield are aligned for the best possible fit and the filter clamp is tightened.
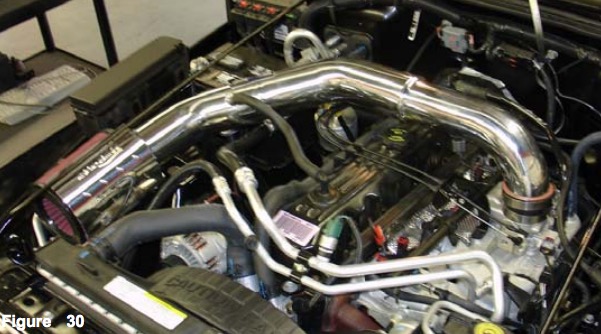
Align the entire intake assembly for the best possible fit. Once the intake, filter and heat shield have been adjusted and cleared from any moving parts, continue to tighten all nuts, bolts and clamps.
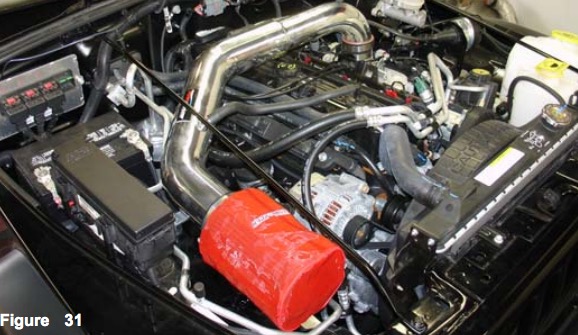
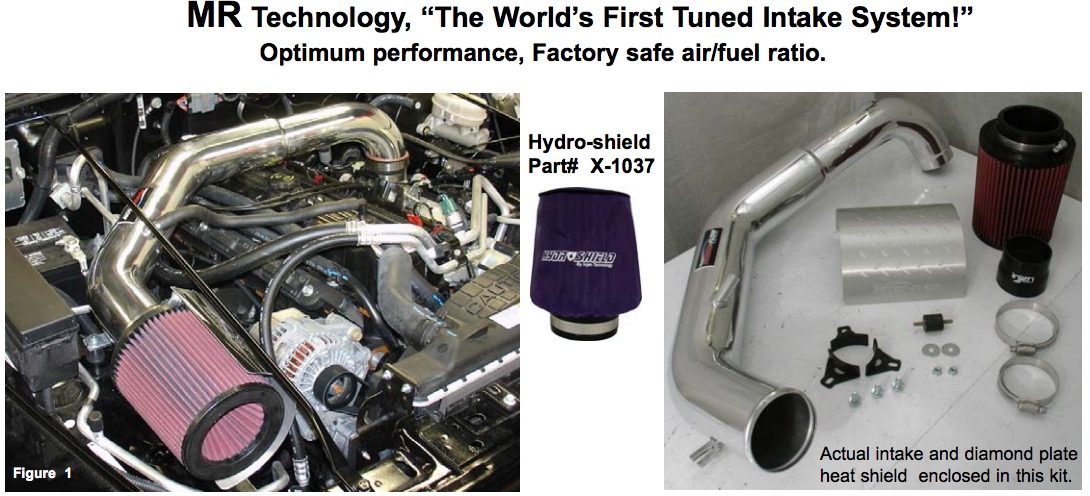
Periodically, Check the fitment of the intake system. Check all lines, clamps, bolts and filter parts for any possible misalignment. The filter should also be checked and cleaned every 5000 to 7500 miles.Hydro-shields are also sold online that will help extend the life of your filter.
1. Upon completion of the installation, reconnect the negative battery terminal before you start the engine.
2. Align the entire intake system for the best possible fit. Once the intake has been properly fitted continue to tighten all nuts, bolts and clamps.
3. Periodically, recheck the alignment of the intake system and make sure there is proper clearance around and along the length of the intake. Failure to follow proper maintenance procedures may cause damage to the intake and will void the warranty.
4. Start the engine and listen carefully for any odd noises, rattles and/or air leaks prior to taking it for a test drive. If any problems arise go back and check the vacuum lines, hoses and clamps that maybe causing leaks or rattles and correct the problem.
5. Check the filter for excessive dirt build up. Clean or replace the filter with an original Injen filter (can be bought on-line at “injenonline.com”). Congratulations! You have just completed the installation of the best intake system sold on the market. Enjoy the added power and performance of your new intake system.
