Installation Time
(approx) 2 Hours
Difficulty Level:
Simple installation for anyone.
FREE 2 or 3-Day Delivery on Orders $119+ Details
$449.99 (each)
FREE Shipping Market Price $525.99 You Save 14% ($76.00)Open Box from $269.99
Saved - View your saved items
We're sorry. We couldn't save this product at this time.
or use
Merideth: If you need some more space to mount up your cargo that you don't want crowding up the back of your Wrangler, this DV8 Offroad Roof Rack will be a great solution for your 2018 or newer 2-Door JL Wrangler. Now, this rack will be a great addition to your build if you want a large basket-style rack to mount up your essentials for your over-landing trips at family vacations, or just everyday life. Now, this will offer you a ton of space for everything that you need while also boasting a lower profile fit compared to other larger systems if you're looking to keep it on the simple side with no modifications to your hard top.The basket or the platform itself will completely cover the hard top, offering you a ton of space while incorporating five lower crossbars to support up to 200 pounds. Now, on the sides and the front, you'll have raised edges to keep your cargo secure, and multiple tie-down points to properly secure whatever you're mounting up. Not to mention, this will also be a non-permanent solution and have an easy installation with the heavy-duty clamps on either side that attach to the drip rails.This will be made of a 0.125-inch thick steel being durable and able to hold up to whatever is thrown at it. Now, on top, this will also have a black powder coat finish to resist any rusting or corrosion on the steel, and also to just offer a heavy-duty appearance and match with any other textured black accessories. Now, on the front and the sides, there will be cutouts and logos, the DV8 logo, that'll be laser cut for some extra style and a very clean appearance. The kit will also come with everything that you need in order to get this mounted up and ready for your next adventure.When it comes to price, this will come in at roughly $500 for the kit. Now, compared to other options, I like the fact that this will give you a ton of space, and compared to other platform racks, this will have higher sides and tie-down points at really every angle. Now, other choices on the page may be set up similarly, but the low-capacity may be a bit different or the rack will require modification as to where this will not.Now, I think if you're in search of a solid system that will offer you ample room, ease of install, and adjustability, as well as a tough off-road look, then this is a great pick. Install will be a one out of three wrenches on the difficulty meter, taking you about two hours to get the job done with some basic hand tools. Now, at this point, we can head over to the shop and check out a detailed breakdown of the install. That's gonna wrap it up for me. Let's go ahead and get into it.Man: We're gonna need a couple of tools for this install. Firstly, a 10-millimeter ratchet wrench and then a 10-millimeter regular wrench, a 4-mill Allen socket, 4-mill Allen key, a 10-mill socket in 3/8, and a 3/8 ratchet or power ratchet. What's going on, guys? We're gonna go ahead and install a roof rack on our Wrangler. Let's get started.One important thing to think about when you do an install that has so many pieces, like this one, is assembly order. Now, it's really important to put things together in an order that you can actually complete the install rather than getting to a certain point and finding that something doesn't fit and you actually have to backtrack and take more things back off to fit the next piece in.So, the way we're going to approach this is we're gonna take the two sidebars, those are the longest pieces, and we're gonna install the runners onto them onto one side. So, we're gonna install one side of the runner on one side of that whole sidebar all the way across, and then we're gonna use the front plates and put them on the front and connect the whole thing together like that. If you follow these steps, it should be nice and easy for you.To get started, we're gonna take a look at these cross beams first. You're gonna notice that they're angled on the end, and then on the side here, you can see that this interface is angled as well. We're gonna wanna make sure that this angle is facing the correct way so that it fits flush against the inside like that.Now, the first thing you may do is take this crossbar and put it at the very end, but we're not gonna do that because we have bars for the front and rear as well. So, this is going to go in the first elongated bolt hole here. That's so we have some adjustment side to side to get everything fitting nice. That's gonna be right after the series of two holes towards either side. So, it's about there for me.And then to put these on, there's tons of hardware included with this kit. We're looking at a 4-millimeter Allen bolt and a lock washer, I'm gonna put that right on the bolt, and that's what's gonna go through the top of the cross beam, and then a regular washer underneath it, and one of those 10-millimeter nuts that come with the kit.So, now that we have an idea of how we're going to assemble this, we can start putting some bolts in. First of those is going to be one of the 4-millimeter Allen bolts that are included with the kit, and I'm gonna drop a flat washer onto that guy just like that. Then I'm taking a 4-millimeter Allen key, I'm gonna use it to kind of hold everything together just like this. And then inside the hole on that crossbar here, I'm gonna drop it inside, get it through the hole on the bottom.Now, I can use this to put some pressure down and keep it lined up with the hole like that. And we can kind of lift the other side like that, the bolt lined up and through. And I'm gonna pass this through this hole so I can hold it with my other hand here in the back. Then on the underside, we're gonna put another flat washer right onto that bolt, another crush washer just like that, and then a 10-millimeter nut.I'm gonna get it started on there just like that. I'm not gonna tighten it up yet because we might need to use that slotted hole to get everything lined up, but I do have it tight enough where it's not gonna come apart on me. Now we can repeat this step for all the holes down the sidebar.Now that we have all of those attached but not tightened down, we can put the front face on. This is going to slide in to the outside bar on the side, just like that. And there's three bolt holes, one here, one here, and then one up top. And then there is one on the bottom as well that you kinda have to keep your eye out for. I'm gonna have to dangle something down in there as well. But these holes are actually smaller than the holes for the cross beams. So, we can actually just put one of those 4-millimeter Allen bolts there right through with no washer. That's gonna give us a really nice clean look on the outside of this.So, I slid this down on top. And then underneath, we're going with a flat washer and then a crush washer, and then one of those 10-millimeter nuts, gonna hold that underneath just like that. We can get that nut started just like that. Now we can get those on the front lined up as well. We can do the same thing with those. So, I'm gonna pass that bolt through just like that, and then a flat washer and a lock washer through the other side, and then one of the 10-millimeter nuts, get that started. And one more up here. Flat washer and cross washer, and then a nut.And then that one on the bottom is going to work the same way. So, we can get the hole somewhat lined up there. I'm gonna pass the bolt through the top of the inside and then a flat washer just like that, and then a lock washer up underneath. Kind of putting some pressure down on the head of the bolt to keep it under there. And then that last 10-mill washer there, a 10-mill nut, get that started, hold everything together just like that.And now since this isn't moving, there's no slots on this at all, we can tighten all of these down right away. And then after you have these three complete, you can go ahead and do the same thing for the bolt on the bottom. And now to tighten these guys down, I'm using a 4-millimeter Allen socket on a 3/8 power ratchet and a 10-millimeter wrench. And with the wrench, I can reach under here and grab on the nut on the inside and then lock that washer down. And when I can't turn anymore, just kind of snug it up a little bit. It's there. Now I'm moving on to the ones on the front.Really not putting a whole lot of pressure on these guys. They don't bear much weight, so I don't wanna break anything, strip anything. Really just snugging it up. And then we have that last one on the bottom, should just be able to kind of hold it up like this, get on it with the socket, crank it down a little bit, just like that. And we've got all the bolts tight.Now what we can do is do the same step on the other end of the same side we're working on. Now we're at the other end of this side and we're gonna do the same thing and put those four bolts in with the other face.Now that we've got that secured, we're going to go ahead and put that other sidebar on. Now that I have all of the hardware in place, I have the corners tightened down, I'm ready to start tightening these guys.Now what I'm gonna do to do that is throw my 10-mill socket on my 3/8 power ratchet here, and I'm back to the 4-millimeter Allen key. And this is gonna let me put that Allen key down in the hole, hold the top of the bolt, and then I can tighten the nut from the underside. So, you can go ahead and do that to all of the bolts and nuts here on these crossbars.Now that we have everything tightened down on the whole rack assembly, what we can do is attach the feet that are gonna clamp onto the sides of the top of the Jeep. To do this, we're gonna have to hold this underneath the corner of the rack like this. And you have these two holes here on each end on all four corners and is set in the middle on both sides.I'm gonna be using two of these 4-millimeter Allen bolts. To get it started here, I'm gonna put a flat washer onto that. And then I'm starting with the larger of the two different kinds of feet pieces here, the bigger one. So, I'm gonna slide this underneath and drop the bolt through just like that. And then I'm gonna use a regular flat washer underneath, and this might be kind of tricky to hold everything together, and then a crush washer, and then a 10-millimeter nut. Just get that started.These were definitely not gonna tighten down all the way right off the bat because these have a channeled hole too and that's so we can adjust this in and out to get it perfectly aligned with the top of the Jeep. Now I'm gonna put the second one on. Should be able to let that go. Again, I'm using one of these 4-millimeter Allen bolts with a flat washer under the head, just like that, drop it through, and then a flat washer, and crush washer second, and then a 10-millimeter nut to finish it off. Okay.Now that we have those secured, we can move around to the front of the foot and attach this next piece here on the face of the outside. So, now we're taking this other piece here. This is gonna sit right underneath like that. I'm gonna have to hold this up. And I can kind of support it on my knee. Makes it a little bit easier like that.In the kit, we've got actually a couple of the only other different bolts are these really long guys. So, I'm gonna stick the crush washer and then a flat washer onto this. Gonna put this guy where he goes. And then you'll see on the inside, there's bolt holes. So, I can put that bolt through. And then there's a receiving nut welded into the foot itself on the inside. I got that one started. I have one more set up the same way, the crush washer, and a flat washer. I'm gonna put it through, find that same bolt hole on the other side and get it started.And we're not gonna tighten these down really at all because this is going to allow us to get this over the channel on the side of the hard top. If you can't get them all on at once, you may need to loosen these all the way or even take them entirely off and put them back on this same way if you can't get it over that channel with it attached.So, now we can do these same steps and attach the feet like this for the five other locations that the feet sit at. So, now that we have this roof rack completely assembled, we're good to throw it on the top of our Jeep. Now, the easiest way to do this is to get a friend to give you a hand so you don't scratch the paint or anything like that. Let's go ahead and put it on.Set kind of on there. And those feet move too. Doesn't need to be on. Just rest there. Now that we have the roof rack up on top of the Jeep, we're good to go ahead and start attaching the feet to this lip here that's on the side of the roof panels. Now, how this works, remember we left this loose so we could adjust it. There's actually a tooth here and a hook that comes around underneath.Now, that tooth on top is gonna sit in the top of the channel and the hook is gonna come around and squeeze the channel between the two. Now, we didn't leave this loose as well, so you should have enough room to squeeze it over the lip. If you don't, you can back these bolts out even farther or you can just take 'em out entirely. For me, I thought it was a lot easier to just do it this way because I was able to kind of maneuver this to the point where it would slip over just like that.Once you have it where it's slipped over the lift like this, you can go ahead and tighten those two bolts down once you have the roof rack in the position you want forward and back. Then before we tighten the two bolts up top on the top of the feet, we need to adjust it side to side to make sure it's center, and then we should be able to tighten everything down.So, I'm gonna go ahead and tighten these feet on the other side. And then when we're done with that, you can do the same thing on the other side. Should be enough. Now that we have those all attached, we can go to the other side and do the same thing. Now we're up on top of the roof rack and we're gonna tighten down all of the tops of the feet to the roof rack itself.Now the first step to do this is to just make sure the roof rack is straight side to side on center with the front of the vehicle. Now that I have it in place, we can go ahead and tighten down all the feet. And after you have them all tight, that's installed complete. So, let's go ahead and do that now.To tighten these bolts, what we're gonna use is a 4-millimeter Allen key. Now, I'm putting it onto the top of the head just like that to hold the bolt still. And then I have a 10-mill ratchet wrench. I'm just using a curved one just because it makes it a little bit easier to hold and gets my hand away from the rail. You can use a straight one too. But I'm dangling that underneath the foot onto that nut that's there to make sure it's going the right direction. And I'm holding the Allen key and I'm just tightening the nut down with the ratchet wrench. That's one. And then we're onto the next one.Now you're good to go ahead and do that same thing to all the other ones. And now that we have all of those bolts tightened down, that is a finished install. That was the DV8 Offroad Roof Rack for the '18 and newer Jeep Wrangler JL 2-Door. For all things Jeep, remember to keep it right here at extremeterrain.com.
Subscribe to our YouTube Channel
Features, Description, Reviews, Q&A, Specs & Installation
Brand | DV8 Offroad |
Rack Type | Roof Rack |
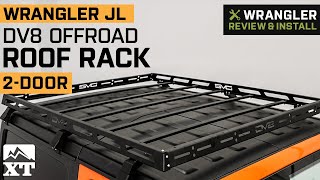
Off-Road Styling and Utility. The DV8 Off-Road Roof Rack is the perfect product to expand your room capacity. Engineered to carry up to 200 pounds of weight, evenly distributed, this stellar design will haul your luggage, camping equipment and more. Featuring easily accessible tie-down points on all sides, this rack conveniently extends almost the full length of the rain gutter. Boasting a noise reduction design for quieter travel, there’s no doubt this rack will enhance all your off-road adventures.
Quality Construction. Manufactured with precision excellence, this rack is made from a 0.125-inch steel for durability. Resistant to rust and corrosion, the powder coated finish ensures superior protection against unwanted damage. Featuring a laser cut-out of the DV8 logo, this design adds quality branding and extra off-road flair. Easy to remove when not in use, you can also reinstall this versatile roof rack in just minutes when needed.
Installation. Common garage tools are required to successfully complete this easy installation. Durable hardware, clamps and pads are included and the install time is estimated at 2 hours or less. This install is a no-drill design.
Warranty. Any defect or imperfection found in the workmanship or materials due to faulty manufacturing will be covered in full with a One-Year limited warranty.
Application. The DV8 Off-road Roof Rack is designed to accommodate all 2018-2023 Jeep Wrangler JL 2 Door models.
Warning. www.P65Warnings.ca.gov
Fitment:
DV8 Offroad RRJL-02
CA Residents: WARNING: Cancer and Reproductive Harm - www.P65Warnings.ca.gov
Installation Info
Installation Time
(approx) 2 Hours
Difficulty Level:
Simple installation for anyone.
What's in the Box
10 More Questions