FREE 1 to 3-Day Delivery on Orders $119+ Details

How to Install Daystar 3 in. Comfort Ride Suspension Lift Kit (97-06 Wrangler TJ) on your Jeep Wrangler
Installation Time
3 hours
Tools Required
- Standard Hand Tools
- Wrench Set & Socket Set
- Coil Spring Compressor
- Drill + 5/16-11/32 Bit
- Floor Jacks / Jack Stands
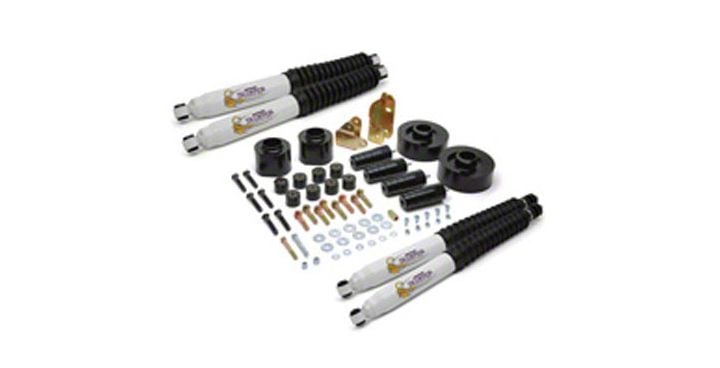
Shop Parts in this Guide


Step(s)
TRANSFER CASE DROP INSTRUCTIONS
1. Place a floor jack under the transfer case cover. Remove all bolts from one
side of the cover, lower the jack and put supplied polyurethane spacers and steel
sleeves between the cover and the frame. (supplied are 1/2-13 for 1997-2003 TJs and M12X1.75 bolts for 2004-newer jeeps)
LIFT INSTRUCTIONS
2. Layout all parts and check quantities against the Bill of Materials. Completely
read instructions before beginning installation.
3. Make sure you are working on a level, stable concrete surface or using a lift to
perform this work.
4. Either using a lift or floor jacks, lift the front of the jeep to full droop (where
wheels are just off the ground). If a floor jack is used, transfer the vehicle to jack
stands. Pull front wheels.
5. Place two floor jacks under the front axle and load (lift) the suspension 2”.
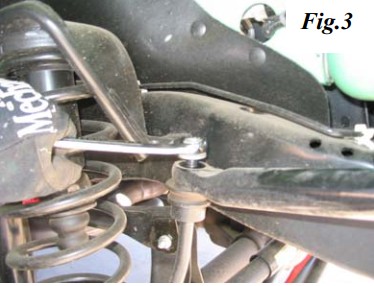
6. Pull shocks off, disconnect sway bar end links and unbolt the track bar. (Fig. 2, 3)
7. Lower the suspension to full droop again
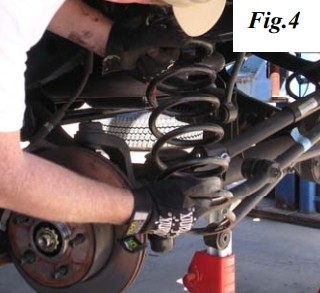
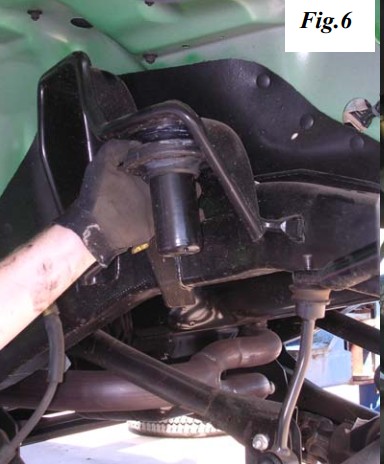
8. Remove one spring (mark or note orientation before removal), take old bump stop off, and remove Phoenix, AZ 85043 steel bump stop mount and old OE spring isolator. Fig 4,5,6.
9. Install the new isolator (M03606)
10. Using the spring compressor compress spring enough that it can be placed back into position.
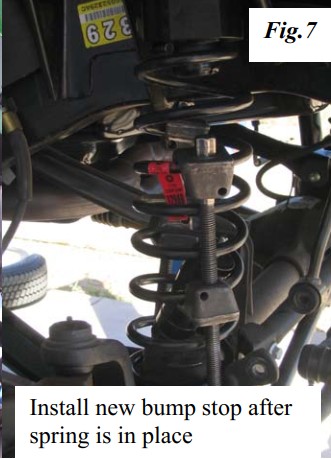
11. Install spring while holding new bump stop inside of spring. Install the new bump stop when the spring is in place. Next, decompress the spring. Fig. 7
12. Repeat steps 7-10 for the other side of the vehicle.
13. Front track bar relocation. Drill a new 7/16 diameter mounting hole in the track bar’s axle bracket, where shown. Shift the axle assembly as necessary to align the track bar eye with the new hole. Insert the stock fastener and tighten. Fig 8 page 3
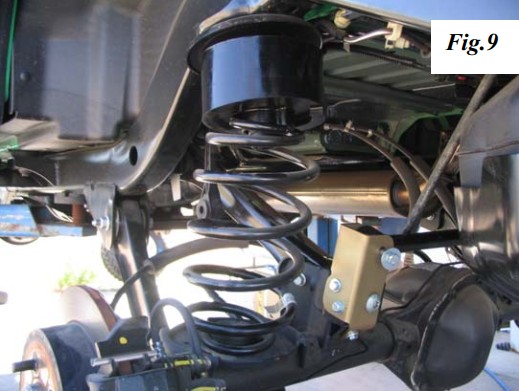
14. Repeat all installation steps on rear suspension. Fig. 9, and Page 4.
15. Torque all bolts to factory specifications. Re-torque all bolts after 500 miles