 FREE 1 to 3-Day Delivery on Orders $119+ Details

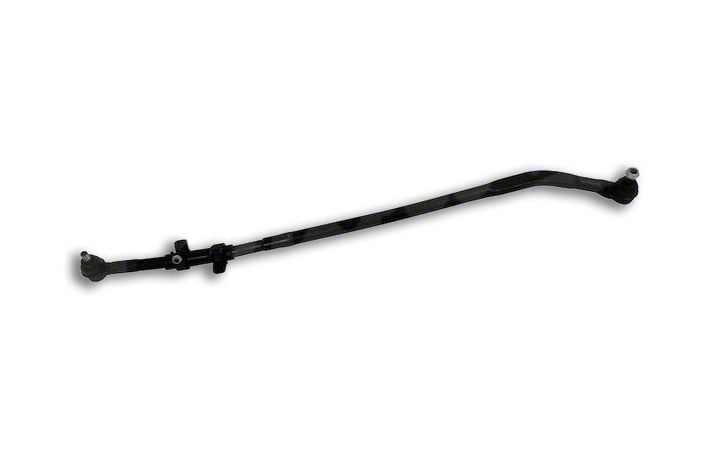
How to Install Crown Automotive Drag Link Assembly (07-18 Wrangler JK) on your Jeep Wrangler
Installation Time
30 minutes
Tools Required
- 21mm Socket
- 22mm Wrench (Crown Part)
- 7mm Allen Wrench
- Hammer (2x)
- Torque Wrench
Shop Parts in this Guide
Pre-Installation notes
This is a simple driveway install and should take no more than 30 minutes. The approach here uses 2 hammers to drop the ends, but there are alternatives, such as a pickle tool or ball joint extractor, both of which are available at your local auto parts store. To start, park your Jeep on a level surface and if necessary, soak the nuts with some penetrating spray (e.g. PB Blaster).
Torque Specs needed (source: https://www.extremeterrain.com/wrangler-jk-suspension-torque-specs.html)
• Drag Link Ball Stud To Pitman Arm 77 ft-lbs
• Drag Link Ball Stud To Knuckle 63 ft-lbs
• Drag Link Clamp 26 ft-lbs
Install
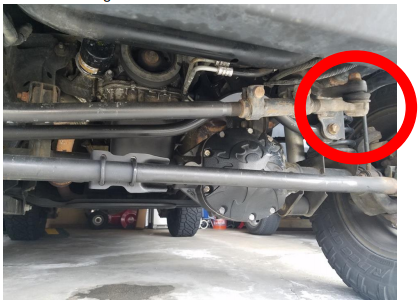
1. Remove the nut on the Pitman Arm using a 21mm socket.
2. Hand screw the nut back on a few turns, so that when it drops (step 6) it will not fall on you or the ground.
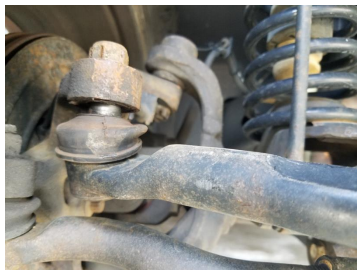
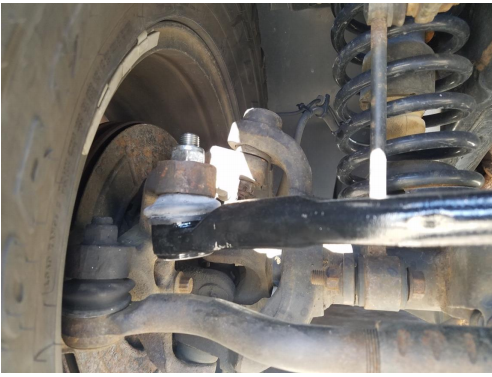
3. On the tire knuckle, using the 21mm socket, do the same. Remove the nut and then hand screw it on a few turns:
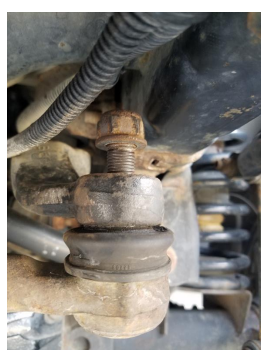
4. On the knuckle, use a hammer to strike the metal.
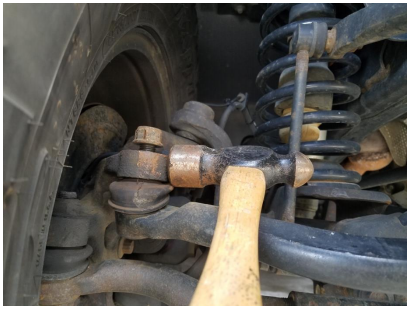
5. It will take some muscle, but eventually it will drop. The nut will keep it from falling to the ground. There are tools that can do this, but a hammer works fine.
6. The pitman arm connects to your steering box, so you want to be careful. Put a hammer on the backside of the metal and strike it with the other hammer. You will know that you are doing it correctly if you strike with one hammer and the one on the backside comes off (you’ll feel it). This will help transfer the energy of the strike and protect the steering box.
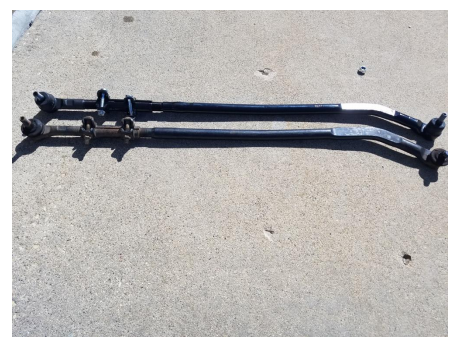
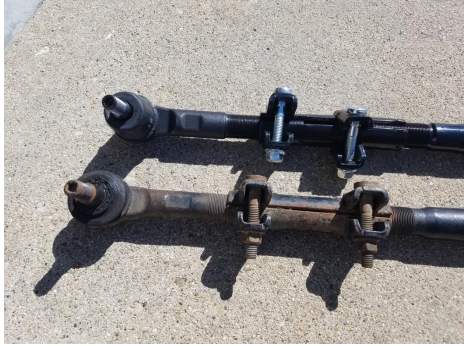
7. The bar will drop and rest on the nuts that you hand tightened earlier. Hold the bar and unscrew the 2 nuts and pull it out of the way. Once off, set it next to the new one and twist the adjusting sleeve to get them to approximately the same length. Here is a picture of the old and the new.
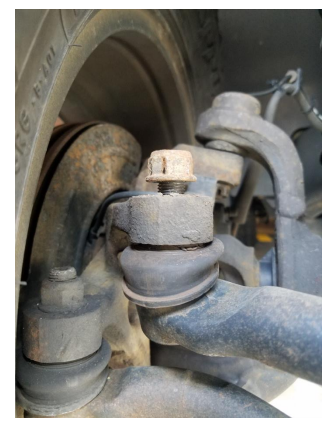
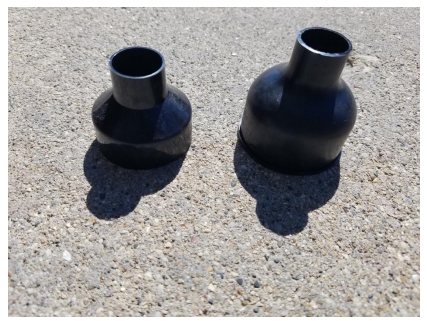
8. Remove the protective end-caps that are covering the ball joints:
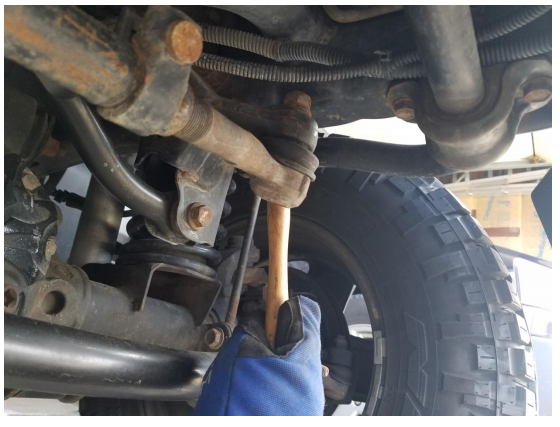
9. Reinstall the drag link with the adjusting sleeve close to the pitman arm. Start with the knuckle and hand tighten the nut. Then, on the pitman side, use the adjusting sleeve to line up the bolt with the hole in the pitman arm and then hand tighten the nut.
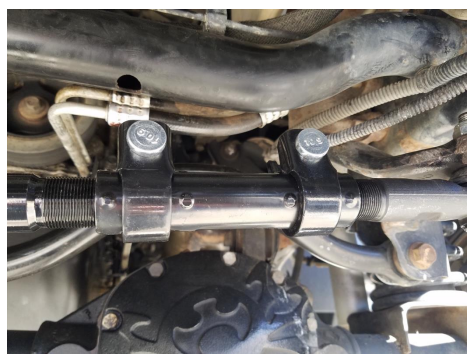
10. Place a 7mm Allen wrench in the top of the bolt and then use a 22mm wrench to tighten the nut until the rubber starts to compress. The Allen wrench may be removed and then using a torque wrench, tighten to 77 ft-lbs.
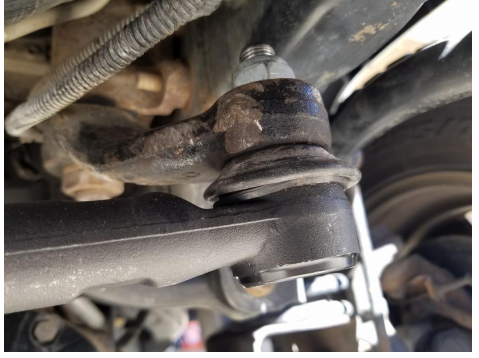
11. On the knuckle side, use the same 7mm Allen and 22mm wrench to tighten the nut until It compresses and the use the torque wrench to tighten to 63ft-lbs.
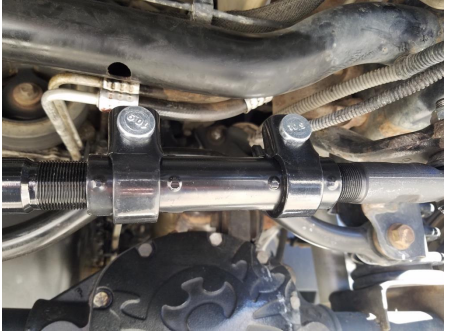
12. Make sure your steering wheel is centered. Adjust the sleeve as necessary and then tighten the 2 adjusting sleeve bolts with the threads facing backwards using a 15mm socket to 26 ft-lbs.
Installation Instructions Written by ExtremeTerrain Customer “Stormbringer" 03/17/2018.